Contents
Overview
Various data are required to perform cloth simulation.
These are called cloth data and are generated from the set mesh and parameters.
In MagicaCloth, the process of generating this cloth data is called Build.
Until now, only runtime builds were available for MagicaCloth2.
With runtime builds, cloth data is created on the fly when used.
Creating this cloth data takes several milliseconds to tens of milliseconds.
This build process will occur in the background and will not affect game progress, but there will be a delay before the simulation actually starts.
This was the drawback of runtime builds.
In pre-build, cloth data is created during editing and saved as an asset.
This allows simulations to start immediately at runtime without any delay.
It is also useful in terms of performance as it reduces the initialization load.
However, there are disadvantages, such as the need to build during editing and the need to separately manage cloth data assets.
Here we will explain how to use this pre-build.
Comparison of build efforts
The comparison between runtime build and pre-build is as follows:
There are advantages and disadvantages to both.
| Runtime build | Pre-Build | |
| Merit |
There is no effect even if there is a version change of MagicaCloth or a change in the mesh or bone structure. No special operation is required even if the parameters are changed. |
Initialization load is low. The simulation will start immediately. The pose and scale of the character at initialization may be in any state. |
| Demerit | Initialization load is high. Because it takes time to build data, there is a delay before the simulation starts. The character must be initialized with the same pose and scale as when editing (v2.13.0 and earlier). |
An operation is required to create cloth data. Cloth data can easily become unusable due to MagicaCloth version changes or mesh and bone structure changes. Cloth data needs to be rebuilt every time parameters are changed. |
How to pre-build
inspector panel

Pre-build is set from the [Pre-Build] panel at the bottom of the MagicaCloth component.
Please enable this panel first.
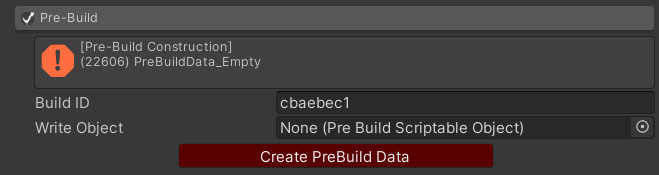
Build ID
First, you need to give the cloth data an ID for identification.
This is called the build ID.
When creating a component, a random string of 8 alphanumeric characters is assigned, but it is better to rewrite the name to something that is as easy to understand as possible.
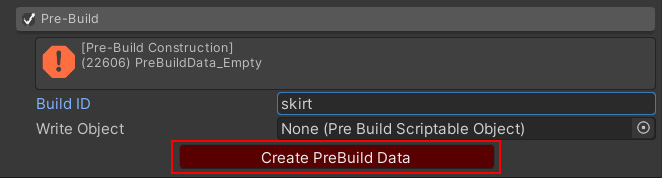
For example, if it is a MeshCloth for a skirt, change the ID to “skirt” etc.

Creating and saving cloth data
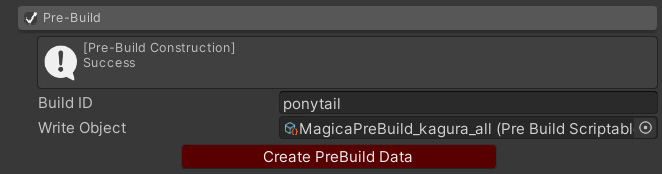
Creation of cloth data will start by pressing the “Create PreBuild Data” button.
All parameters must be set up.
If “Write Object” is empty, the asset save dialog will be displayed.
Save the asset with any name you like.
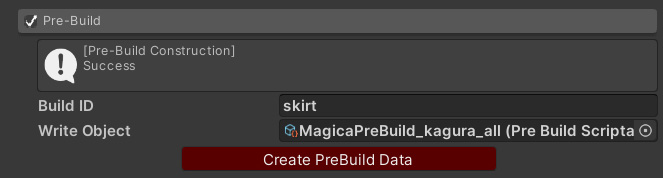
When the cloth data is saved successfully, the status changes to “Success”.
The assets saved in “Write Object” will then be linked.
If successful, you will see something like this:
Cloth data is saved as a separate asset from the MagicaCloth component.
These can be checked in the Project window.

Execute
So let’s run it!
Once the settings are complete, all you have to do is press the play button.
Unlike runtime builds, simulation starts immediately.
Everything else is exactly the same as before.
Check the status
You can check whether pre-builds are being used in the inspector of a running MagicaCloth component.
If “Pre-Build Construction” is displayed in the information panel and the status is “Success” as shown below, it is working properly.

Cloth data vulnerability
Pre-build data creation itself is easy and can be completed by simply pressing a button, but there are important points to note.
It is very vulnerable to changes in resources and data can easily become unusable.
For example, this applies when the number of mesh vertices inside the cloth data and the number of vertices of the actual mesh do not match.
Therefore, if the following factors occur, you will need to redo the build.
- If parameters are changed
- When the structure of the referenced mesh changes
- When the structure of the referenced Transform is changed
Add to existing cloth data
It is also possible to save multiple pre-built cloth data in one asset.
First, before building, select the existing cloth data asset as “Write Object”.
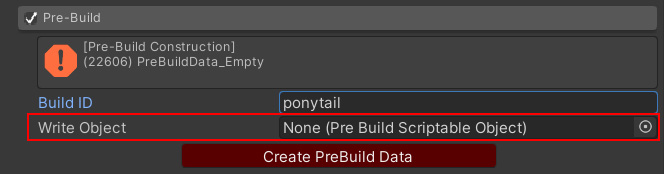
By running a pre-build in this state, cloth data will be added to the specified asset.
If you actually select the cloth data asset in the Project window, you can see that multiple cloth data are saved as shown below.
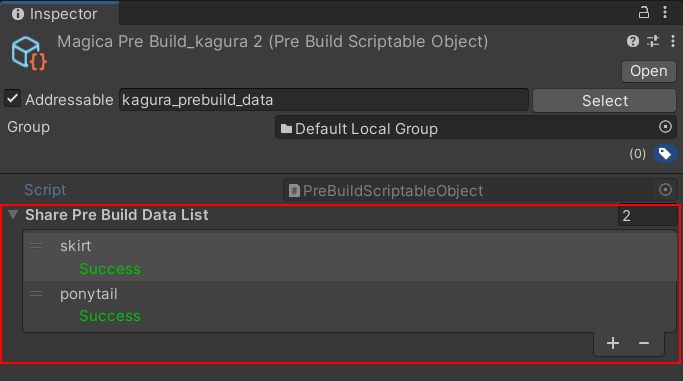
If multiple MagicaCloths are set for a character, it is also possible to manage them all as one cloth data asset.
Cloth data assets
You can check the contents of the saved cloth data asset by selecting it from the Project window.
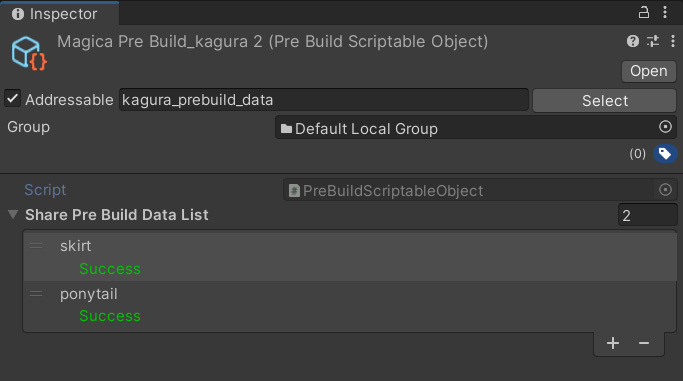
Status
The inspector will display the build ID and status of the cloth data.
If the status is “Success”, there is no problem.
In the case of an error, the cloth data will no longer be available.
Delete
Cloth data that is no longer needed can be freely deleted from the list.
Also, if you do not need the cloth data asset itself, please delete the asset from the Project window.
Manual creation
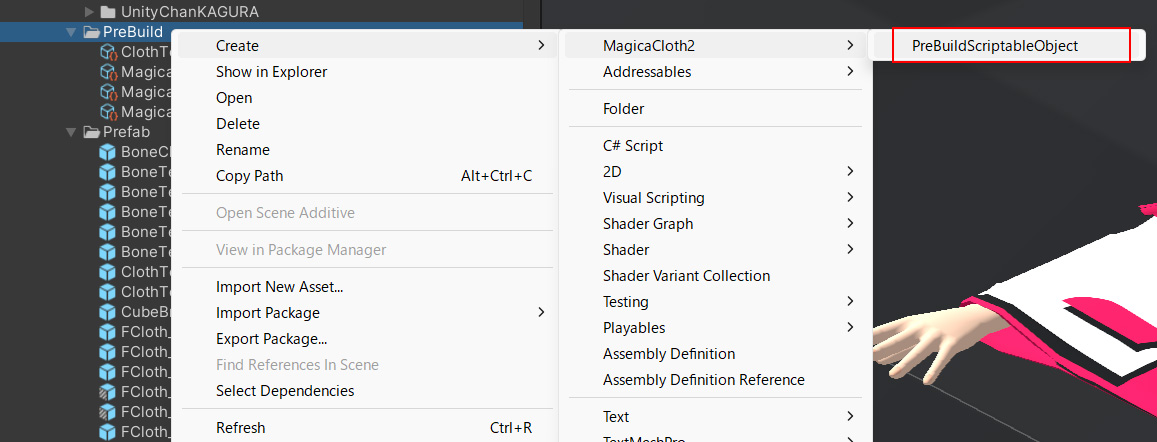
Cloth data assets can also be created manually.
It can be created by opening the right-click menu in the Project window as shown below and selecting Create/MagicaCloth2/PreBuildScriptableObject.
Advanced operations
This section mainly explains data management methods for programmers.
These operations are optional and not required.
Warm up
Pre-built cloth data is basically a collection of byte data.
When cloth data is used at runtime, a deserialization process is performed to restore the original data structure from this byte data.
This deserialization is a relatively heavy process.
If this load is a problem, you can deserialize the cloth data in advance.
Once deserialized data remains resident and will not be deserialized again.
This is done by running the following API on PreBuildScriptableObject:
/// <summary>
/// すべてのPreBuildデータをデシリアライズしてマネージャに登録します
/// この処理は負荷が高いため事前に実行しておくことでクロスデータ利用時の負荷を軽減できます
/// Deserialize all PreBuild data and register it with the manager.
/// This process requires a high load, so running it in advance can reduce the load when using cross data.
/// </summary>
public void Warmup();
Clean up
Deserialized cloth data remains resident in memory.
Resident data is managed by a usage counter, but it is not automatically released even if the usage count reaches 0.
This is intended for use with characters that are frequently created and deleted.
Although resident data is not very large, unused data will continue to remain in memory.
A cleanup function is provided to solve this problem.
By executing the cleanup, all resident data with a usage count of 0 will be released.
For this, use the following API of MagicaManager.
/// <summary>
/// 未使用のデータをすべて解放します
/// Free all unused data.
/// - Unused PreBuild data
/// </summary>
public static void UnloadUnusedData();
This implementation is almost the same as UnloadUnusedAssets(), which releases unused assets in Unity.
Execution from script
Pre-builds can also be run from a script.
For this, use CreatePreBuildData() of the PreBuildDataCreation class.
However, the build ID and cloth data asset must be set in advance.
/// <summary>
/// PreBuildDataを作成しアセットとして保存する
/// Create PreBuildData and save it as an asset.
/// </summary>
/// <param name="cloth"></param>
/// <param name="useNewSaveDialog"></param>
/// <returns></returns>
public static ResultCode CreatePreBuildData(MagicaCloth cloth, bool useNewSaveDialog = true);