MESH SPRING SETUP
MeshSpring allows you to swing the vertex of Mesh with a spring.
This is also applicable to SkinningMesh.
In MeshSpring, you need to set the deformer to deform the mesh like MeshCloth.
This guide is a continuation of the MeshCloth Getting Started Guide, so we will skip some of it.
Render Deformer / Virtual Deformer setup
First you need to set up a render deformer for the Renderer that applies the shaking as well as the MeshCloth, and build a virtual deformer to integrate them.
Please refer to “MeshCloth Start Guide” for the setting method.
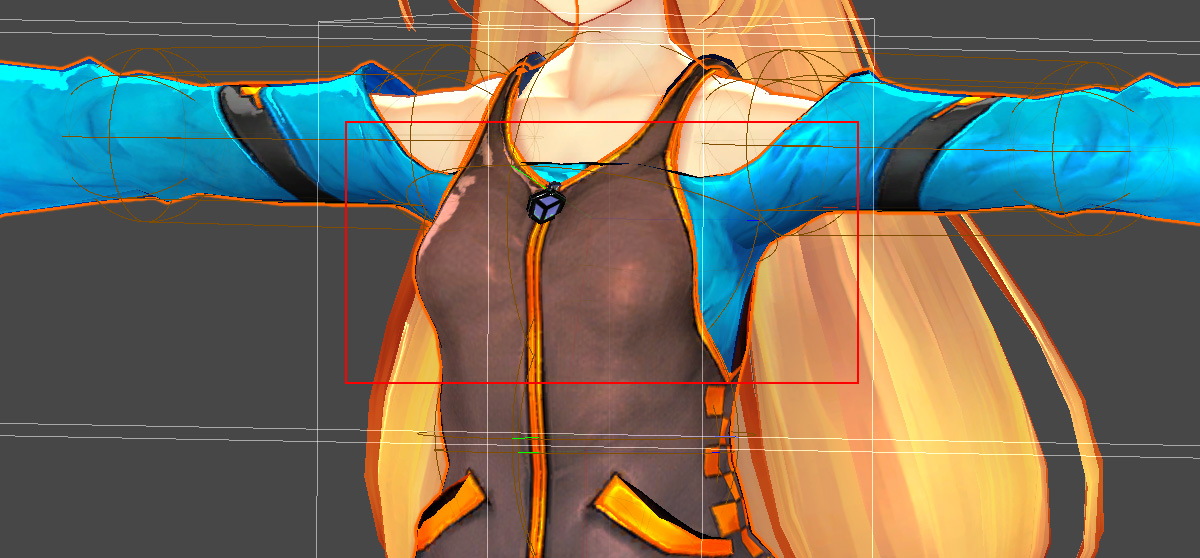
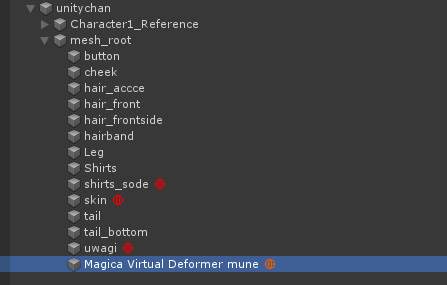
This time, I want to shake Unity-Chan’s breast, so I select the renderer that I want to shake from the model. (Red range)
Render deformer is applied to the following three meshes.
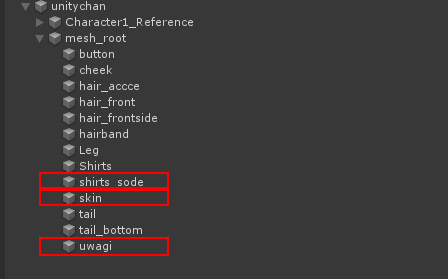
Attach a RenderDeformer component to them.
And build a virtual deformer that controls these as one virtual mesh.
The result is the following configuration:
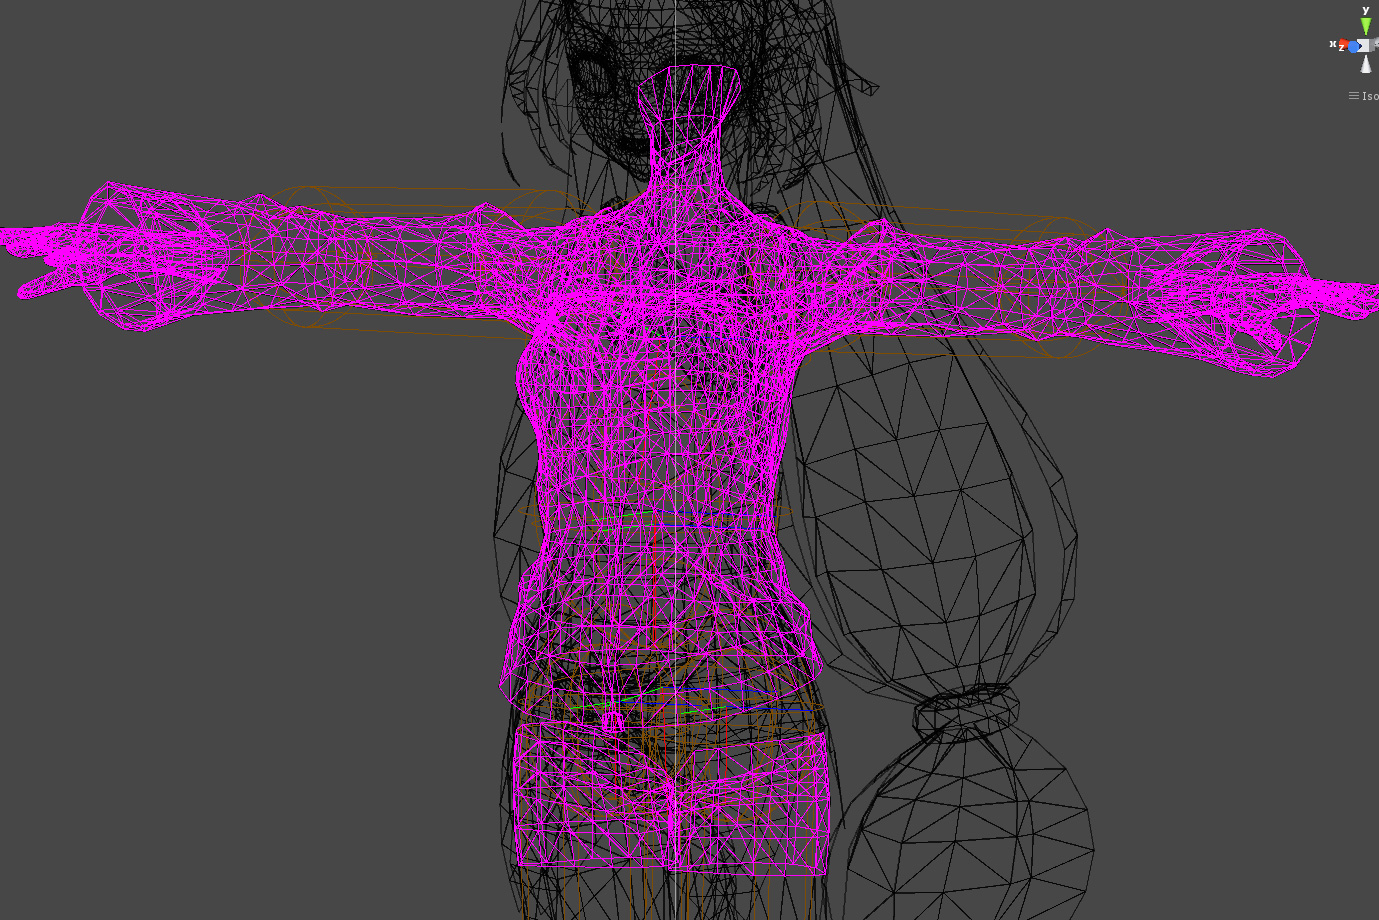
Since the mesh of the Unity-Chan model is a high polygon, adjust it to a certain low polygon by reduction.
Even if the virtual mesh becomes a low polygon, the actual mesh vertices will be smoothly interpolated by inverse skinning, so there is almost no effect on the appearance.
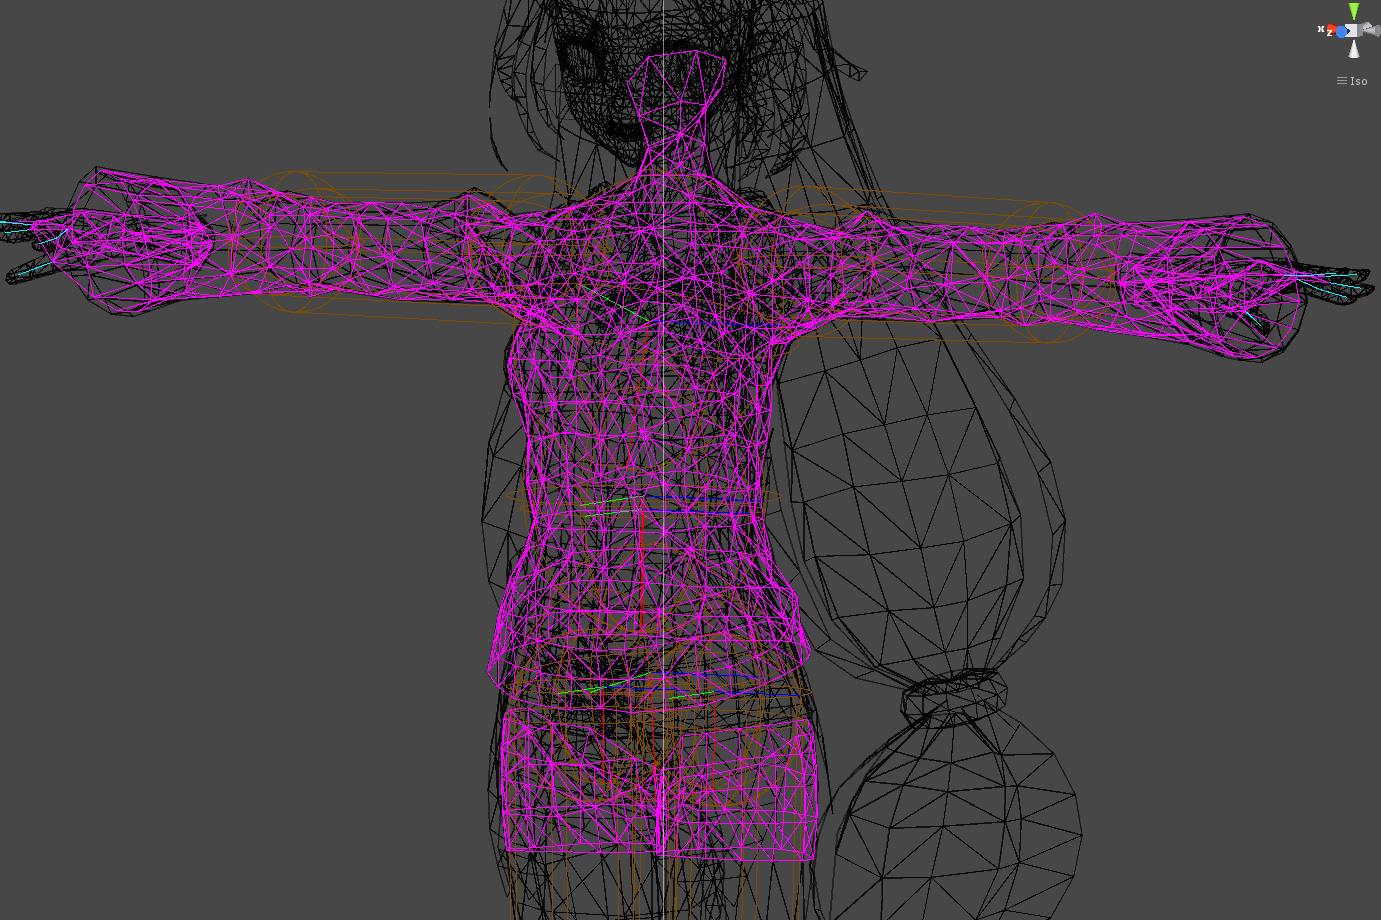
This completes the deformer setup.
Mesh Spring setup
Normally, you need to shake the left and right two ranges for the swaying of the chest, but this time we will set only the left side as an example.
Add MeshSpring to your character.
Right-click in the Hierarchy window and select “Magica Mesh Springs” from the menu as shown below.
A MeshSpring object is created.

The inspector looks like this:
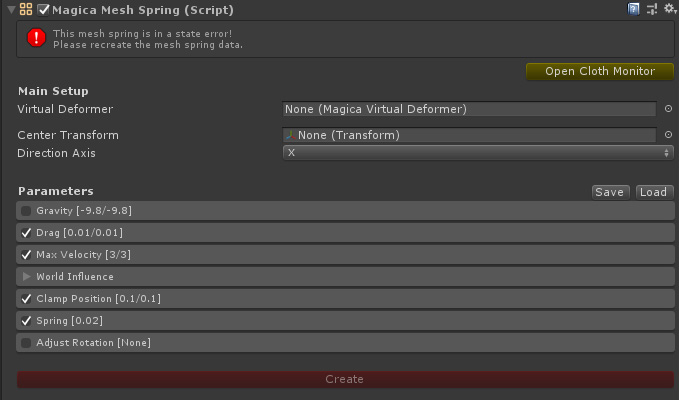
First, set the VirtualDeformer to operate.

Next we need to select the Center Transform that will be the center of the MeshSpring swing.

If there is no such Transform in the model structure, add a Transform manually and configure it.
In the Unity-Chan model, there was no Transform in the center of the chest, so I manually added and set the [BL] transform.
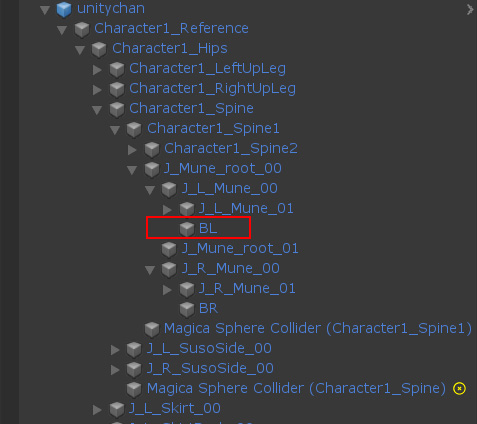
At this time, rotate so that the axis of the Transform matches the front direction of the swing range.
In the Unity-Chan model, the [BL] transform Z axis (gizmo’s blue axis) was set to face in front.

Set the center transform to [Center Transform] and set the front axis to [Direction Axis].
In the Unity-Chan model, the Z axis of the chest transform [BL] is set as the front, so [Direction Axis] is set to [Z].

You can check the direction set in the Scene view.
The direction of the yellow arrow is the front axis.

Adjust spring parameters
Set the parameters that control the behavior of the spring.
First, let’s load a preset and set it up easily.
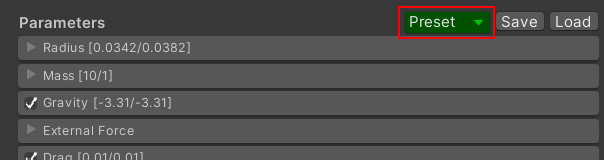
Press the [Preset] button to the right of [Parameters].
Select [Breast] from the list to load it.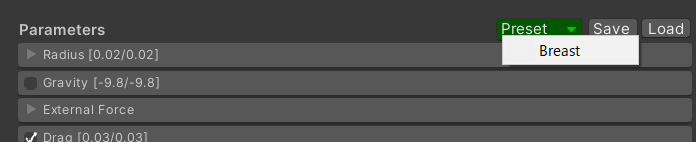
The Preset button has been implemented since v1.8.4, so if you don’t have the Preset button, press the [Load] button on the right and load [MeshSpring_Breast.json] from the MagicaCloth/Preset folder.
You have now set most of the parameters for the chest shake.
However, with MeshSpring, it is necessary to adjust the range and direction of the swing even after loading the preset.
Set the swing range.
Open the [Spring] panel of the parameter.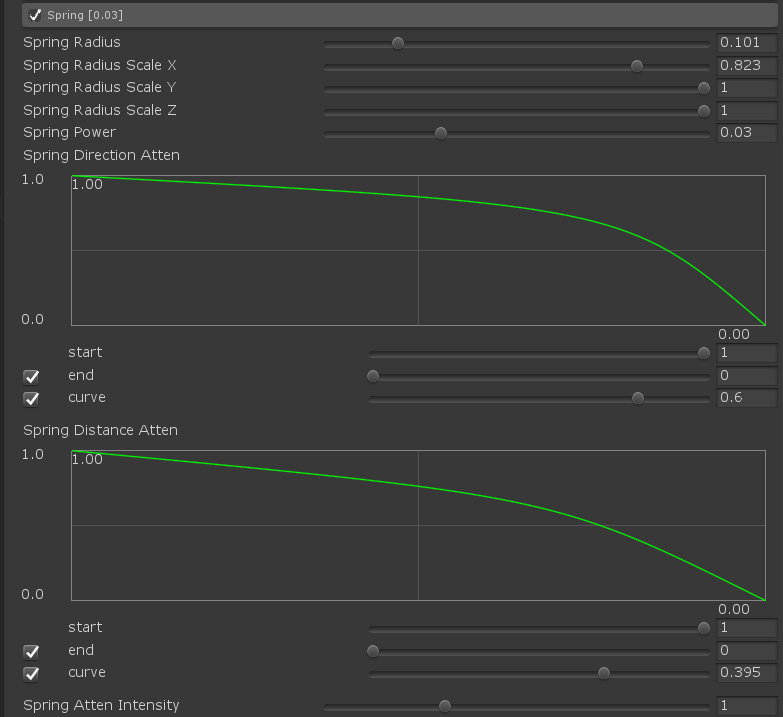
The following four parameters are adjusted by specifying the range.
These can be used to set a spherical range.
| Name | Description |
| Spring Radius | The radius of the spherical area |
| Spring Radius Scale X | X-axis influence ratio of spherical range |
| Spring Radius Scale Y | Y-axis influence ratio of spherical range |
| Spring Radius Scale Z | Z-axis influence ratio of spherical range |
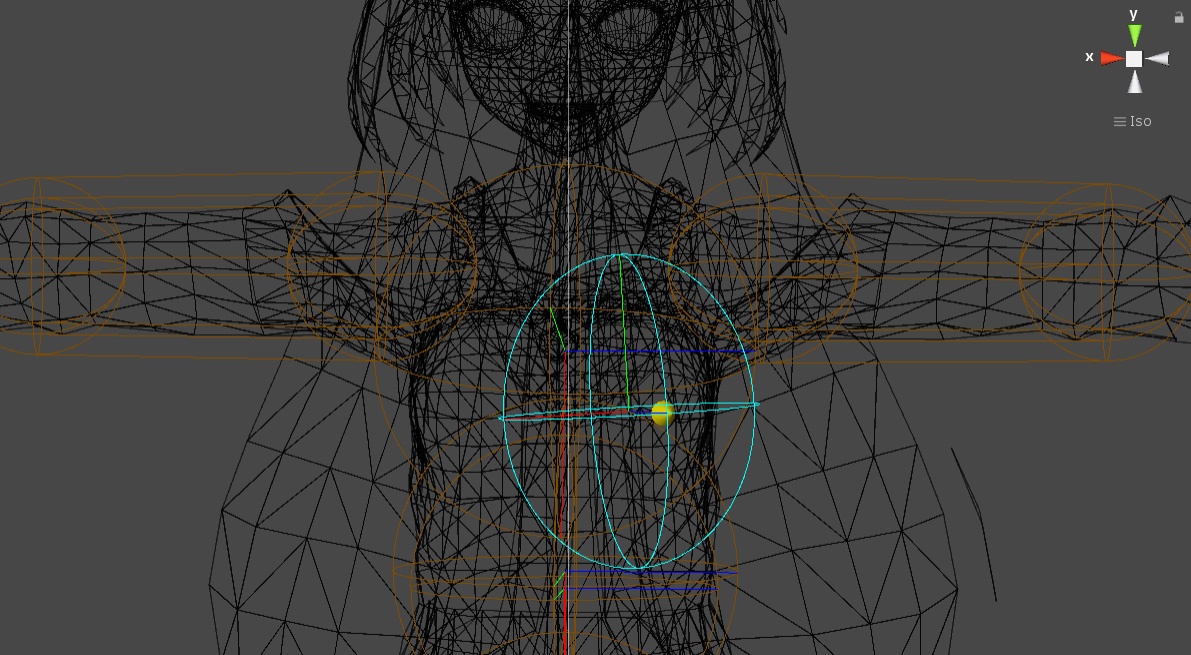
On the chest of Unity-Chan, the X axis was slightly squeezed to have an oval range.
The range is displayed as a light blue sphere in the gizmo in the Scene view.
The peaks of this light blue area are subject to shaking.
Actually, the setting that shakes strongly in the front direction is included in the initial state by the curve of [Spring Direction Atten] and [Spring Distance Atten].
This completes a series of settings for MeshSpring.
Let’s create data by pressing the [Create] button.

The setting is completed when the start icon of MeshSpring changes to “white”.

If you run Unity and the mesh is shaking, setup is complete.
When shaking the left and right chest
If you want to shake the chest both left and right, you need another setting of MeshSpring.
In this case, it is the setting example on the left side, but this is only done for the right side.
At this time, VirtualDeformer can be set to a common one for both.
VirtualDeformer has a function to blend the movement of multiple cloth components.
The MeshSpring component created in this example can be easily created by duplicating with [Ctrl + D] and changing the [Center Transform].
Please do not forget to press the [Create] button to create the data after setting the duplicated component.
Mesh Spring Adjustment Guide
Movement range restriction
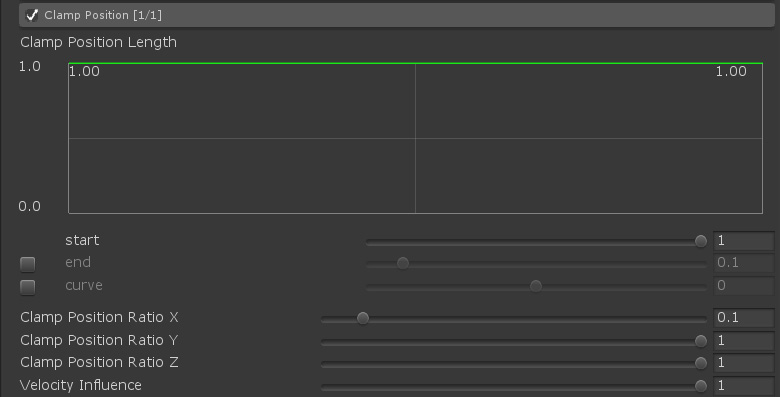
By setting the [Clamp Position] parameter, it is possible to specify the limit range to move.
Movement restriction can be performed for each XYZ axis.
Rotation control with movement
By setting [Adjust Rotation], it is possible to add rotation to the Center Transform according to the distance moved by the spring.
| Mode | Description |
| Fixed | No rotation control is performed. |
| XY Move | Rotate X axis and Y axis with movement |
| XZ Move | Rotate X axis and Z axis with movement |
| YZ Move | Rotate Y axis and Z axis with movement |
This setting works the same as BoneSpring.
For example, if the front of the spring is the Z-axis, set to XY Move mode and set the Rotation Power to about 5, the movement will be as follows.