Mesh Cloth that directly operates Mesh
A feature of MeshCloth is that mesh vertices can be cloth-simulated as they are.
This is also applicable to SkinningMesh.
MeshCloth is ideal for simulating complex movements such as skirts and collision detection.
However, since processing such as control of each vertex of the mesh and writing back the result to the skinning mesh occurs, the calculation load increases accordingly.
MeshCloth also requires something called a “deformer” to deform the mesh.
Therefore, before constructing MeshCloth, it is necessary to set Deformer first.
model import settings
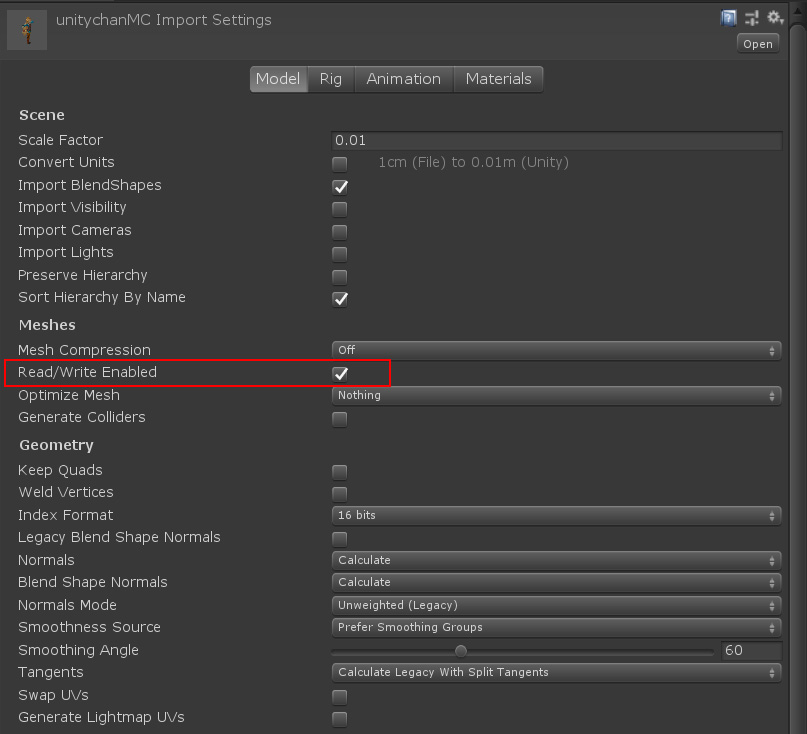
Before setting, you need to check the import settings of the model to be used.
The following settings must be enabled:
| Item | Description |
| Read/Write Enabled | Allow reading and writing to the mesh. It must be ON. |
Render Deformer setup
First, you need to set up a render deformer in the Renderer to which you will apply MeshCloth.
RenderDeformer has a function to freely deform the mesh attached to Renderer.
Let’s set the deformer using the Unity-Chan model as an example.
In this case, I want to swing the skirt of Unity-Chan, so I select the renderer that I want to swing from the model. (Red range)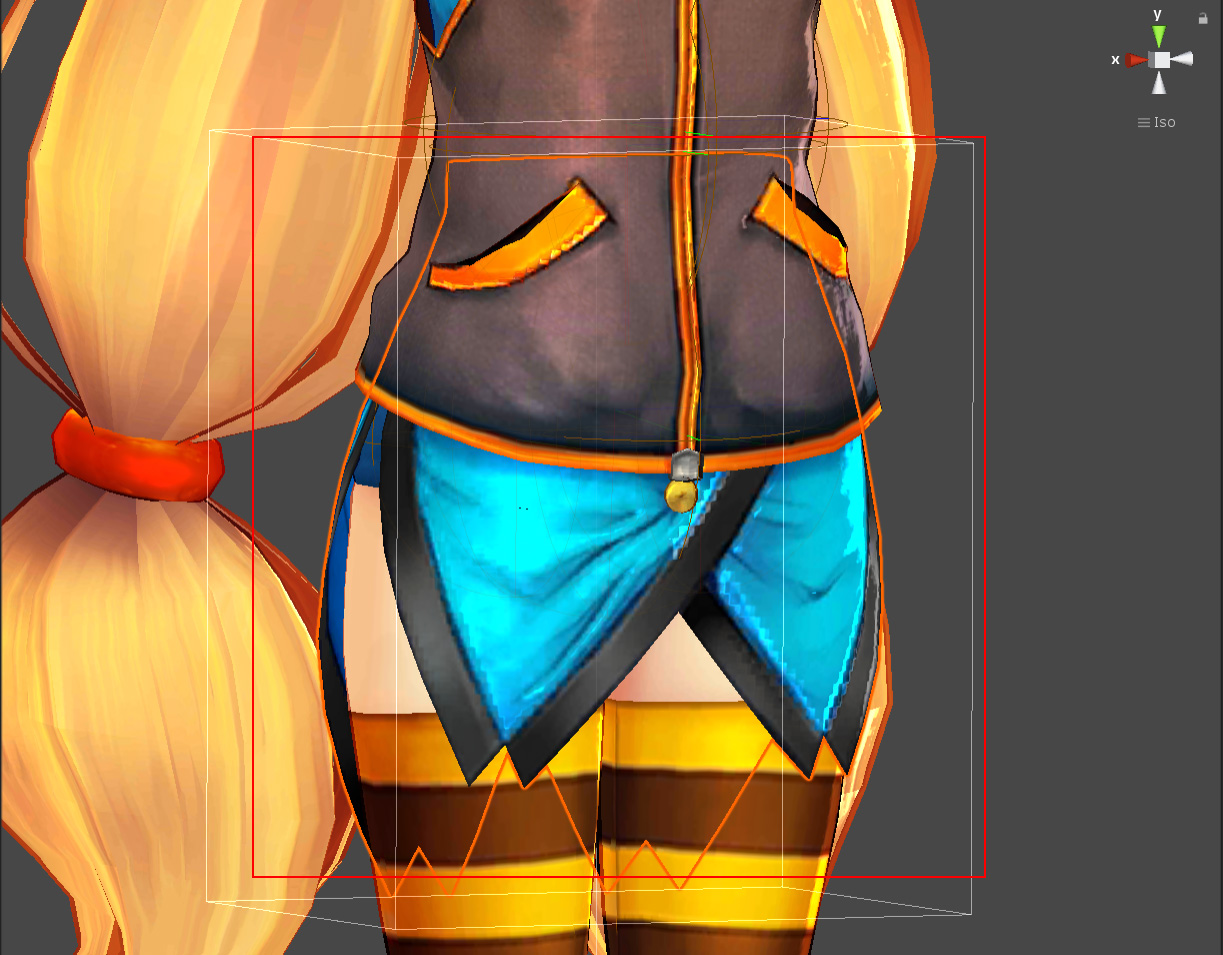
The following three renderers apply the render deformer.
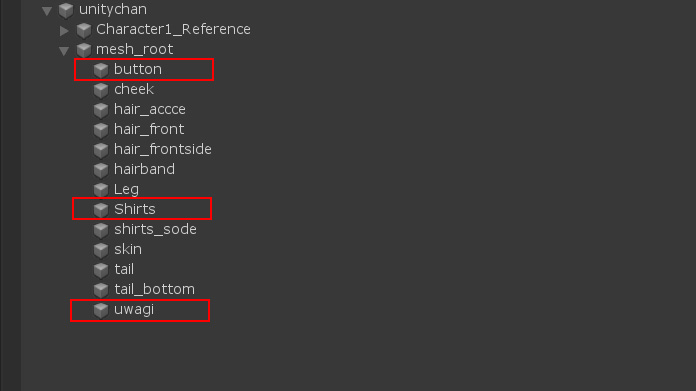
Attach the Magica Render Deformer to these three renderers.
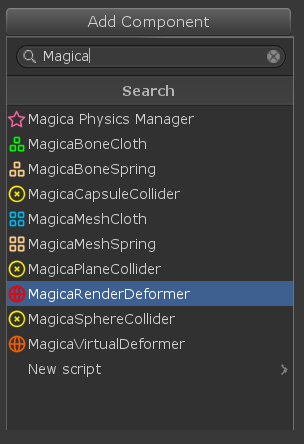
Open the inspector for each renderer and press the [Add Comonent] button.
Enter [magica] as a search key. A list of MagicaCloth components will be displayed. From there, attach the Magica Render Deformer.
Unlike other components, Render Deformer creates data automatically at the time of attachment, so there is no need to press the [Create] button separately.
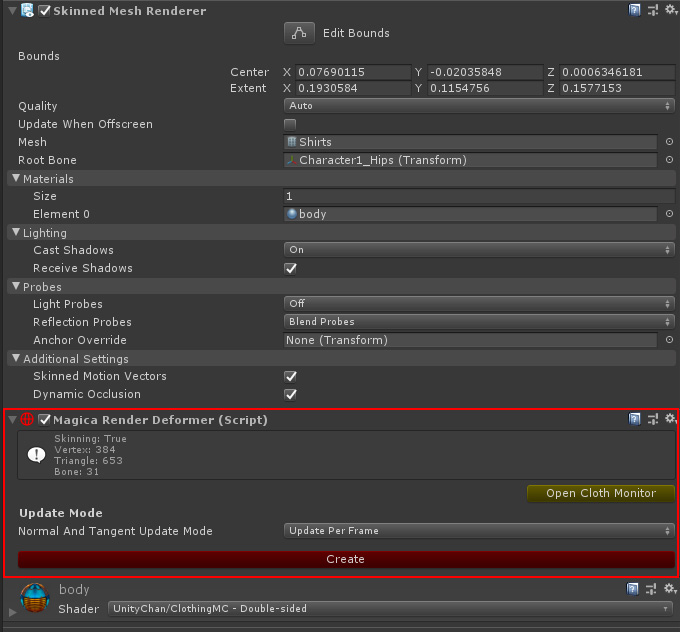
Once you have done this for all renderers, the Render Deformer setup is complete.
Virtual Deformer setup
Next, set the virtual deformer to control multiple Render Deformers as one virtual mesh.
The virtual deformer has the function of combining render deformers to reduce vertices and convert high polygon meshes to low polygons.
A virtual mesh is treated as a memory-only mesh with no Unity Mesh components.
And since MeshCloth is executed by controlling the vertices of this virtual deformer, it is possible to control the mesh of the high polygon by a cloth simulation with a reduced number of reduced vertices.
The virtual mesh is only used for cloth simulation, so the actual mesh is not reduced.
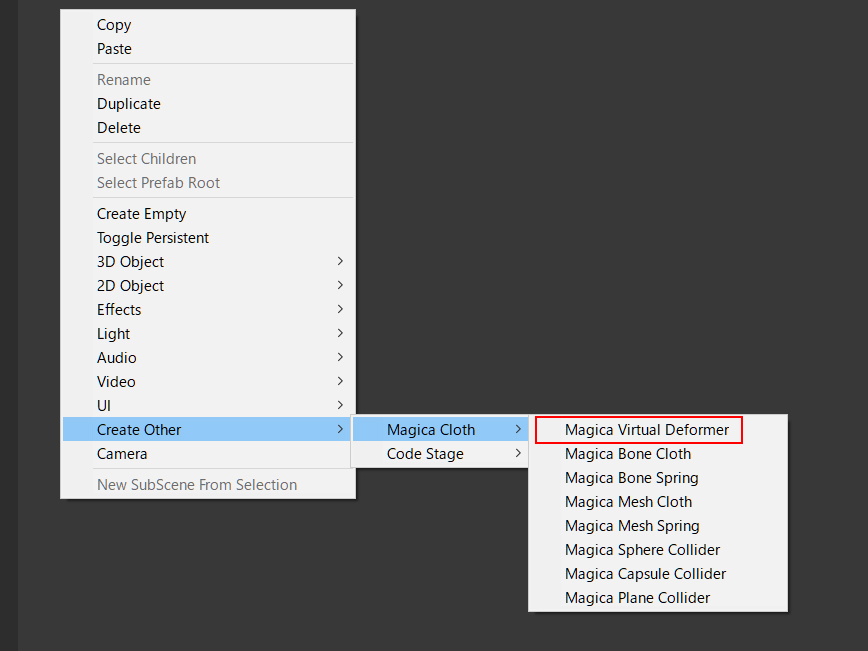
First, create a Virtual Deformer object.
Right-click in the Hieraruchy window and select “Magica Virtual Deformer” from the menu as shown below.
A Virtual Deformer object is created.

VirtualDeformer can be set from the inspector.
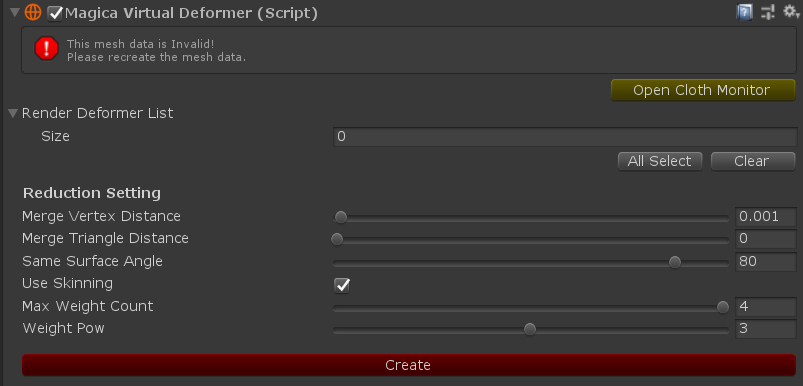
First, register the RenderDeformer to be combined.
Register the RenderDeformer of [button] [Shirts] [uwagi] attached to the Render Deformer List.

Next, set the reduction. First, let’s create the data by pressing the [Create] button once for confirmation.
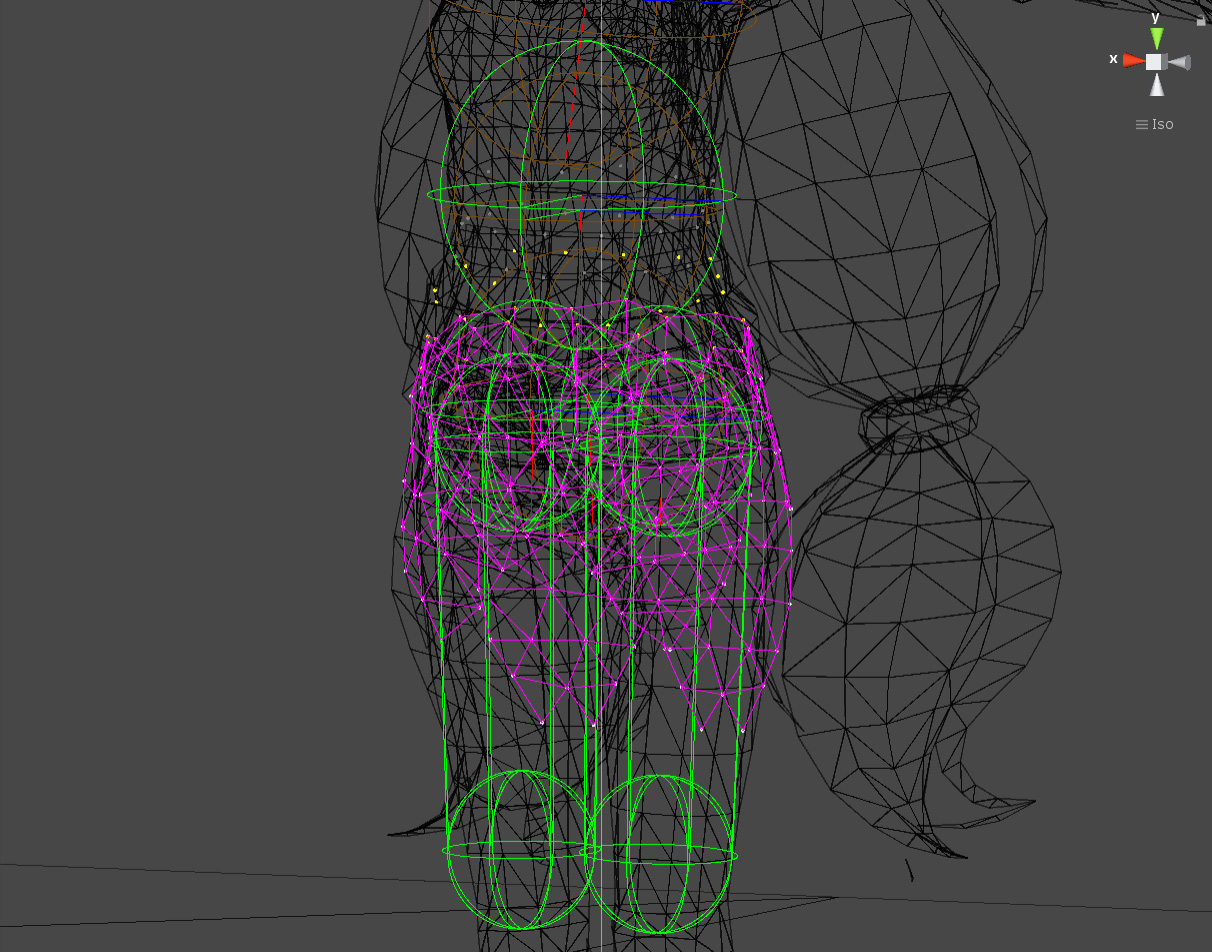
Look at the Scene view when [Create] is completed.
The polygon shape of the virtual mesh is drawn with purple lines.
(※ It is easy to confirm by displaying in wire frame)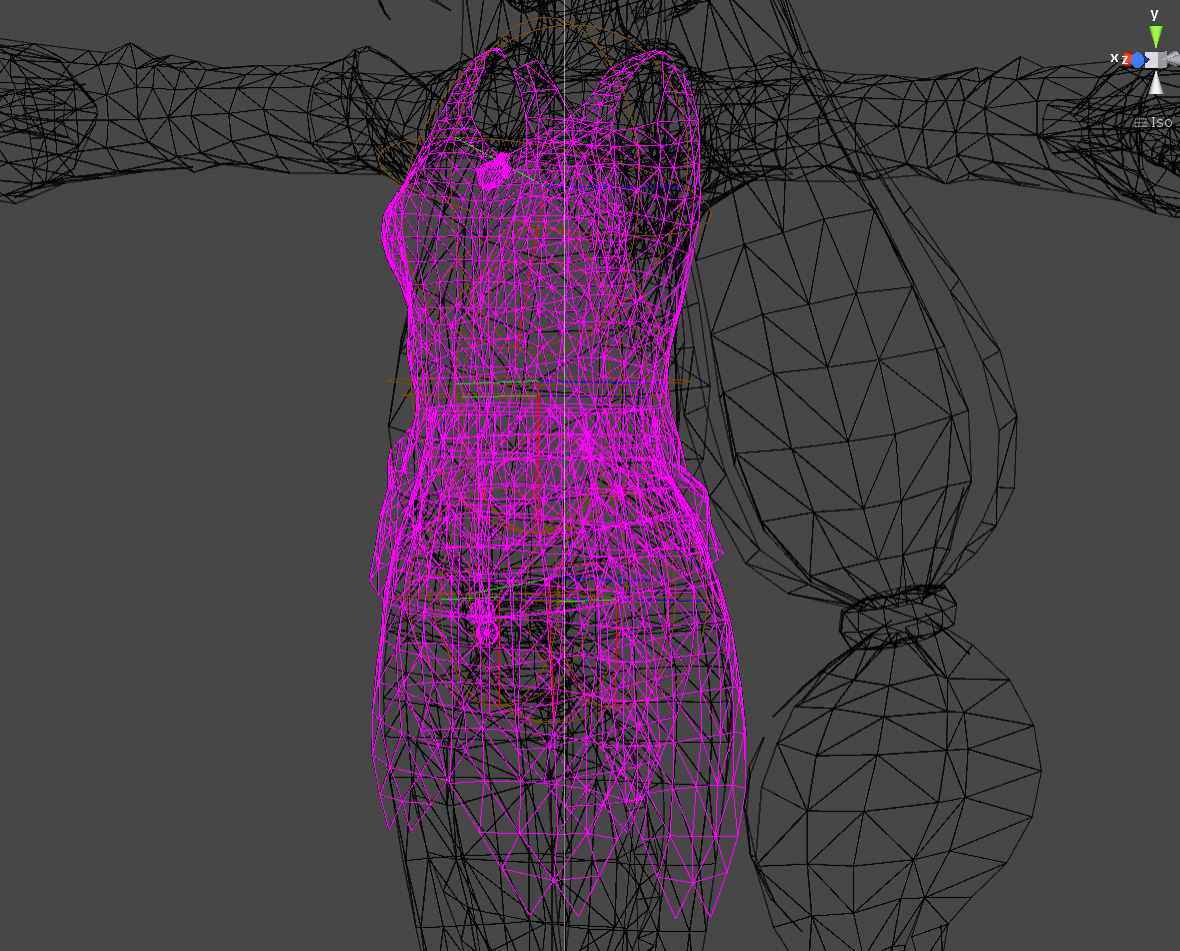
In the initial state, there is almost no reduction, so the virtual mesh is also a high polygon.

If it is left as it is, the load will be high and the particles will be too fine and the simulation will not be stable.
Adjust the following two parameters for reduction.
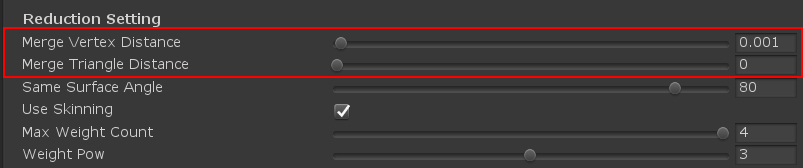
| Name | Description |
| Merge Vertex Distance | Combine vertices within this distance, ignoring mesh connectivity. |
| Merge Triangle Distance | Combine vertices within the range set to this distance in consideration of mesh connection. This is effective when you do not want to change the shape of the mesh very much. |
It is necessary to adjust this value according to the situation while watching the mesh to be handled and the simulation.
This time, set [Merge Vertex Distance] to 0.0273 (m) and create it.
The result was the following virtual mesh with significantly reduced vertices.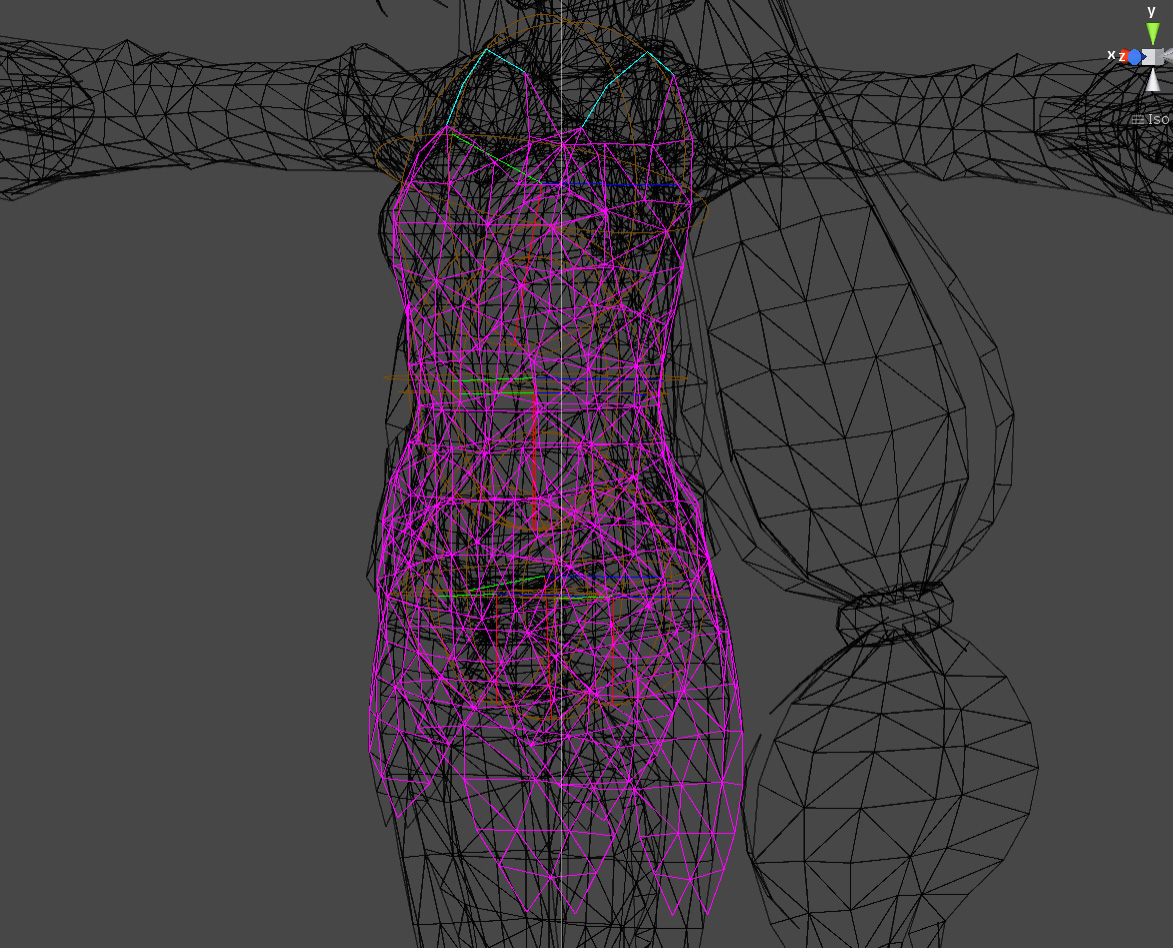

Even if the virtual mesh is a low polygon, the actual mesh vertices are smoothly interpolated by reverse skinning, so there is almost no discomfort in appearance.
Apply MeshCloth to the vertices of this virtual mesh.
The following points are suggested as adjustment guidelines.
- The load is reduced as the number of polygons decreases
- The smaller the number of polygons, the more stable the cloth simulation
Mesh Cloth setup
After that, there is no big difference from the setting of BoneCloth.
Add MeshCloth to your character.
Right-click in the Hierarchy window and select “Magica Mesh Cloth” from the menu as shown below.
A MeshCloth object is created.


The inspector is almost the same as BoneCloth.
[Traignel Bend] is just added.
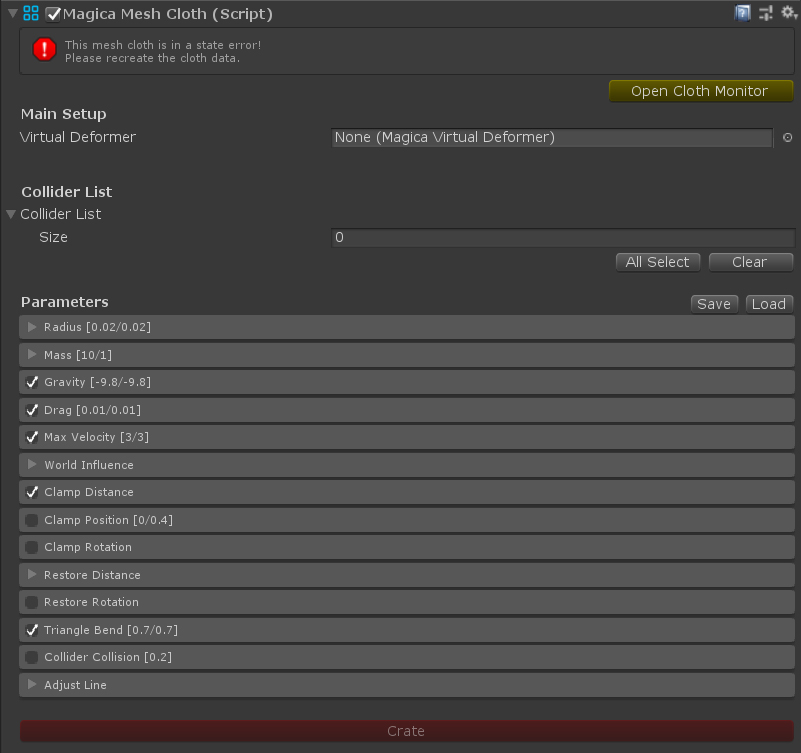
First, set the VirtualDeformer to operate.

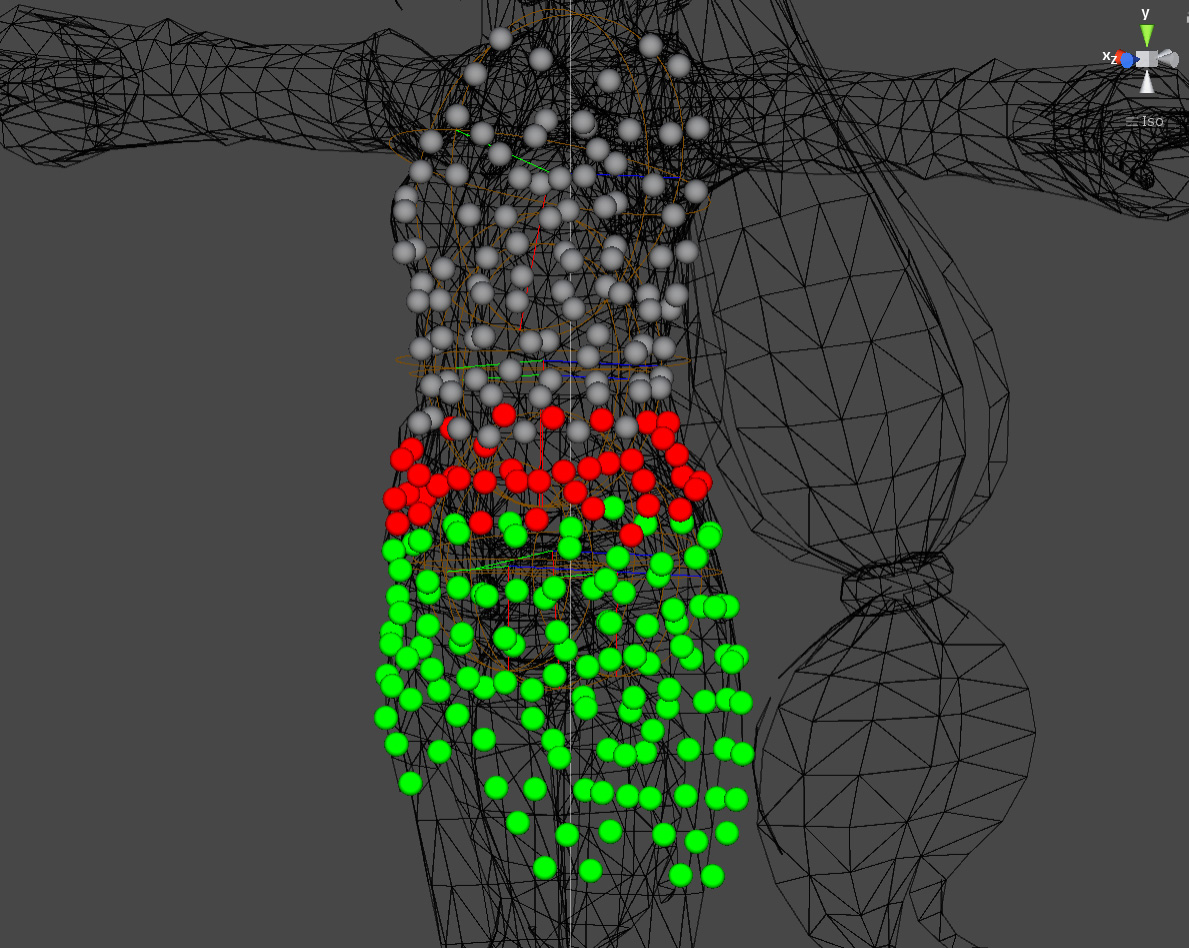
Next, you need to edit which vertices in the virtual mesh are moved and which vertices are fixed.
Press the [Start Point Selection] button to enter edit mode.
(* Please refer to “BoneCloth Start Guide” for edit mode)

Set the fixed and moving particles in the scene view by “left drag” of the mouse.
Note that moving particles always require fixed particles to be connected.
However, since this connection is performed automatically, there is no problem if you mark particles that do not move as “fixed”.
And mark particles that are not needed for the cloth simulation as invalid.
This will remove it from the particle calculation and reduce the load.
The final settings for Unity-Chan skirts are as follows:
Set the parameters that control the behavior of cloth simulation.
First, let’s load a preset and set it up easily.
Press the [Preset] button to the right of [Parameters].
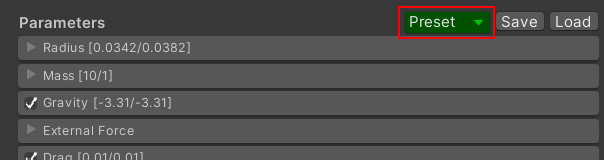
Select [Skirt] from the list to load it.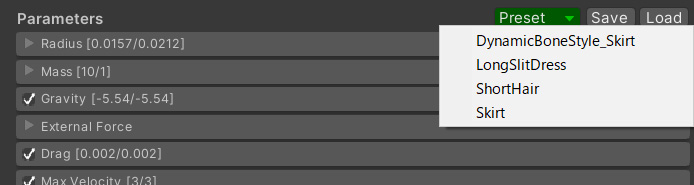
The Preset button has been implemented since v1.8.4, so if you don’t have the Preset button, press the [Load] button on the right and load [MeshCloth_Skirt.json] from the MagicaCloth/Preset folder.
You have now set most of the parameters for the skirt.
(* Adjustment is required according to the model shape to be used.)
Now that a series of settings has been completed, press the [Create] button to create the data.

If there is no problem, the status icon of MeshCloth changes to “white” and information is displayed.

Let’s actually run Unity and test.
It is a success if the skirt of Unity-Chan is physically controlled in conjunction with the movement of the main body (animation etc.).
Set collision judgment (Collider)
The skirt has moved, but there is no hit detection yet, so the skirt will pass through the body.
As with BoneCloth, setting the Collider can prevent particles from entering.
The settings of Collider are exactly the same as BoneCloth, so please refer to “BoneCloth Start Guide” for the setting method.
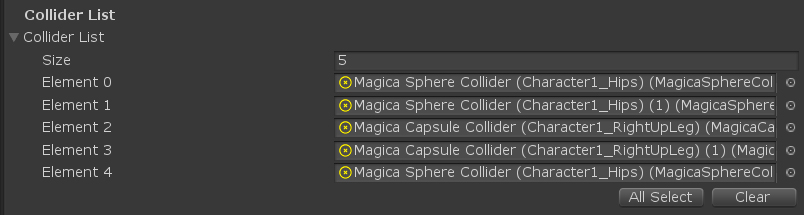
Unity-Chan finally set up Collider as follows.
There is no problem if Collider is duplicated with other cloth components.
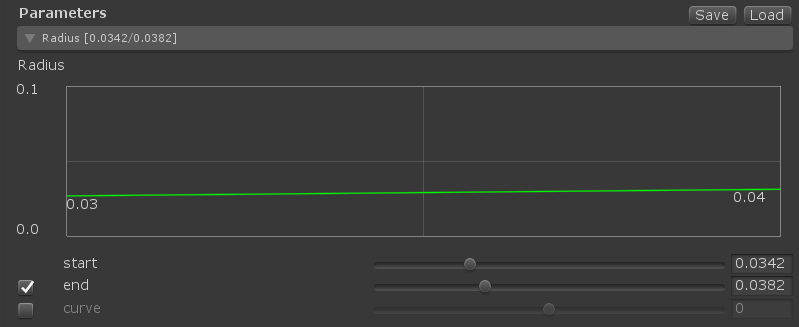
Adjust the radius of collision judgment for each particle.
When you select a MeshCloth object in Hierarchy, the particles appear in the scene view as yellow (fixed) and white (moving).
The size of the sphere at this time will be the hit judgment size of each particle.

Move the slider of the Radius curve in the [Radius] panel of the parameter to adjust the size of the hit judgment ball.
* If the gizmo is difficult to see, use the cloth monitor and hide unnecessary gizmos to make it easier to see
Finally, don’t forget to check the Collision panel.

Finally, don’t forget to press the [Create] button to update the data.
Let’s run Unity and check.
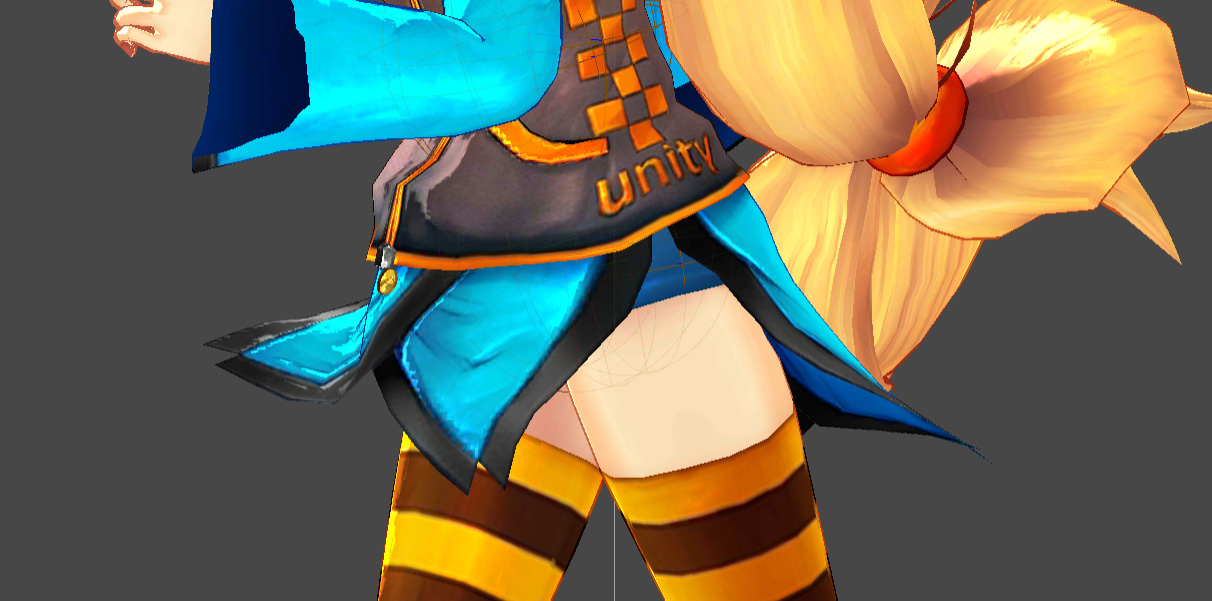
This time, the skirt should have collided without penetrating the foot.
The MeshCloth setup is now complete.