Contents
Introduction
In order to achieve ideal movement, parameter adjustment is indispensable.
Here, we will explain the concept of baseline, which is deeply related to parameters, and the role of each parameter.
Understand the baseline
The concept of baselines is essential to understand when setting parameters.
The baseline is the path starting at the fixed vertex of the proxy mesh and following the surface connection to the moving vertex at the end.
For example, let’s say you have a hierarchy of Transforms like this.

If you create a BoneCloth starting from the [Fixed] bone of this structure, the baseline will be assigned as follows.
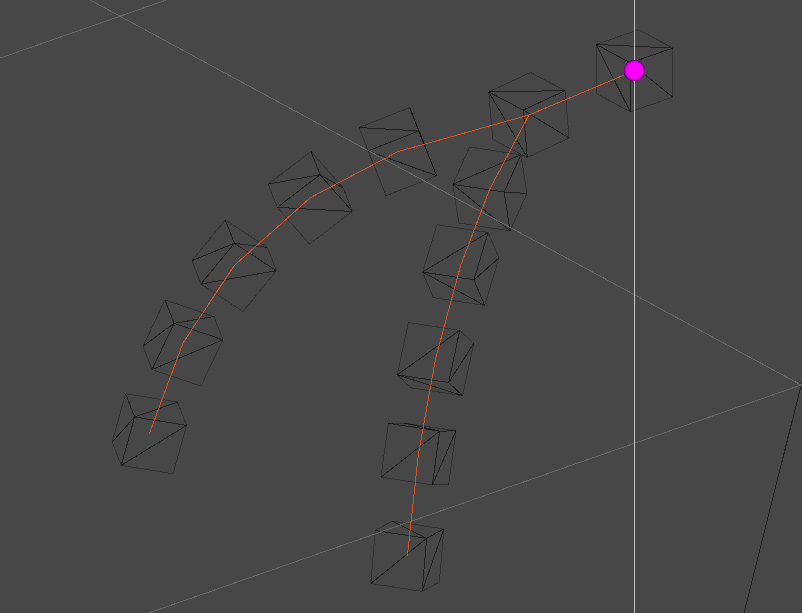
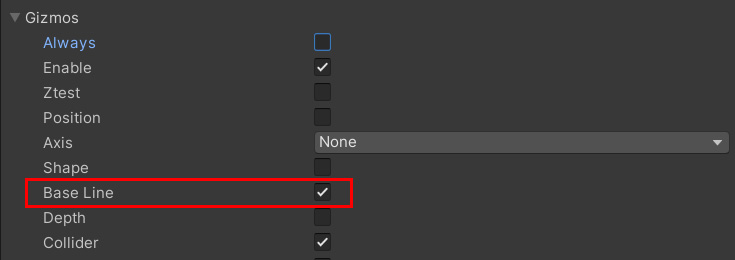
This line can be confirmed by checking [Base Line] in the gizmo.
MagicaCloth restores the shape along this baseline.
As a result, we have achieved a 2.5D-like behavior that combines 2D-like movements while retaining physically realistic movements.
start/end and depth
A baseline contains start and end points, as well as depth information.
You can check this by turning on [Base Line] and [Depth] in the gizmo settings.
Let’s take the Transform structure from earlier as an example.
The white numbers represent the depth, and the starting point is (0.0) and the ending point is (1.0), so you can check which depth each vertex corresponds to.
This depth value is an essential index for parameter setting.
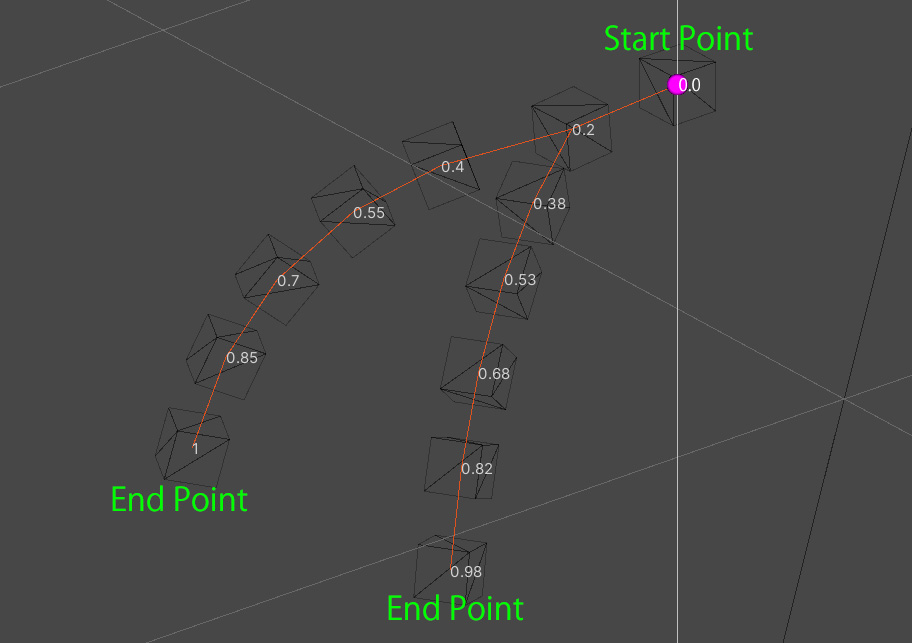
Depth is automatically assigned so that (1.0) is the end of the longest baseline in the proxy mesh.
Baseline with Bone Cloth
In BoneCloth, baselines are simply constructed from a tree structure of Transforms.
So it’s the same as the Transform hierarchy.
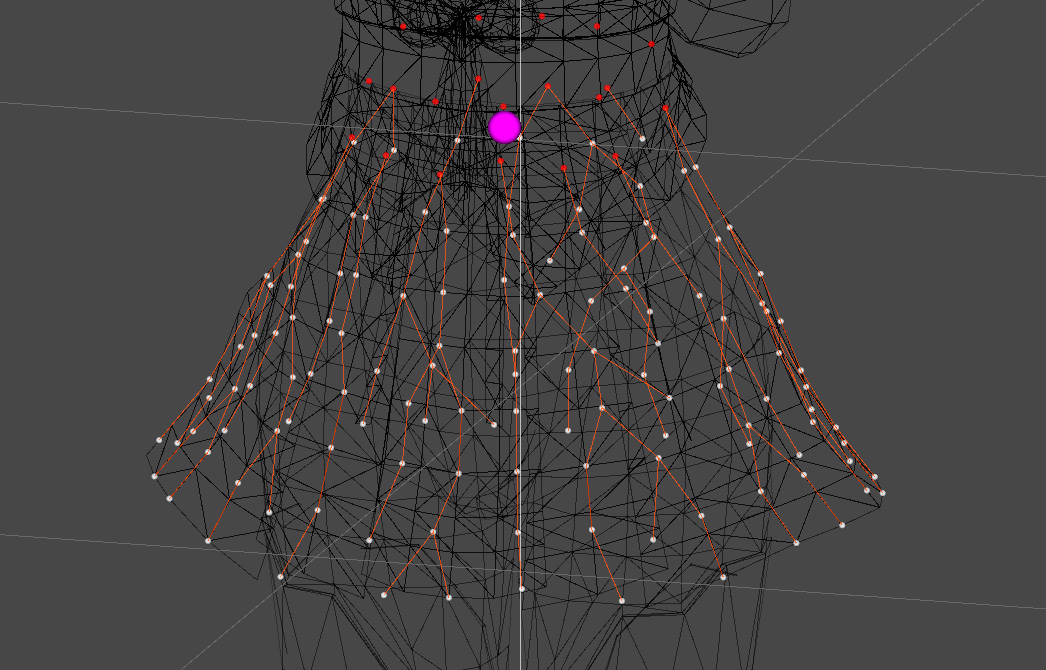
Baseline with Mesh Cloth
MeshCloth is a little more complicated, and the baseline is automatically calculated according to the connection of the surface around fixed vertices.
For example, with KAGURA’s skirt, the baseline is automatically formed as follows.
Keep in mind that the MeshCloth’s baseline will change in various ways depending on the connection state of the surface and the distribution of fixed vertices.
Relationship between depth and parameters
As mentioned above, when the baseline is created a depth is set for each vertex.
The depth of this vertex is an important index when adjusting parameters.
MagicaCloth has many parameters that determine values based on this depth.
As an example, let’s look at the Angle Limit movement that limits the angle.
Angle Limit limits the angle at which the edges of the baseline can bend.
The settings panel for this Angle Limit looks like this:

Currently, the curve setting is turned off, so a uniform 60 degrees is set regardless of the depth.
Let’s press [C] on the right here.

Then the inspector will expand and you will be able to set the curve.
This operation allows you to set different limit angles for each vertex depth.
Let’s take a look at the contents of the set curve.
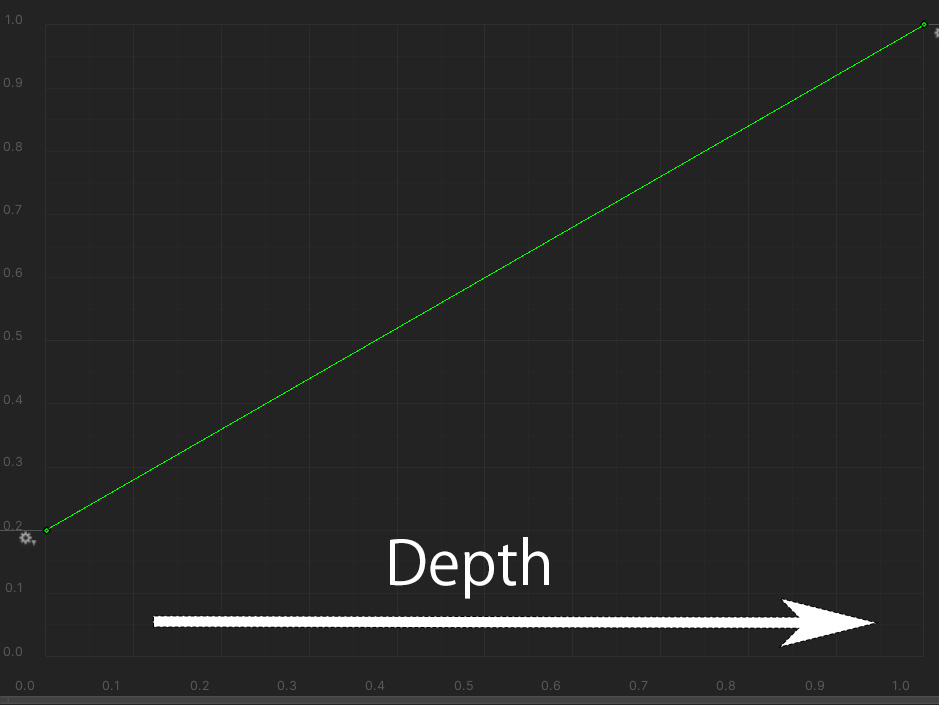
The horizontal axis is the depth (0.0 to 1.0) and the vertical axis is the strength of the parameter (0.0 to 1.0).
When the depth is 0.0, the strength is 0.2, so the limit angle is 60 x 0.2 = 12 degrees.
At depth (0.5) the strength is 0.6, so the limit angle is 60 x 0.6 = 36 degrees.
At depth (1.0) the strength is 1.0, so the limit angle is 60 x 1.0 = 60 degrees.
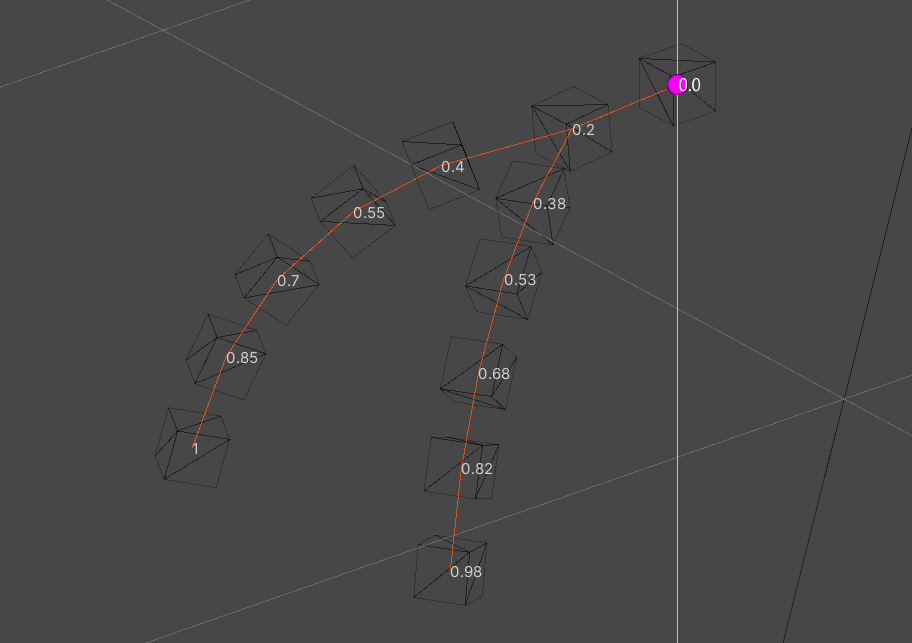
Combine this with the BoneCloth depth diagram from earlier.
The vertex depth (0.0~1.0) corresponds directly to the horizontal axis of the curve.
I hope you can understand how the limiting angle each vertex receives is determined.
In this way, the curve parameter has a mechanism in which the final value is calculated in conjunction with the depth.
This is the relationship between depth and parameters.
Remember that this applies to all parameters with a [C] button.
Parameter type
Here, we will introduce what kind of parameters actually exist by type.
If you explain each function of each parameter in detail, the amount of pages will be enormous, so here we will focus on the overview of the parameters and the guideline for setting.
Please refer to the separate component reference for parameter details.
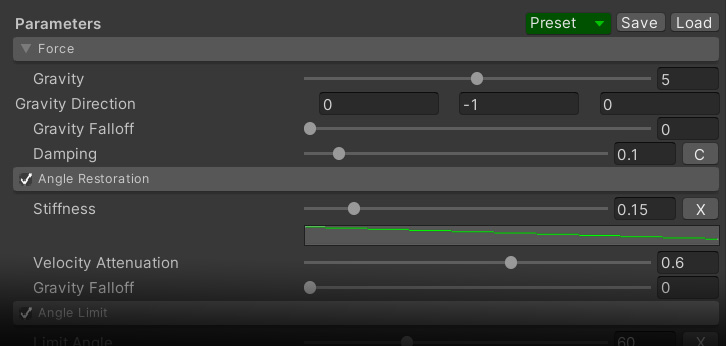
Force

Controls forces such as gravity and air resistance (Damping).
Adding some gravity will make the movement more realistic.
If you lower the air resistance, the vertices will not come to rest easily.
Conversely, if you increase the air resistance, the top will move slowly.
Gravity Falloff reduces the effect of gravity depending on the orientation of the cloth.
For example, if Falloff is 1.0, if the cloth is at the same angle as the initial posture, no gravity will be applied.
Angle Restoration

Rotate each edge of the baseline back to its original position.
This Angle Restoration is the most important parameter for controlling movement.
It is no exaggeration to say that the majority of movement is determined here.
Stiffness is the amount of rotation angle corrected in one pass.
Increasing Stiffness speeds up restoration.
Velocity Attenuation is the amount of velocity attenuation applied to vertices during restoration.
If you lower it, the acceleration will be stronger and it will bounce like a spring.
Adjusting these two properties requires a certain amount of familiarity and experience.
A good place to start is to load a preset and try to imitate it.
Angle Limit
Limits the angle each edge of the baseline can bend from its original pose.
It is effective when you do not want to bend too much like bangs.
It is also a good idea to limit the angle of skirts to a certain extent in order to maintain their shape.
Shape Restoration

It does three movements to maintain the shape of the proxy mesh.
| Distance |
Stretchability of the mesh. However, if it looks better if the outside is stretched a little like a skirt that rotates, it is also effective to use a curve to weaken the restoring force near the end point. |
| Tether |
Limits how close a vertex can be to the start of its baseline. Lowering the value makes it harder to deform the shape of the mesh. |
| Triangle Bending |
The resistance of the mesh to bending. |
Inertia
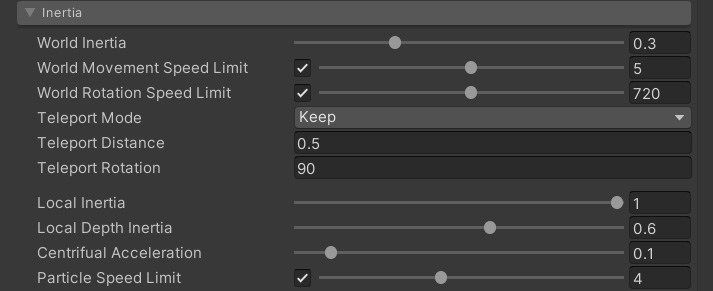
Here you can control how character movement and animation movement affect the cloth.
For example, if the cloth sways unexpectedly when the character moves, it is possible to weaken the effect by lowering the parameter.
Inertia is divided into world inertia, which is linked to character movement, and local inertia, which is linked to character animation, and the range of influence can be set individually for each.
You can also choose to automatically detect character teleports and reset the simulation or continue as is.
See the Inertia page for a detailed explanation of inertia and teleportation.
Movement Limit
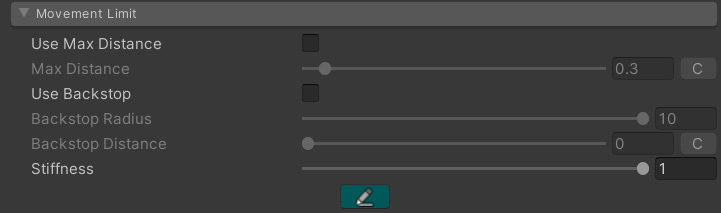
Restricts vertex movement relative to the vertex normal direction of the proxy mesh.
This is also called a backstop.
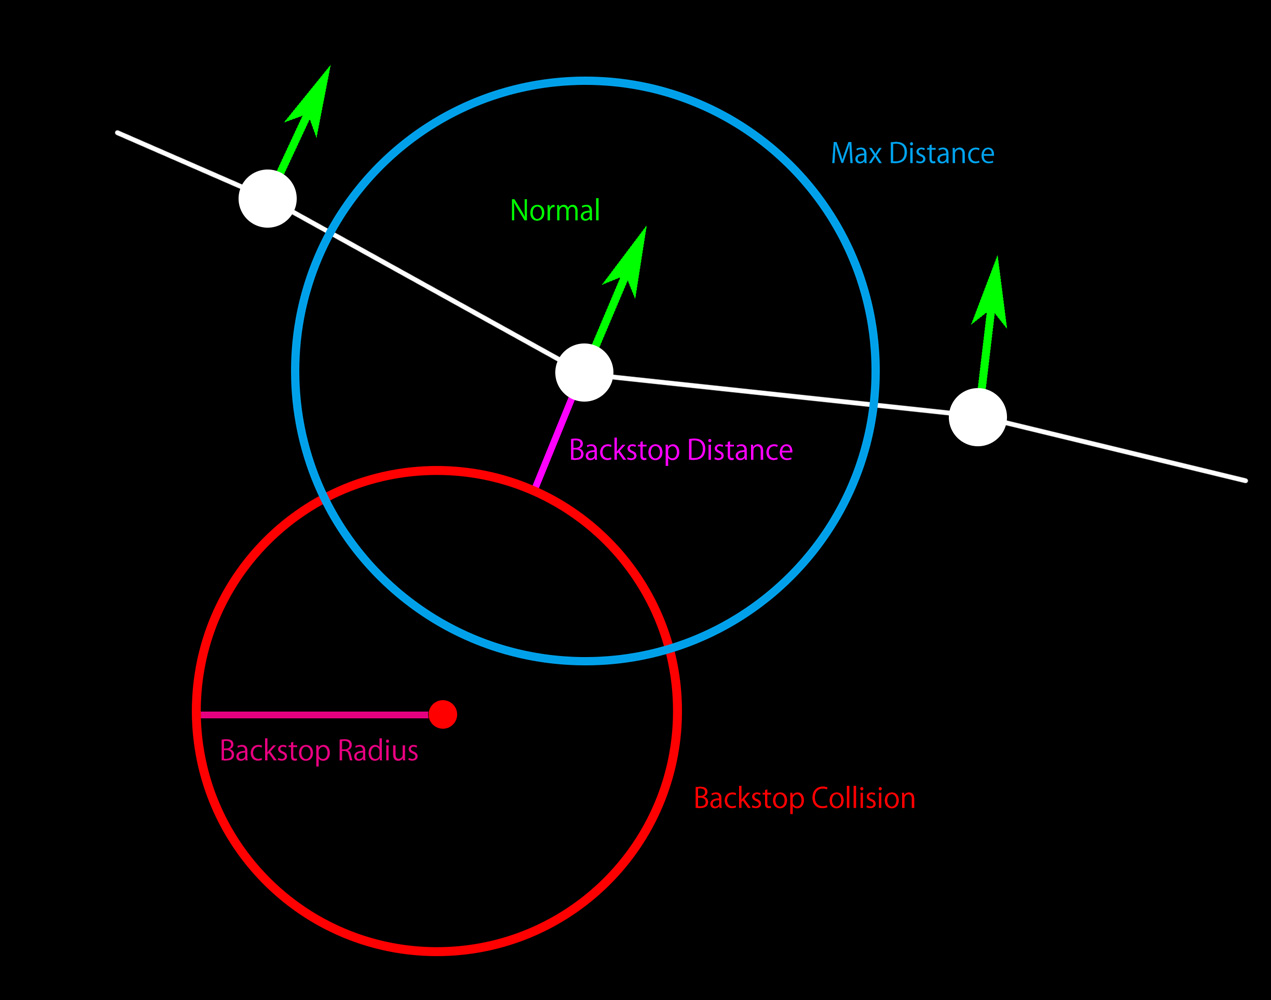
See the diagram above for how it works.
Simply put, vertices can only move within the MaxDistance range and outside the BackstopCollision.
For example, let’s say you have a T-shirt with all vertex normals pointing outwards from the human body.
Here, we use the backstop function to restrict the vertex from entering beyond a certain distance in the opposite direction of the normal.
This prevents the T-shirt from digging into the human body without using a collision collider.
Using the same principle, it is also possible to easily prevent bangs from digging into the inside of the head.
The important thing is that it is calculated at the proxy mesh vertex normals.
Remember that the vertex normals of the render mesh are irrelevant.
Also, the vertex positions and normals that are the basis for the constraints are obtained from the pose of the skinned proxy mesh before the simulation.
And the proxy mesh normals can also be adjusted.
Backstop explanation is a little long, so please refer to the backstop explanation page for more details.
Collider Collision
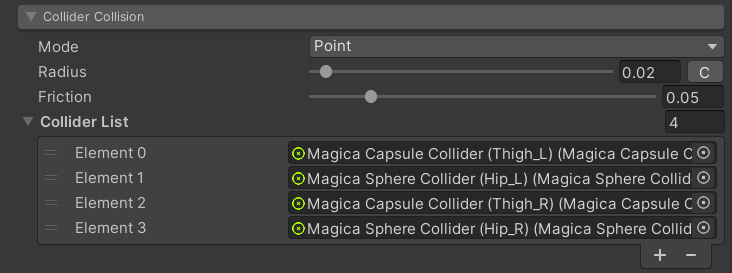
This is the most frequently used collision control that uses colliders such as spheres and capsules to restrict the cloth from entering the human body.
Collider collision detection is explained in detail in Collision detection settings, so please refer to that.
Self Collision
🚧beta version🚧

Here you can set self-collision to prevent cloth from digging into itself, and mutual collision to prevent cloth from digging into other cloths.
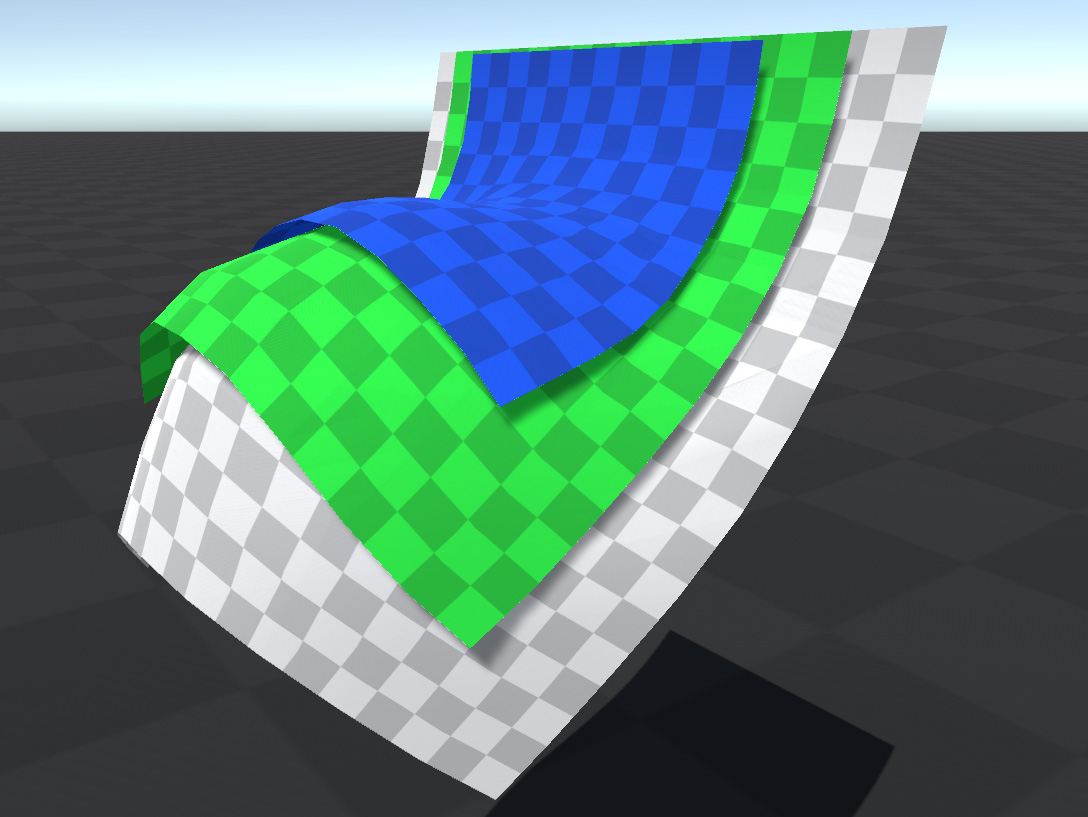
If you use self-collision, the cloth itself will collide like the image.
However, self-collision requires a large amount of collision calculations, so the load is very high.
Therefore, it is recommended to use it on a desktop PC or high-end console machine.
Also note that self-collision is currently an experimental feature, i.e. in beta.
Therefore, behavior and settings may change in the future.
See the dedicated page for more information on self-collision.
Spring

Applies a spring effect to fixed attribute vertices.
This is perfect for things like a character’s chest shaking.
Spring panels are available only with BoneSpring.
Tuning tips
So far, I have explained the role of each parameter.
All you have to do is repeat trial and error to get closer to the ideal movement.
However, this work is very difficult, so I would like to post some adjustment tips.
Adjust important parameters first
Although the number of parameters is large, there are only a few items that actually determine the movement.
Try adjusting these first.
| Force | gravity and air resistance This has a lot to do with vertex movement. |
| Angle Restoration | rotation reconstruction It is the most important parameter that determines the overall movement. It is best to adjust from here first. |
| Inertia | Adjust here if the cloth moves too much when the character runs or jumps. |
Adjustable on the fly
Parameters can also be adjusted from the inspector during runtime.
Making adjustments while actually playing the game makes trial and error easier.
Take advantage of presets

Presets are shortcuts for setting parameters.
First, let’s load a preset and check if it’s close to the ideal movement.
If you have a preset that is close to the ideal movement, you can reduce the time by adjusting the parameters independently from there.
Saving presets
Parameters can be easily saved as original presets.

Save your painstakingly adjusted parameters as presets.
Saved presets can be easily set up from the Preset button.
By doing this, you can save a lot of work when setting up similar movements.
Saving presets is also available while running.
Take advantage of component copies
The trouble with adjustment is that the contents of the inspector adjusted during execution are all restored when execution ends.
Use the component copy feature to avoid this!
This is a function that allows you to copy the contents of the inspector by pressing the “︙” button of the component during execution.
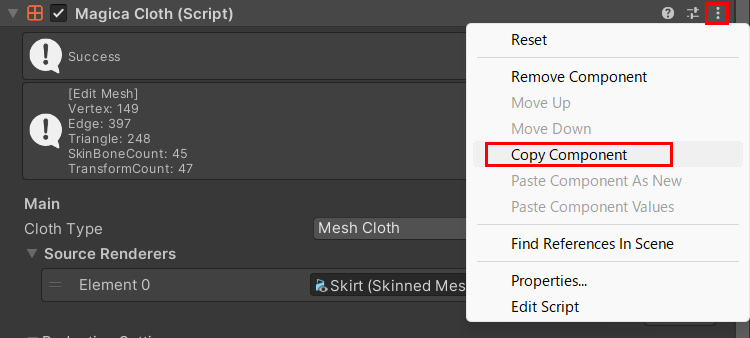
If the parameter adjustment is successful during execution, copy the contents with this function.
And after the execution is finished, select Paste from the “︙” menu of the component as well.
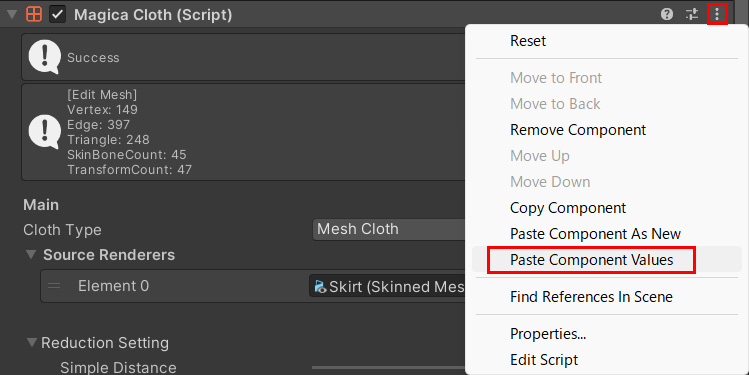
With this operation, it is possible to restore the running parameter to the inspector after stopping.
What next?
So far, I have explained the basic setup of MagicaCloth.
By applying these, most cloths can be set up.
So unless you’re doing something too complicated, you don’t need to read any further guides.
However, there are some features we haven’t explored in detail yet, such as backstop and self-collision settings.
Continue reading other guides if you want to know more about them.