
Contents
Introduction
Backstop is a type of collision detection that limits the distance that can be entered based on the normal direction of the vertex.
By using this, you can easily prevent bangs etc. from invading your head.
It can also prevent T-shirts and other items from entering the human body.
The mechanism is simple, the processing load is low, and it is a system that can strongly prevent intrusion into the human body.
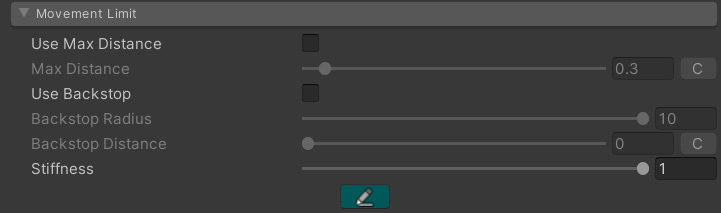
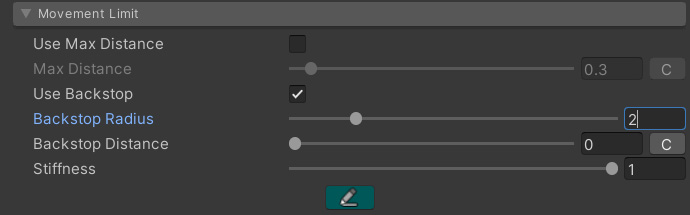
The backstop is set by the [Movement Limit] panel.
This guide will first explain the principle of the backstop and then explain how to use it based on two examples: bangs and skirts.
Structure
The backstop principle is simple.
Limits the range that each vertex of the proxy mesh can move relative to the normal direction.
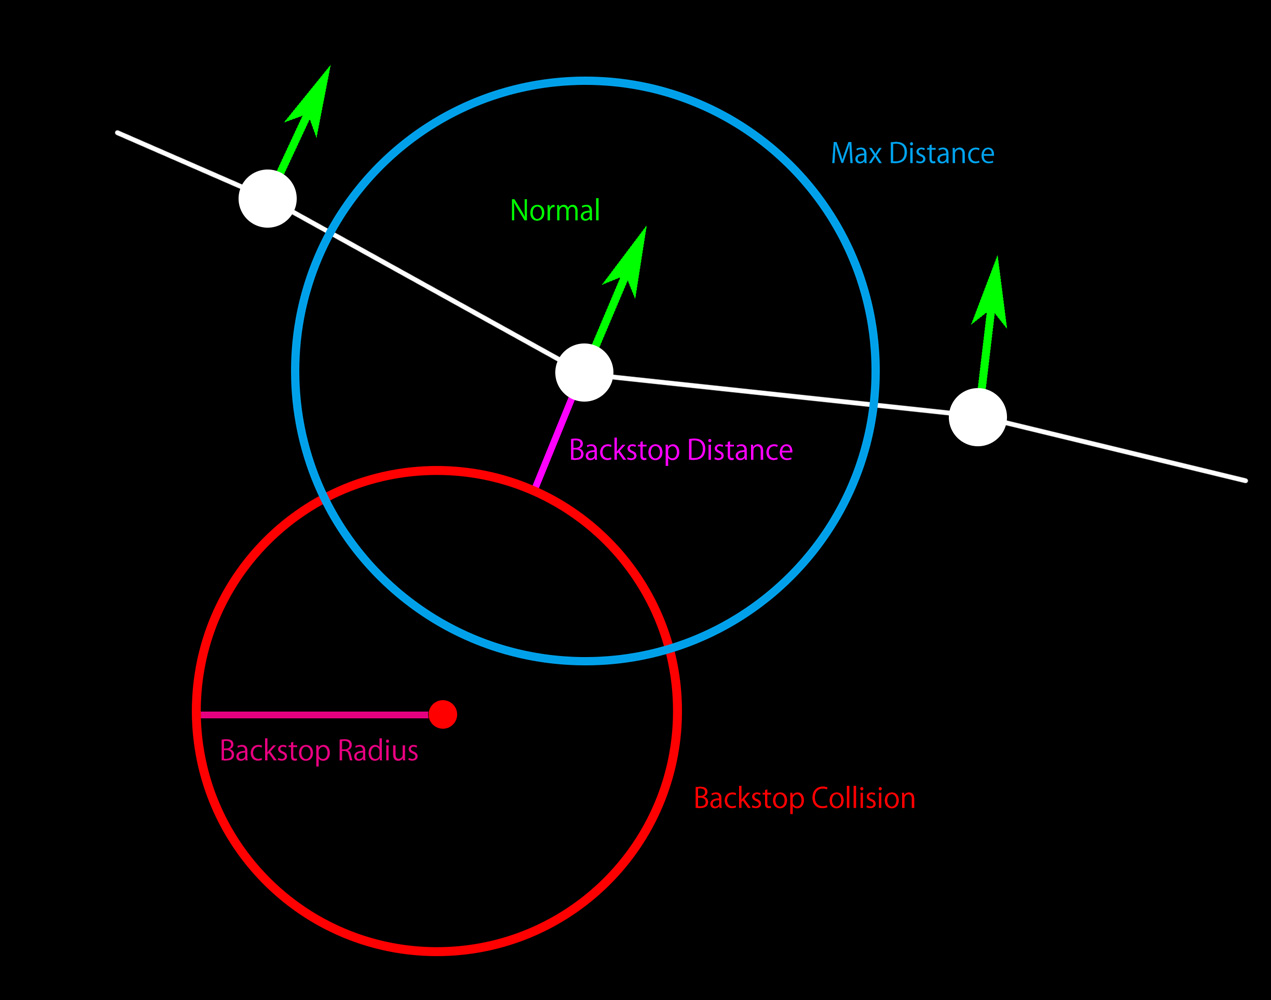
The figure above shows the configuration properties and their limits.
The proxy mesh’s vertices and normals show the animation pose, or origin, rather than the current translation position.
First, vertices can only move inside a sphere centered at the origin with a radius of Max Distance.
This is the first limitation.
Vertices can then only move outside the Backstop Collision sphere with a radius of Backstop Radius at a distance of Backstop Distance against the origin normal.
This is the second limitation.
These two restrictions mean that vertices can only move within the Max Distance and outside the Backstop Collision.
You can use both or just one side of this restriction.
Setting example of bangs
Let’s take bangs as an example.
We will use the backstop to prevent the bangs from entering the head.
BoneCloth is set in advance for the bangs so that it sways.
Check normal direction
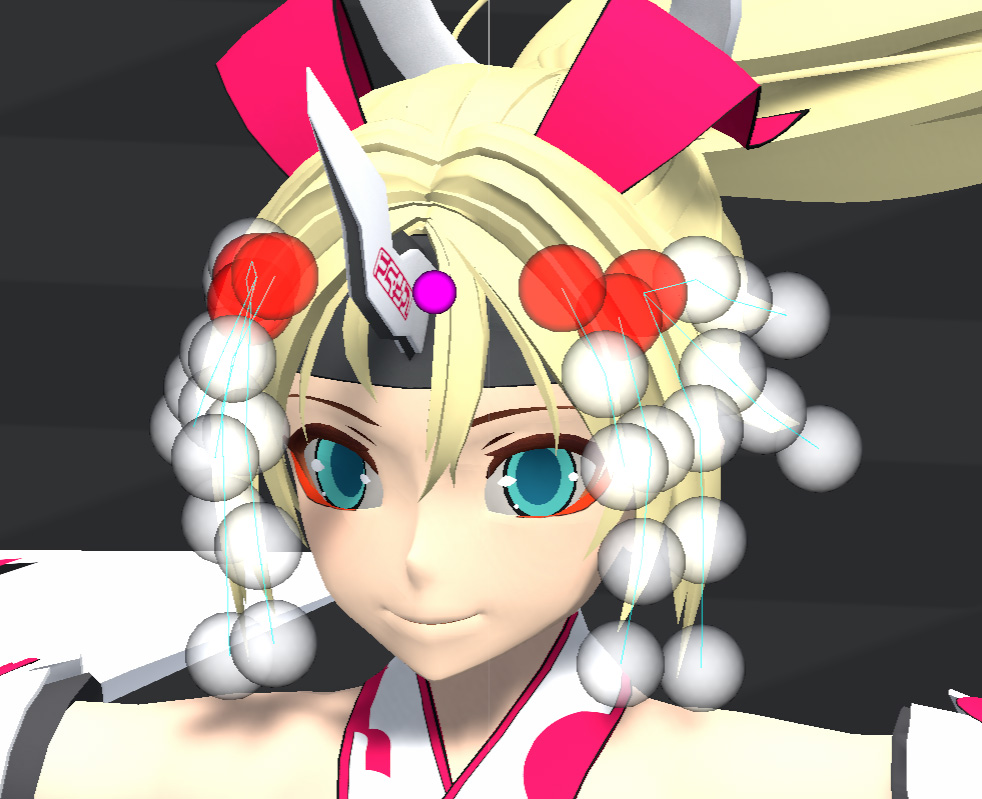
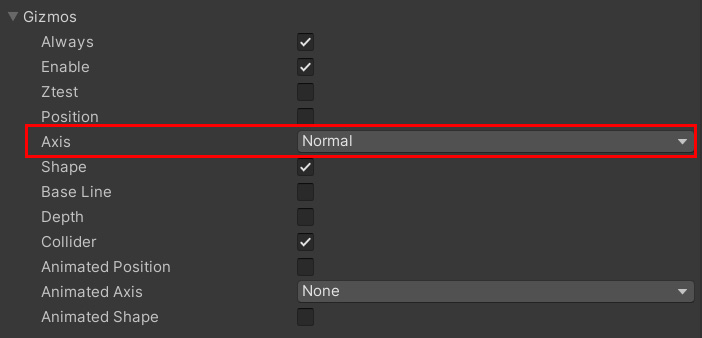
First, let’s check what the normal direction of the current proxy mesh is.
This will be displayed by setting the Axis in the Gizmo Panel to Normal.
The green line is the normal direction.
The vertex sphere is hidden for visibility.
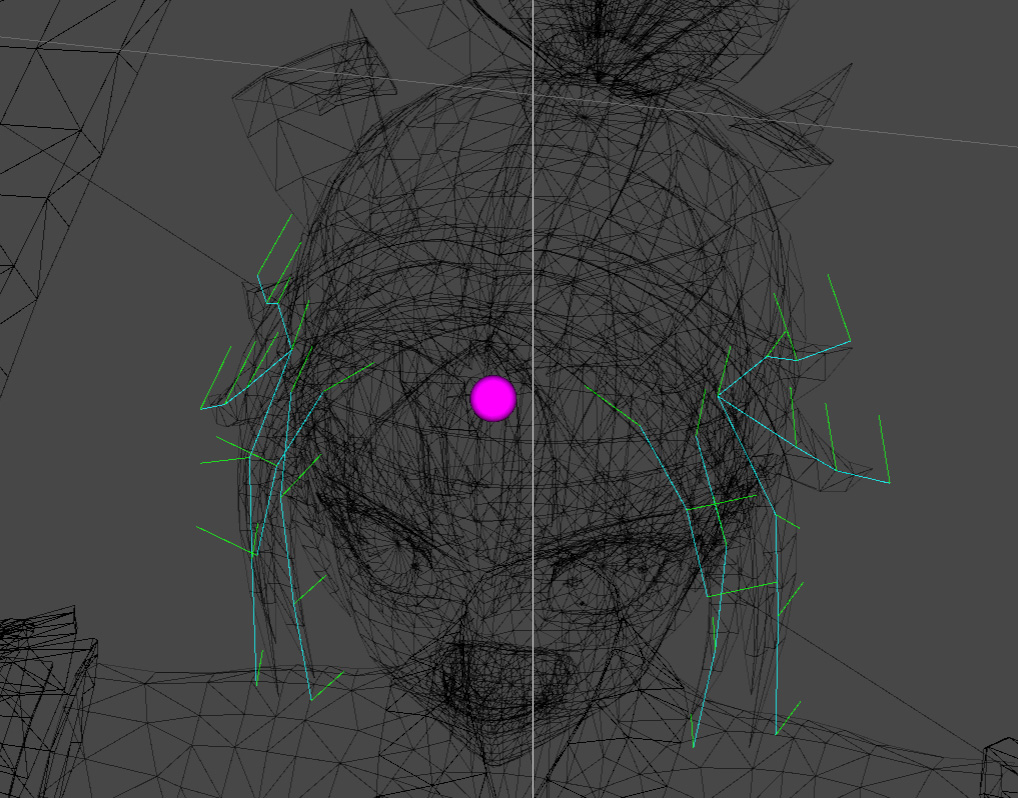
BoneCloth simply uses the Y axis of Transform, so this model has a messed up direction.
Backstop is not available in this state.
Normal adjustment
Let’s adjust the normal direction.
Ideally, all normals point out of the head.
Adjustments are made with the Normal Axis and Normal Alignment properties.
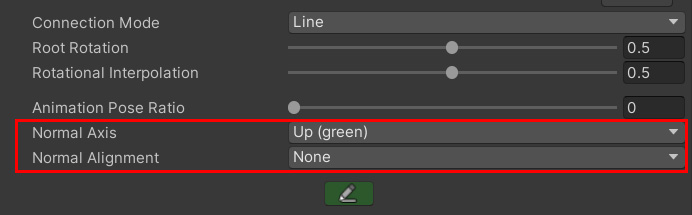
Set Normal Alignment to Transform.

Then register the Transform at the center of the head.
If you don’t have a Transform in the center of your head, it’s a good idea to create a new GameObject and register it.

In Transform mode, normals are changed radially from the specified Transform coordinates.
This change is made to the proxy mesh and does not affect the original Transfrom or Mesh.
As a result:
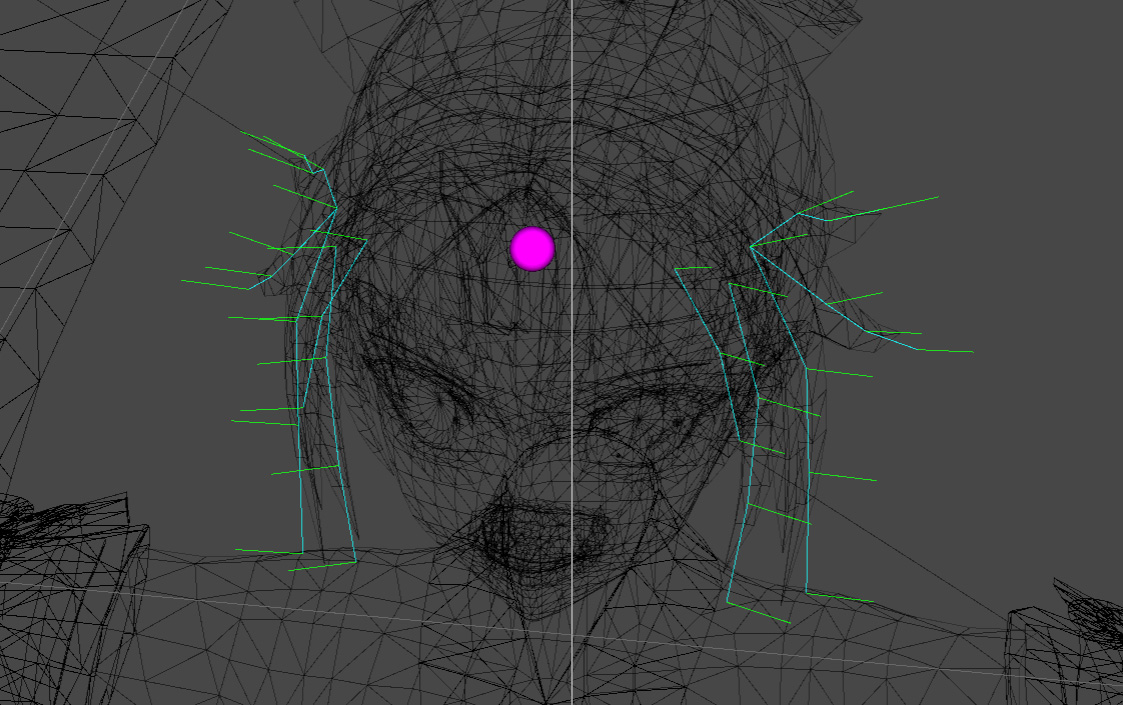
Now we are ready to set the backstop with all normals pointing out of the head.
Backstop setting
All you have to do is set the distance that you can invade.
This time I did the following:
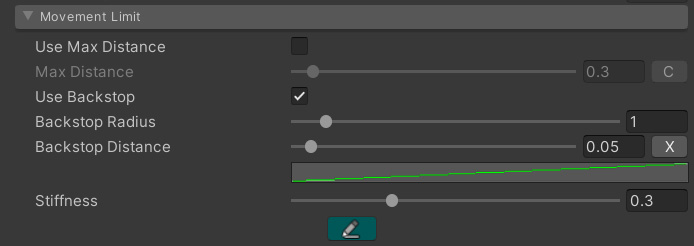
A curve is used so that it can enter from 0 cm to 5 cm from the start point to the end point.
Max Distance was not used this time.
Stiffness is the strength of the repulsion.
Lowering the value will make the vertices return a little softer.
Complete
Let’s run!
* The character is moved left and right.
I was able to prevent hair from entering the head without using a collider.
Skirt setting example
Here, we will explain advanced backstop settings using a skirt as an example.
The backstop mainly prevents the vertex from penetrating the human body.
However, the human body is always animated and its posture changes in various ways.
Because of this, it will not be as simple as the bangs mentioned above.
Importance of animation posture
Animation posture is important here.
This is the pose that Transform or Mesh deforms for animation without using MagicaCloth.
For example, the following character has a skirt that is skinned to the left and right legs.
Therefore, the skirt follows the leg and animates.
This is ideal and in this case you can set a backstop.
However, the following character does not have the skirt skinned against the legs.
As a result, when the animation is performed, the legs will pass through the skirt.
Backstop cannot be set in this state.
A backstop places a limit on the animation pose.
In order for the backstop to work, it is important that the Transform or Mesh follows the animation.
Animation posture adjustment
The best way to solve the above problem is to set the skinning weights so that the mesh follows the legs.
Alternatively, add a bone to the skirt and control the animation of the bone for each action such as running, jumping, attacking, etc. to control the posture to some extent.
This is usually done by an artist with an external tool such as Blender.
The method of superimposing the cloth simulation on the animation posture created by this artist is the most robust against intrusion against the human body.
This method is recommended.
If this method is not possible, you can also use the custom skinning function described later as an alternative.
Check animation posture
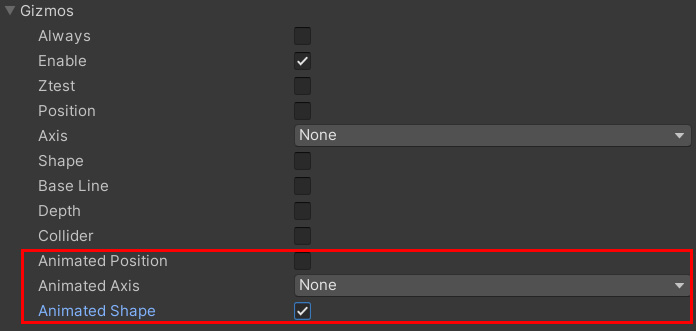
You can display the state of the current animation posture with a gizmo.
You can check it by turning on the animation posture check as follows.
For example, UnityChanKAGURA’s skirt included in the sample is not skinned against the legs.
The gizmo confirms it.
Using custom skinning
If for some reason artist correction is not possible, there is a custom skinning feature as an alternative.
This is a feature that automatically skins the proxy mesh for the specified bones.
Not necessary if the animation pose is already set correctly.

Turn on the check in the Custom Skinning panel and register the bones required for skinning in Skinning Bones.
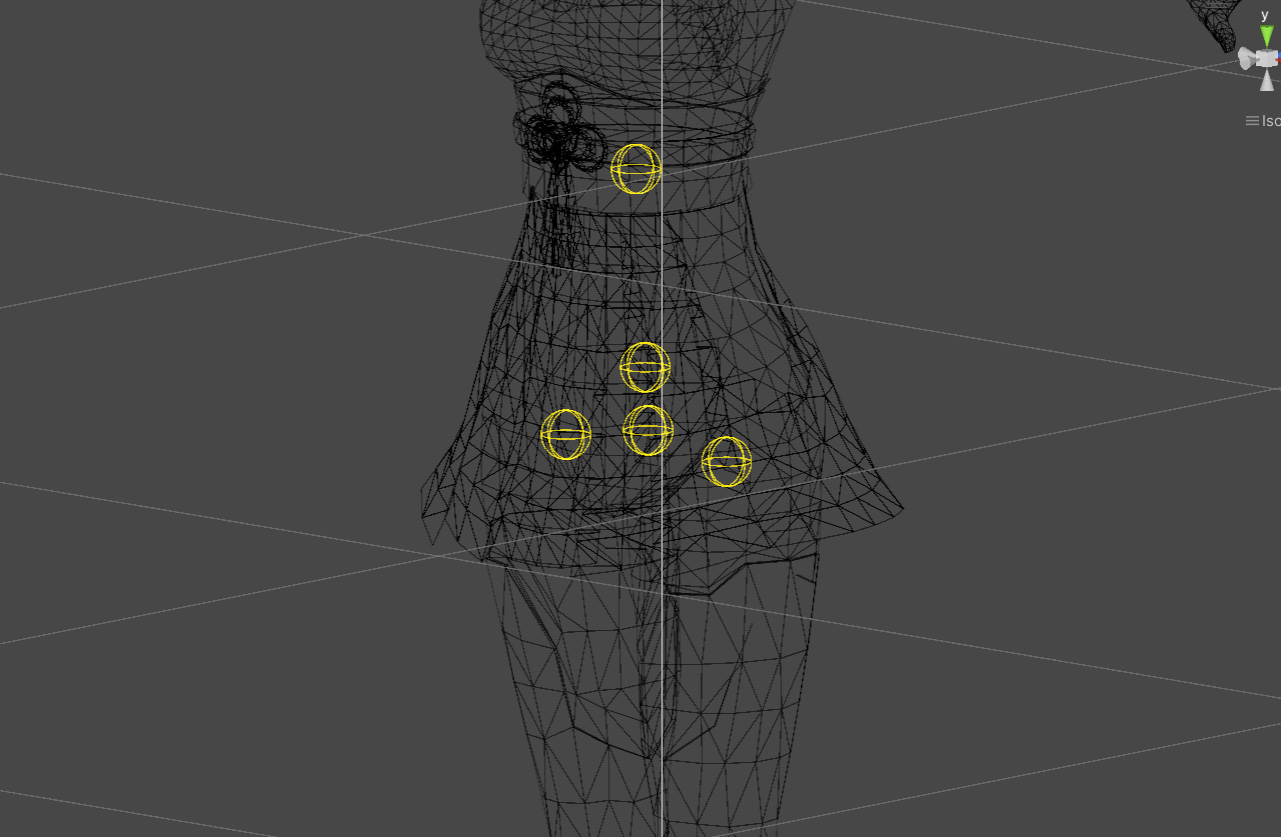
For the KAGURA skirt, I registered the bones from the chest to both legs as follows.
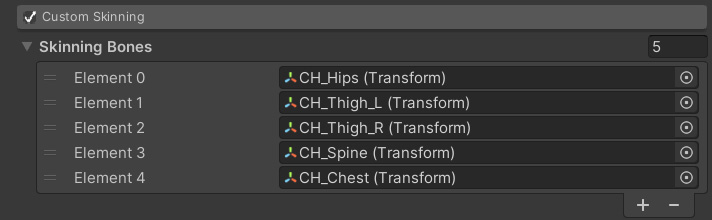
This registered bone can be seen as a yellow sphere in the Gizmo.
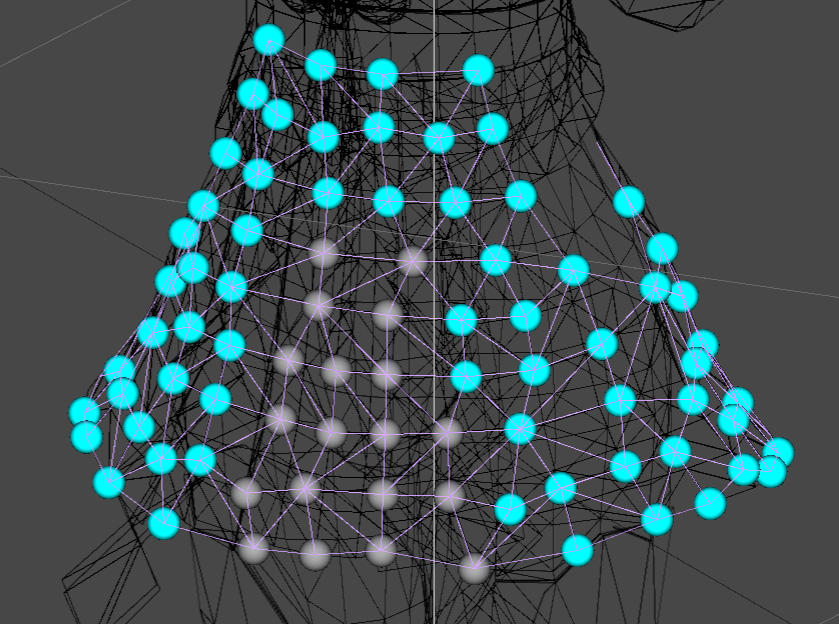
Let’s run it in this state.
Custom skinning made the proxy mesh follow the legs.
This will make the backstop work.
Also available in BoneCloth.
But remember that custom skinning is just an alternative feature.
Therefore it is not very accurate.
Paint valid vertices
Backstop can be set with or without function for each vertex.
This is done by launching vertex paint from the blue pen mark in the panel.
![]()
It can be used, for example, when you do not want the backstop to work on a specific part of the mesh.
backstop setting
After this, all you have to do is set the backstop as in the bangs example.
This time, we will set custom skinning for KAGURA’s skirt.
In order to make the effect easier to understand, we set the no-entry distance to 0 cm.
Complete
Let’s run!
This is a backstop-only control that does not use any collider collisions.
You can see that the backstop restricts the movement of the leg and prevents the vertex from entering the leg.
Also notice that there are no vertices encroaching around the waist.
By adding a collider and reinforcing it in this state, you can control the skirt from penetrating the leg no matter how hard you move.
Animation posture ratio
This item is not directly related to the backstop, but it is important for controlling sway, so I will explain it.
So far, I’ve explained about animation poses.
MagicaCloth internally holds both the initial posture and animation posture.
Backstop is always calculated from the animation pose.
However, some constraints can specify whether to restore based on the initial pose or the animation pose.
This is the animation posture ratio.
This is done from Animation Pose Ratio in the basic panel.
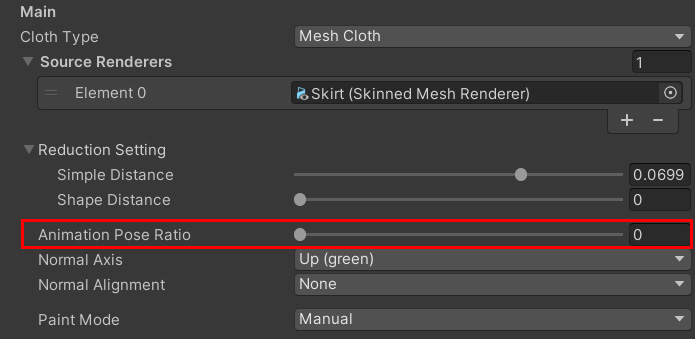
The closer this value is to 1.0, the more restoration is calculated based on the animation posture.
The initial value is 0.0 and the restoration is calculated from the initial pose.
In other words, it is the ratio of whether to restore the initial posture or the current animation posture as the target.
If the ratio is 0.0, a restoring force will be generated to return to the initial posture.
If the ratio is 1.0, a restoring force will be generated to return to the current animation posture.
A ratio of 0.5 will blend both postures 1:1.
Affected Constraints
There are three constraints affected by this animation pose ratio:
- Angle Restoration
- Angle Limit
- Shape Restoration
Setting guidelines
Basically, it is fine to leave it at 0.0.
This is because the movement of the cloth is more stable in most cases.
However, if the animation posture is greatly deformed, it may be more stable to increase the ratio.
Also, if the animation pose is completely controlled by the artist, higher values are more stable.
In that case, try adjusting from a setting of about 0.5 while watching the movement.