
Contents
Introduction
From here, it will be guidance on how to use MagicaCloth.
We’ll walk you through each feature step-by-step.
In order to facilitate the explanation, detailed explanations about each item are omitted.
See the separate reference page for details.
Let’s start with the most frequently used Bone Cloth!
What is BoneCloth?
BoneCloth is a mechanism that performs cloth simulation based on Unity’s Transform structure.
Perfect for wiggling hair and accessories with bones built into the mesh.
- Express shaking by manipulating Transform
- It can be used in large quantities because the processing load is low.
Adding BoneCloth
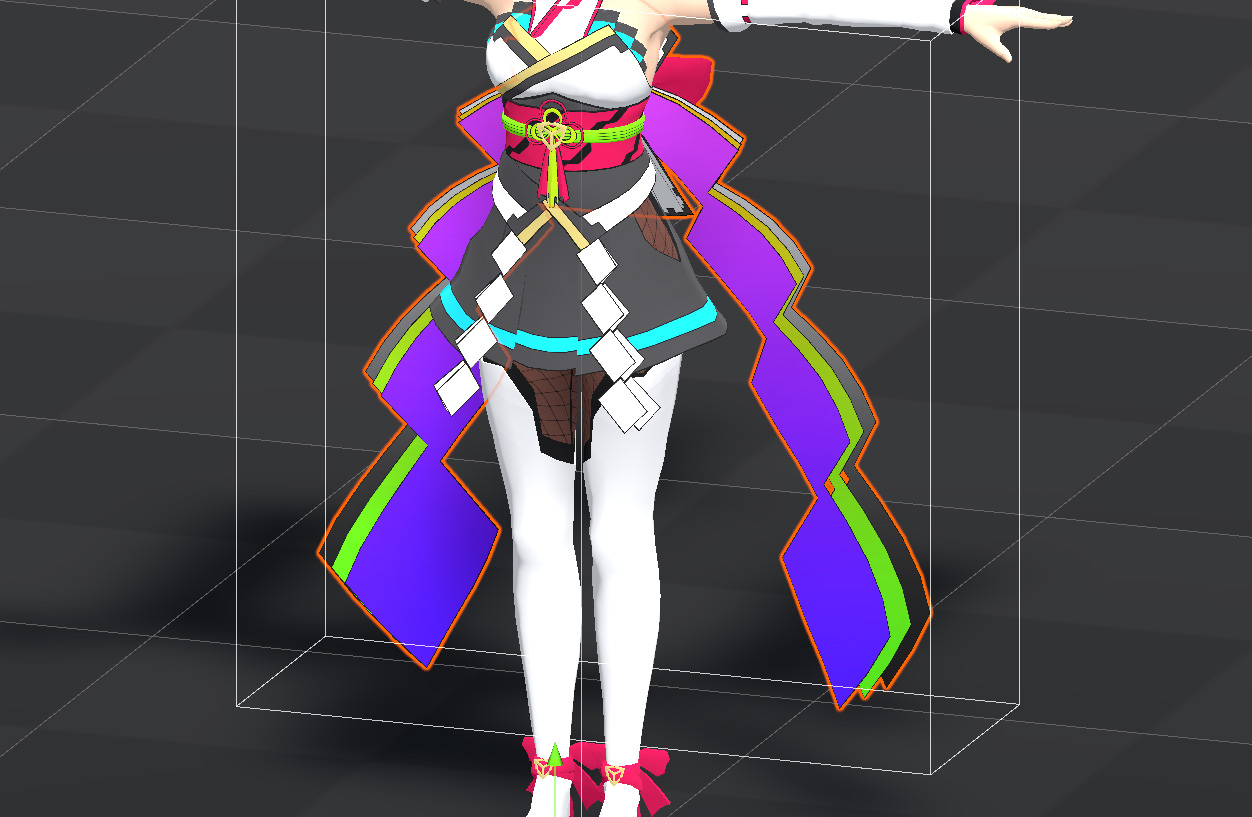
Here, I will explain the setup using UnityChanKAGURA’s waist wing as an example.
First add a MagicaCloth component to your character.
Select a character and open the right-click menu in the Hierarchy window.
Select Create Other/Magica Cloth2/Magica Cloth from the menu as shown below.
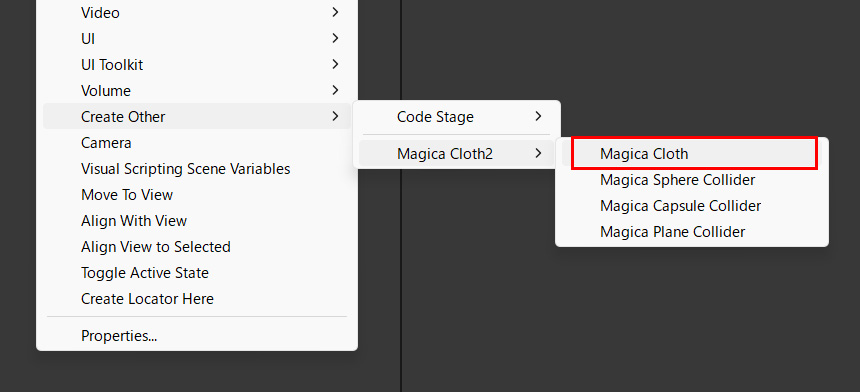
This will generate a MagicaCloth game object.

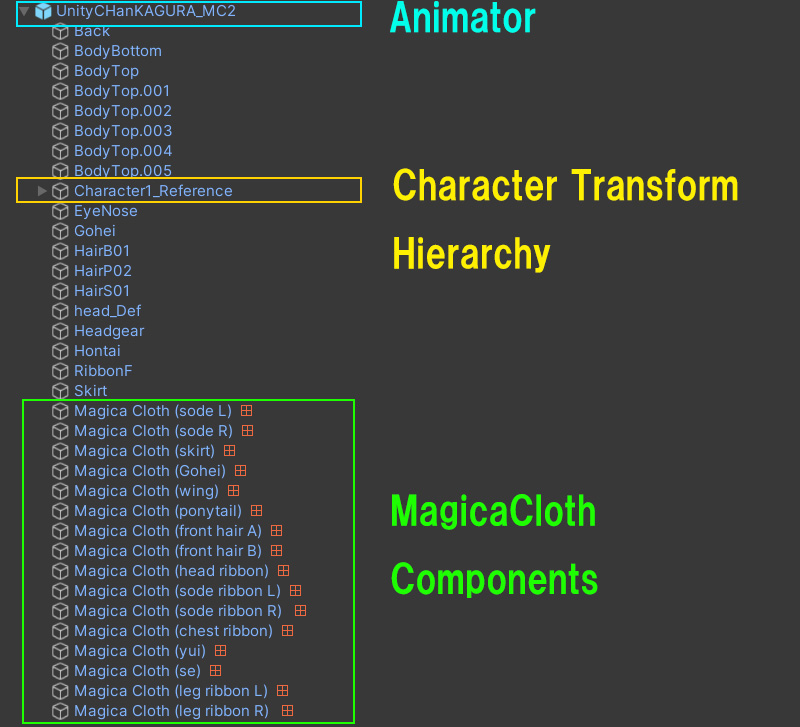
Whenever possible, place the MagicaCloth component directly under the character root.
This will usually be a child of the Animator component.
Inspector Overview
MagicaCloth’s inspector consists of four blocks as follows.
Red…information window
Blue…Setting up simulation target
Green…Operation Parameter Setting
Yellow…Gizmo display settings for SceneView
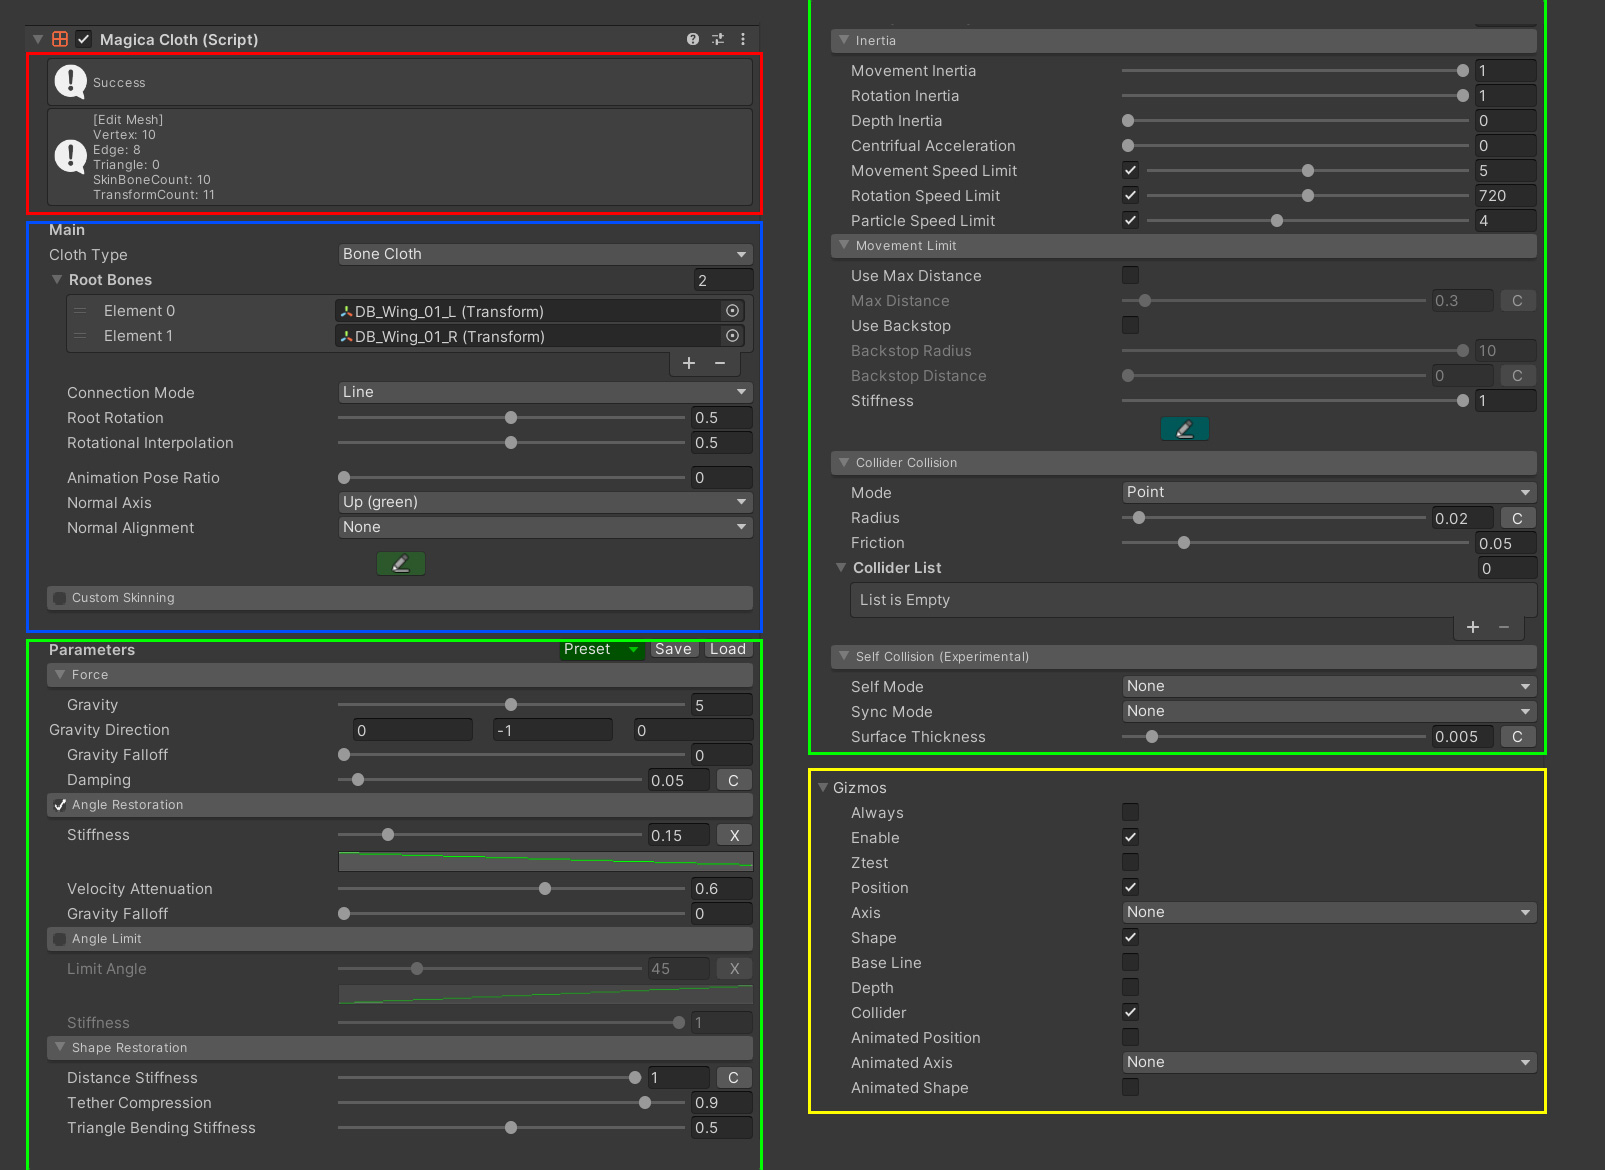
Although there are many, only the blue and green parts are relevant to the setting.
First, the blue part sets the simulation target, and then the green part sets the shaking motion.
BoneCloth Usage Settings
The first thing to do is change the component type to BoneCloth.
Change the Cloth Type to [Bone Cloth] as follows.
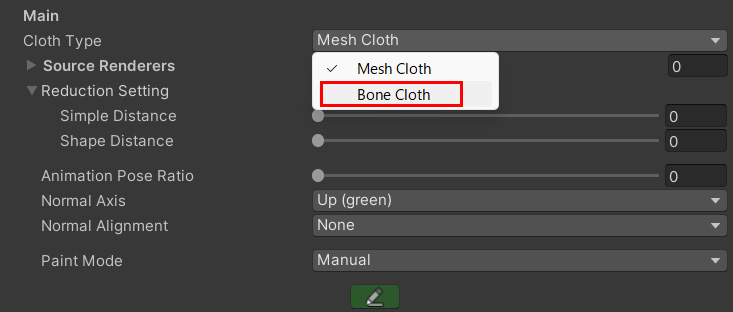
This will switch the inspector for BoneCloth.
Transform Settings
It is necessary to register the Transform to be simulated in BoneCloth.
In KAGURA, there are 10 transforms for the waist wing as follows.
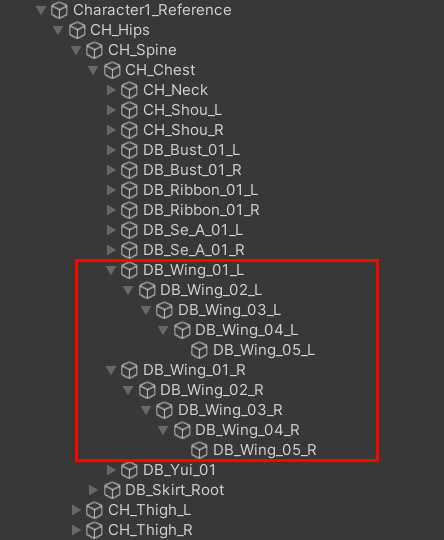
BoneCloth registers only the Transform that is the starting point of the hierarchy.
The waist wing has two transforms, [DB_Wing_01_L] and [DB_Wing_01_R].
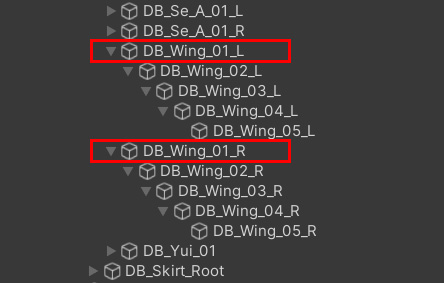
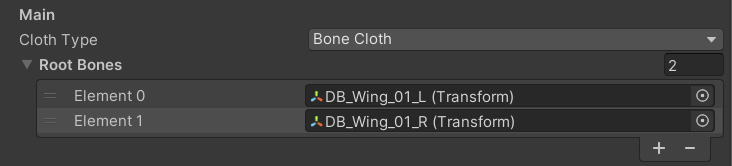
Add these two Transforms to the Root Bones list.
At this point, the Transform structure is visualized in the Scene view with red and white spheres and light blue lines as shown below.
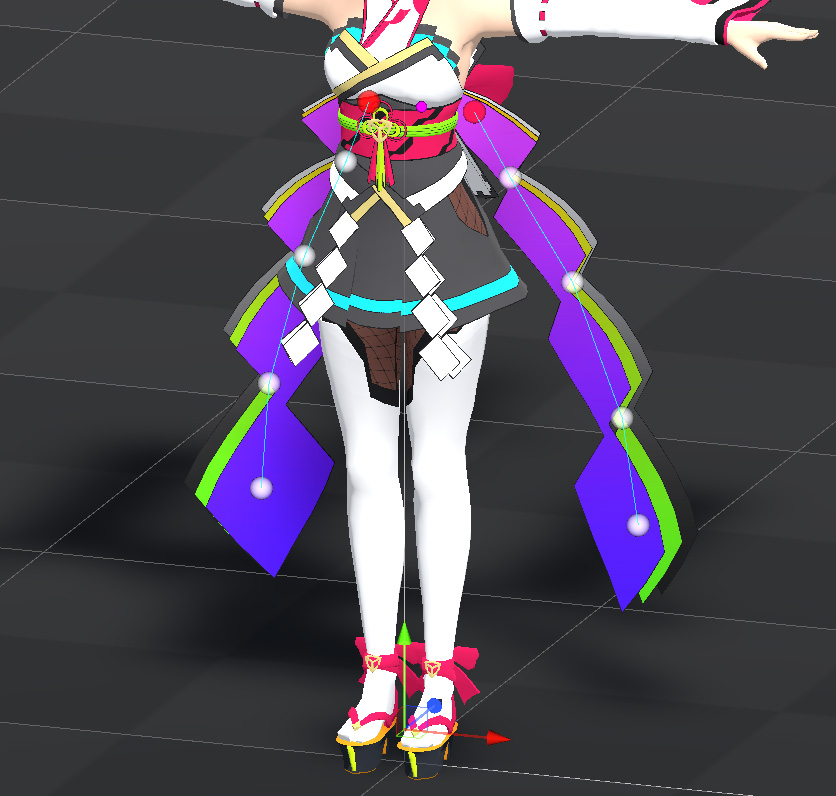
This red and white sphere represents the attribute of the simulation vertex.
And the light blue line represents the connection structure of Transform.
Switching the display of gizmos
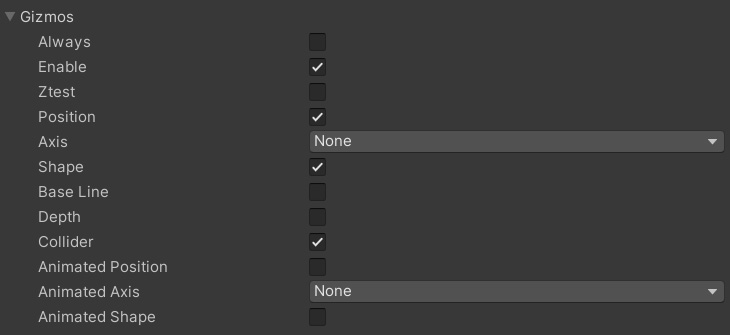
The type of gizmo displayed in the scene view can be switched in the Gizmos panel at the bottom of the inspector.
If you uncheck Enable, the gizmo will no longer be displayed.
Details will be explained on another page.
The gizmo display can also be turned on/off using the gizmo button in the upper right corner of the scene view.
Please note that if the gizmo button is turned off, all gizmos will not be displayed.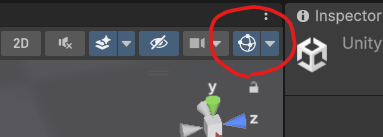
You can also make changes for each component from the toggle menu.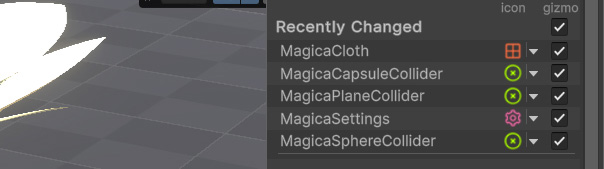
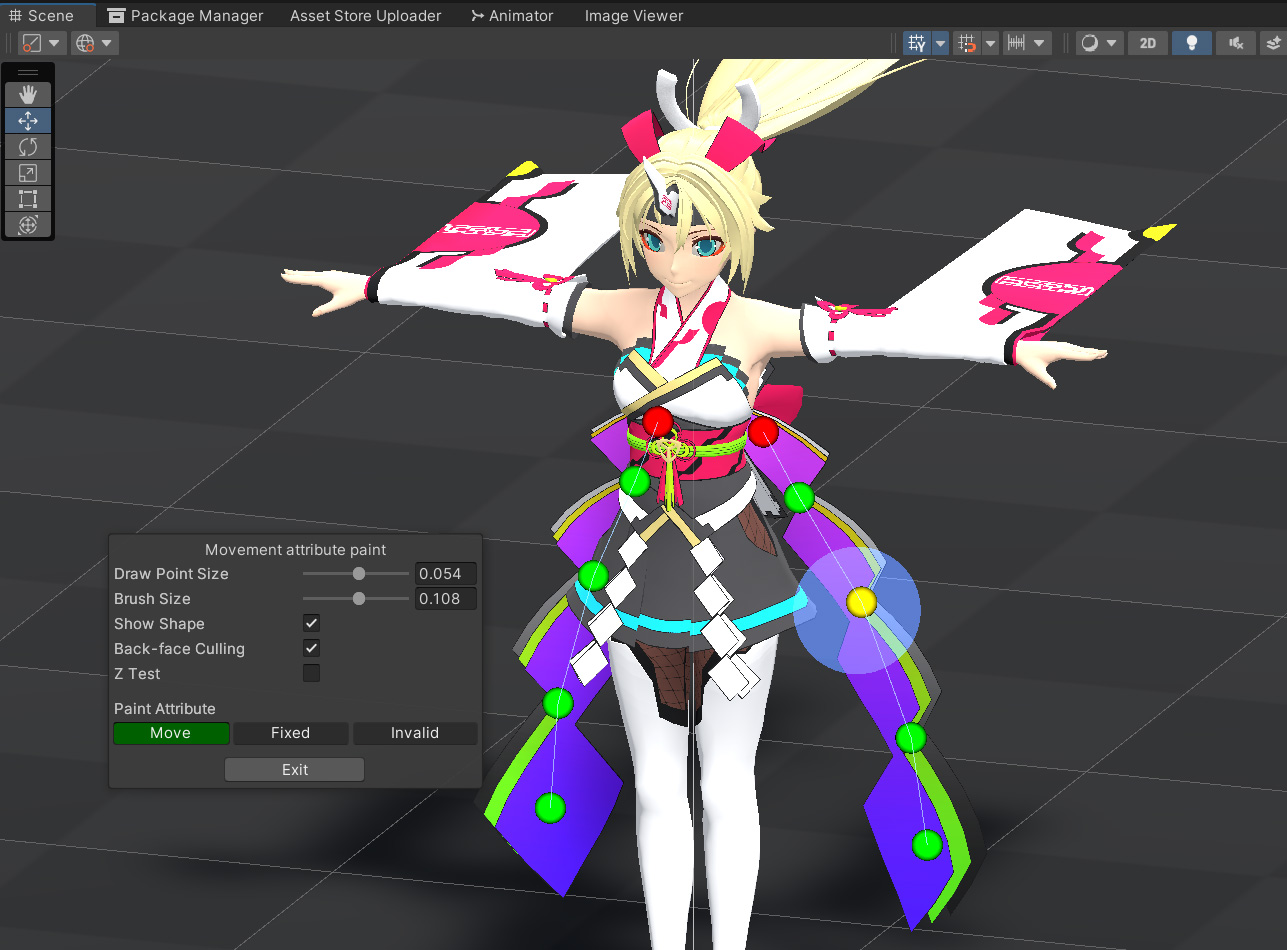
Vertex Attributes and Painting
In MagicaCloth, simulation vertices are divided into three behavior attributes.
| Fixed | Red | Unmovable vertex Required to connect move vertices |
| Move | White or Green | free moving vertices Represented in green while painting for visibility |
| Invalid |
Black |
Vertices completely ignored from simulation |
BoneCloth sets the Transform added to Root Bones to fixed attributes and automatically sets the others to moving attributes.
If you want to change this setting, you can manually rewrite the vertex attributes.
In that case, click the pen mark as follows to launch the vertex paint mode.

A paint window will appear in the scene view and you can change the vertex attributes.
This guide does not cover vertex painting in detail.
Vertex painting will be explained in detail in How to use MeshCloth.
Parameter Setting
After setting the Transform and vertex attributes, all you have to do is set the parameters that control the movement.
This parameter is an essential item to achieve the ideal movement.
However, as you can see from the inspector, there are a lot of parameters, and it takes a certain amount of experience and familiarity to understand the whole thing.
Therefore, it is better to use the presets prepared in advance for easy setup at first.
This is selectable from the Inspector’s Preset menu.

Press the Preset button and select the [tail] preset.
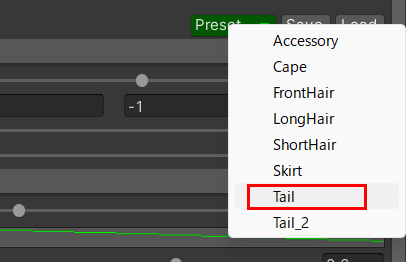
Now the preset content of tail has been expanded to parameters.
Operation check
After that, just press the Play button in the Unity editor.
Let’s run!
Move the character while running and if the waist wing shakes, you’re good to go!
Runtime delay
There is one thing to mention about execution.
Unlike Ver1, MagicaCloth2 creates cloth data on the spot at runtime.
This cloth data creation is done in a background thread, which takes some time.
As a result, there will be a delay of several frames between the appearance of the character and the actual start of the simulation.
Please keep this in mind.
What next?
This time, I easily performed BoneCloth, but I still need a lot of work to get close to the ideal movement.
Read on to learn how to use MeshCloth.
Cloth simulation using mesh vertices is explained.