Bone Cloth setup
This section describes how to set up BoneCloth using the Unity-Chan model as an example.
Since this guide is a continuation of the “Basic Setup Guide“, the explanation of the basic system configuration is excluded.
BoneCloth is a cloth simulation that operates Unity Transform.
Ideal for shaking “hair” with bones built into the mesh in advance.
Introduction of Bone Cloth
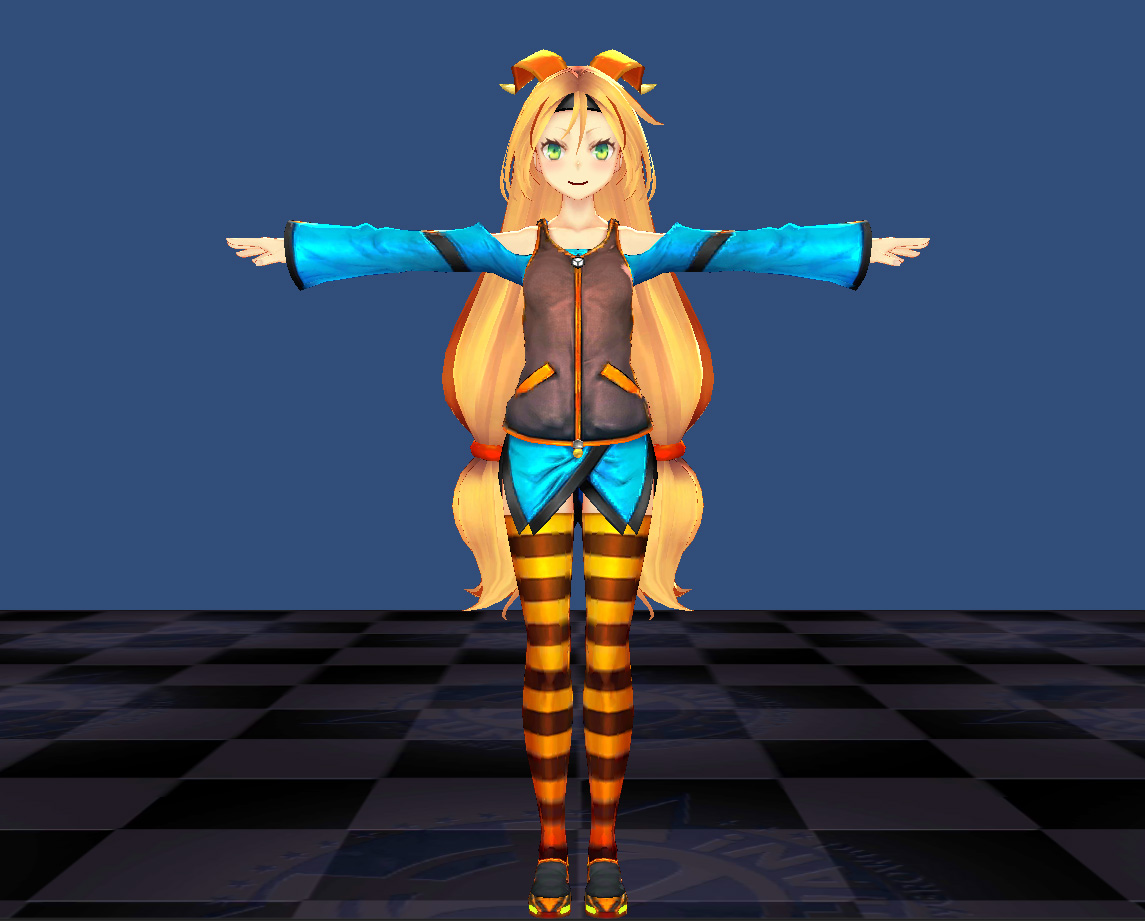
Since the back hair has a bone in the Unity-Chan model, make settings to move it with BoneCloth.
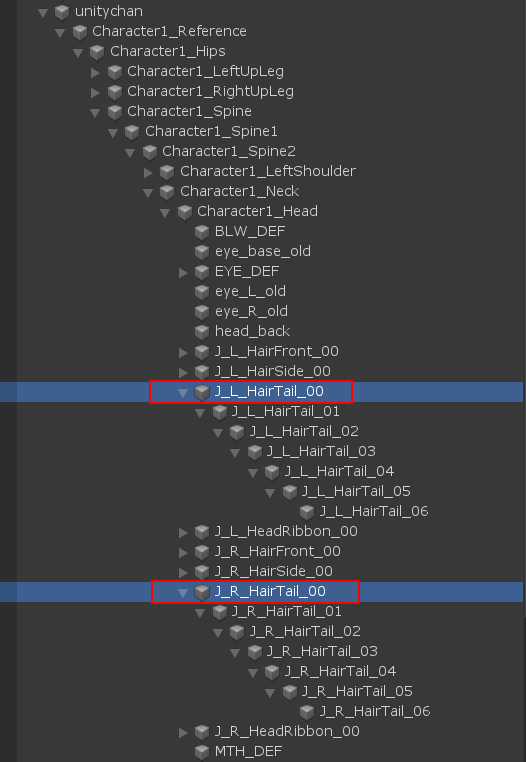
First, check the base Transform from the structure of the bone to be moved.
Add BoneCloth to your character.
Right-click in the Hierarchy window and select “Magica Bone Cloth” from the menu as shown below.
A BoneCloth object is created.


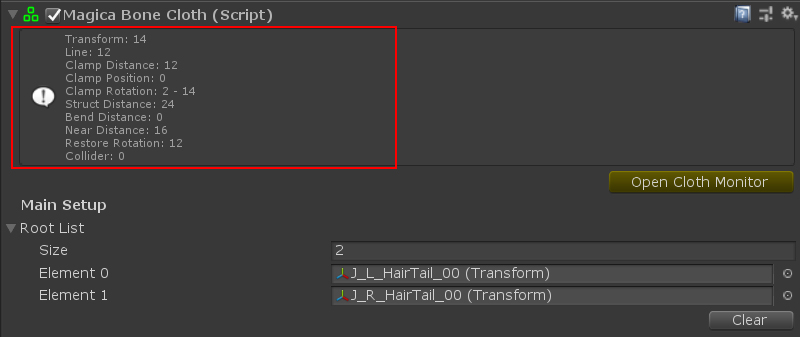
BoneCloth settings can be made from the inspector.
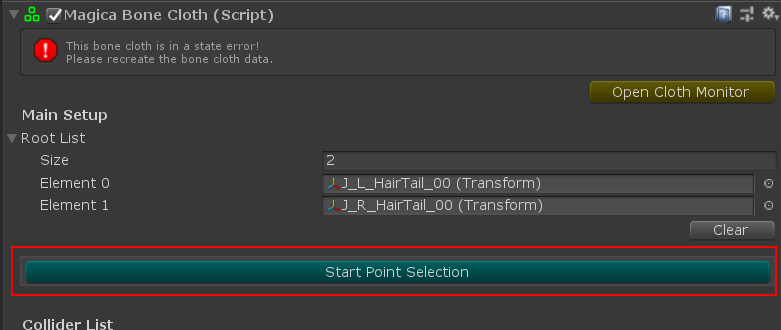
There is a red icon in the info, which indicates that something is wrong.
Currently, an error has occurred because no data has been set.
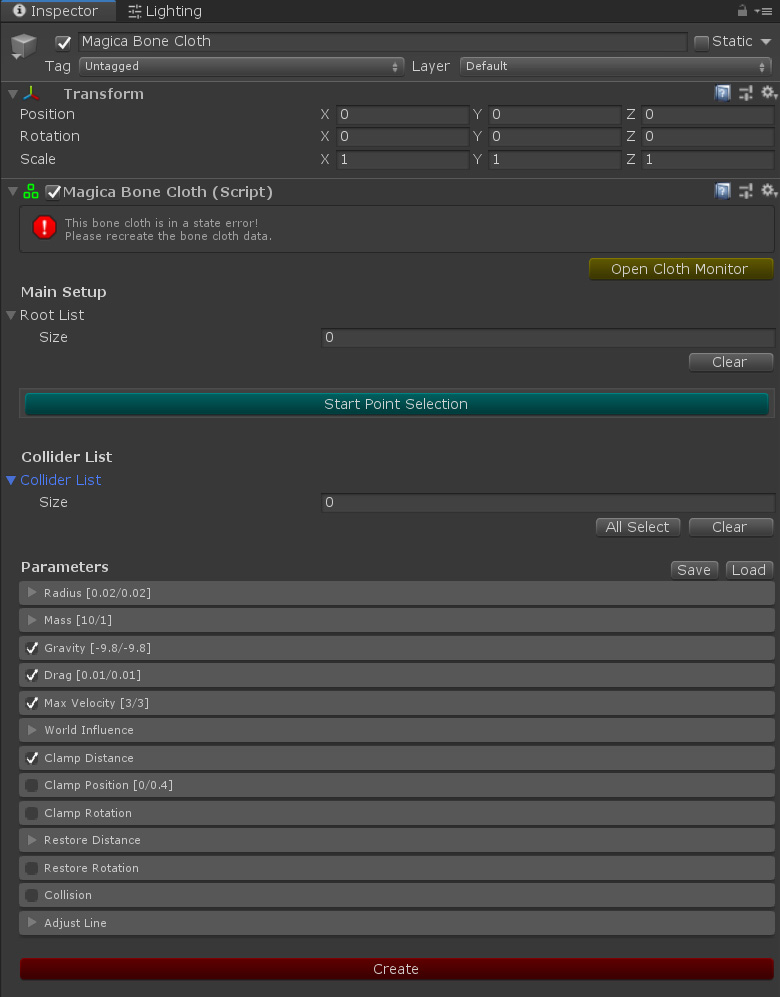
First, register the reference bone.
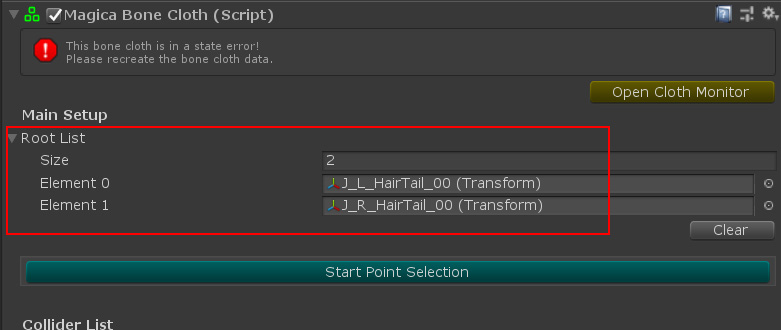
Register the root bone [J_L_HairTall_00] and [J_R_HairTall_00] of the hair you checked earlier in the RootList.
Hierarchical bones below the root bone are automatically read.
Next, edit the fixed bones and moving bones for the linked bones from the registered root bones.
Press the [Start Point Selection] button as shown in the image.
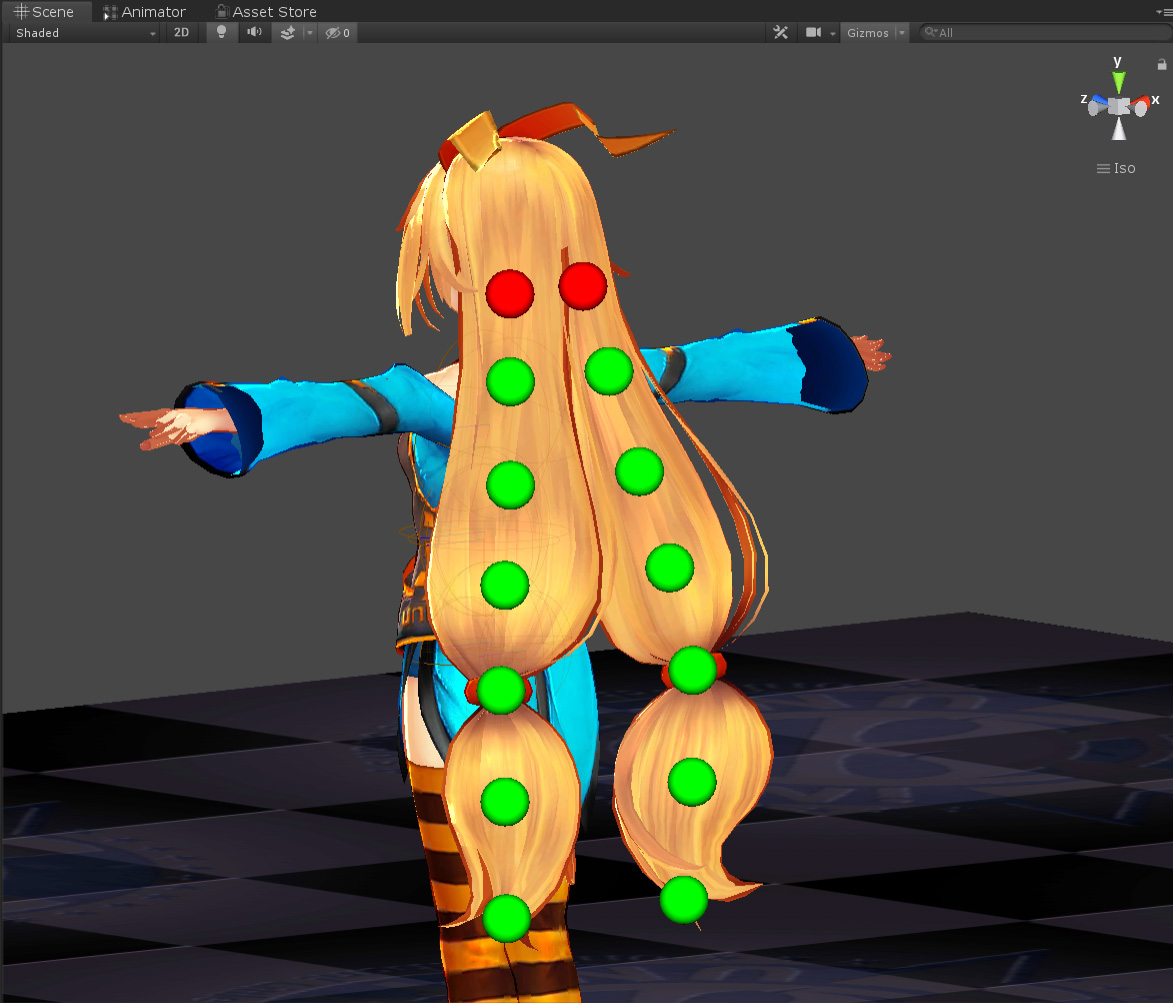
When you enter particle edit mode, the inspector changes, and the bones being edited appear in the scene view in a gizmo.
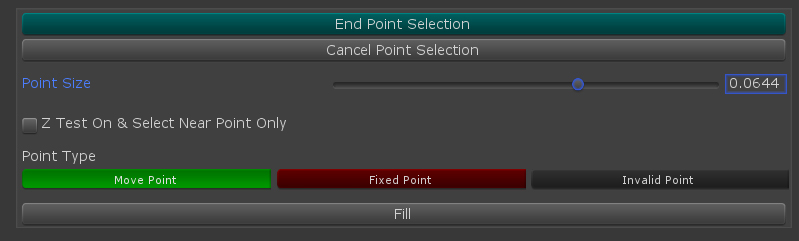
* The particle size displayed here is for editing. It is not the actual hit judgment size.
The following three types can be set in the edit mode.
| Name | Description |
| Move Point | Moving particles. All particles affected by the physics engine must be marked with this movement type. |
| Fixed Point | Fixed particles. Basically, it is set as the moving particle route. Fixed particles do not move, but have an important role at the root of the moving particles that move with them. Therefore, a fixed particle is always required as the starting point of the moving particle. |
| Invalid Point | Particles that are completely excluded from the calculation. Be sure to set particles that are completely unnecessary to calculate to Invalid. This reduces the computational load. |
In the case of BoneCloth, the root bone specified first is set as “fixed particle”, and the other is automatically set as “moving particle”.
If you want to set it manually, you can use this panel to select the particle type and change it by “left dragging” the mouse cursor in the scene view.
However, note that fixed particles are always required at the starting point of moving particles.
When all editing is completed, press the [End Point Selection] button to reflect the data.
Set the parameters to control the movement.
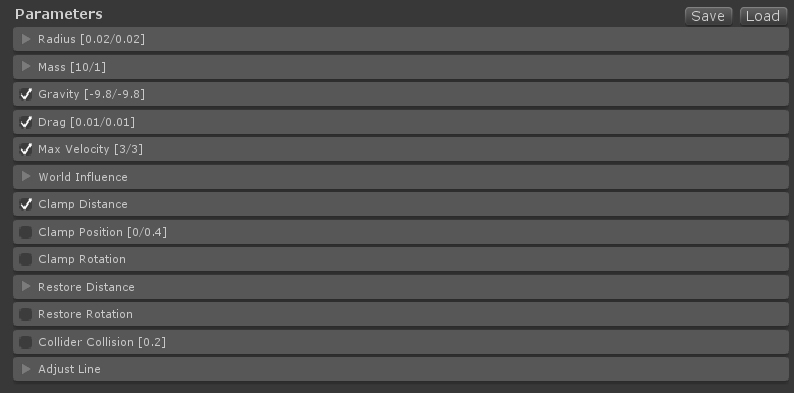
However, as mentioned above, parameter setting requires some experience, so let’s first load a preset and set it up easily.
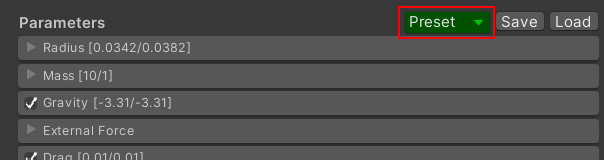
Press the [Preset] button to the right of [Parameters].
Select [PonyHair] from the list to load it.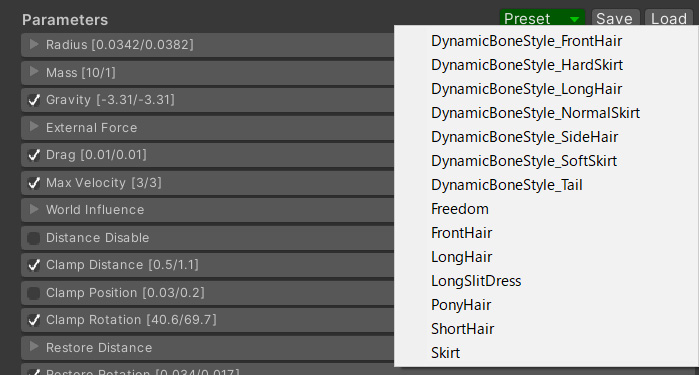
The Preset button has been implemented since v1.8.4, so if you don’t have the Preset button, press the [Load] button on the right and load [BoneCloth_PonyHair.json] from the MagicaCloth/Preset folder.
You have now set the general parameters for hair.
(* Adjustment is required according to the structure of the model used from here.)
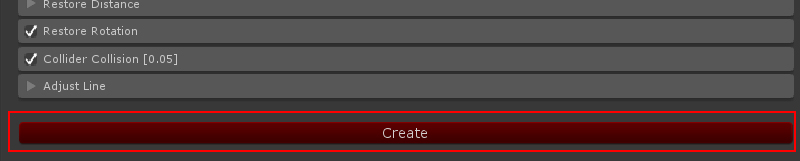
Now that a series of settings has been completed, press the [Create] button to create the data.
If there is no problem, the status icon of BoneCloth changes to “white” and the information of the cloth is displayed.
In this state, it can be started.
Let’s run it and test it.
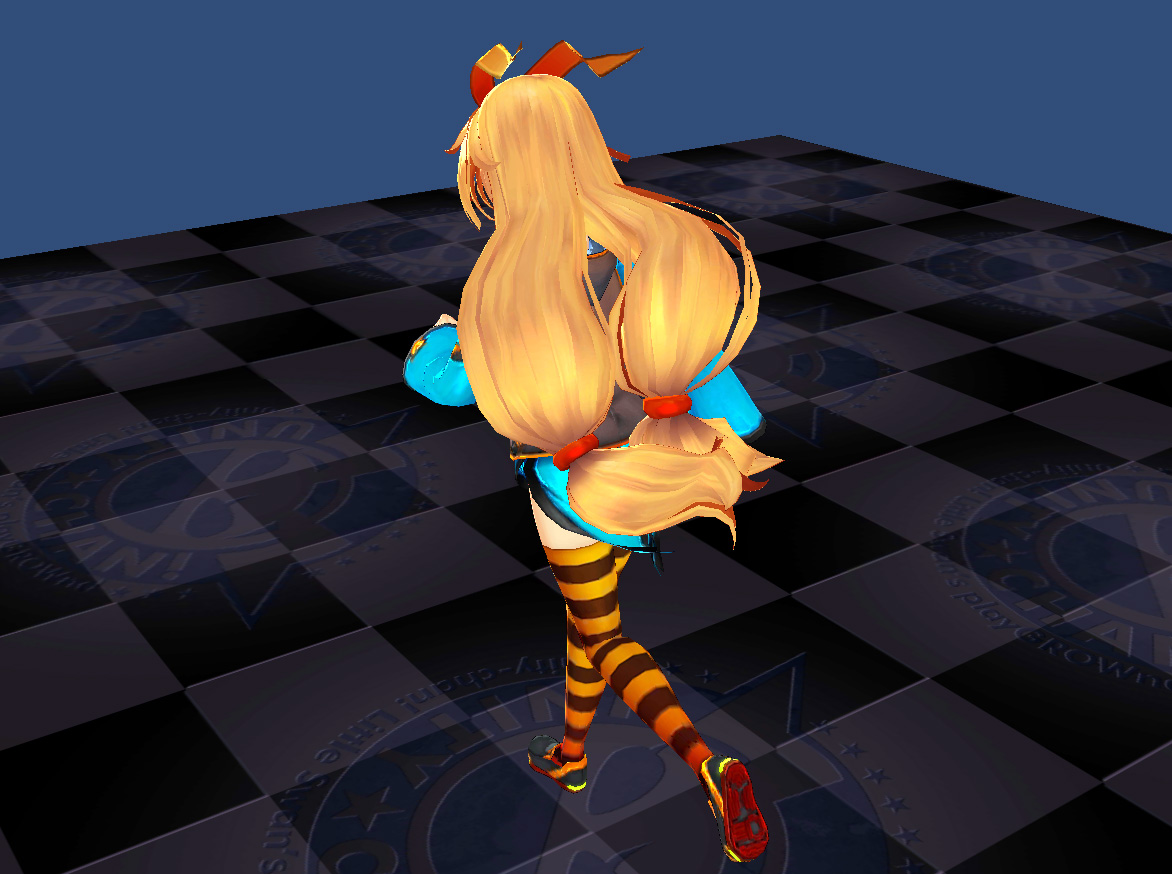
Success is achieved if the hair of Unity-Chan is physically controlled in conjunction with the movement of the body (animation etc.).

Set collision judgment (Collider)
However, if there is no hit judgment as it is, hair will penetrate the body.
To prevent this, you need to set up a collider to prevent particles from entering.
Note that MagicaCloth colliders are different from Unity colliders.
There are three types of colliders.
SphereCollider and CapsuleCollider are mainly used for this human body.
| Name | Description |
| MagicaSphereCollider | Spherical collider. Simple and lightest. |
| MagicaCapsuleCollider | Capsule type collider. Tip and end sizes can be changed. Higher load than spherical collider. |
| MagicaPlaneCollider | Plane collider. Mainly used on the ground. |
Let’s add colliders to the waist, chest and arms.
In order to prevent long hair from penetrating the human body, it is essential to place a collider from the waist to the chest and from the shoulder to the arm.
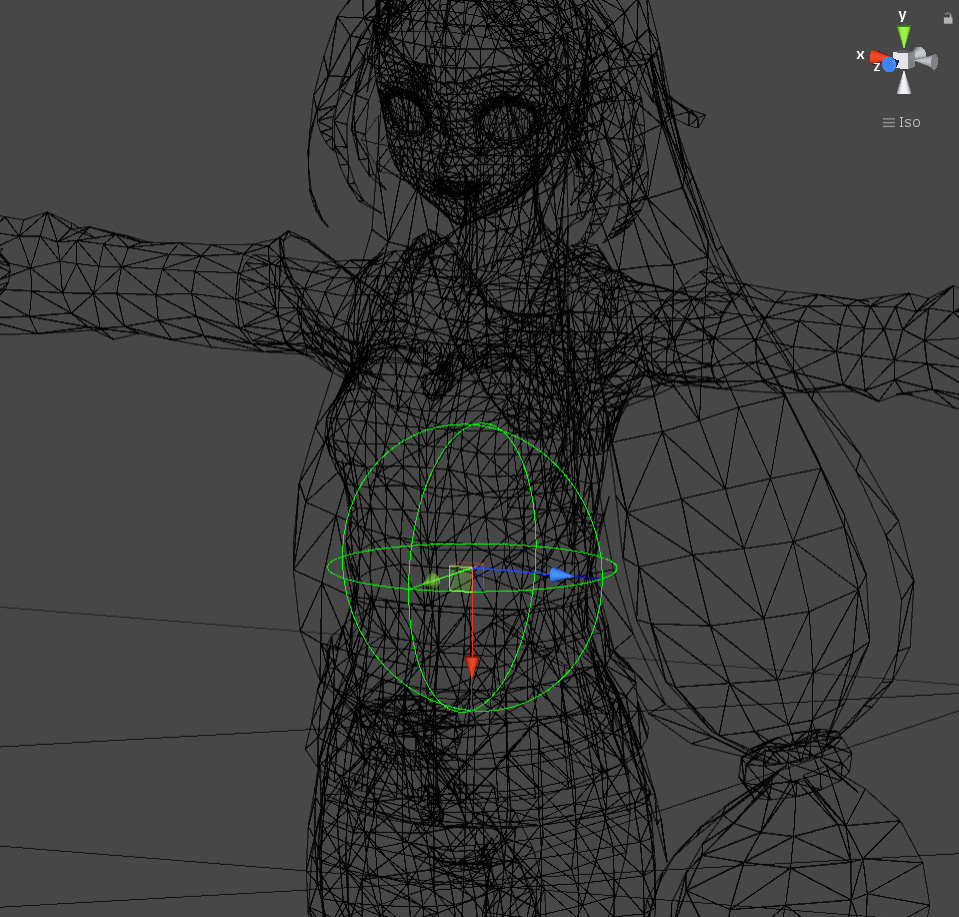
First, add the Sphere Collider to your waist.
Select the hip bone of the Uniy-Chan model and add [Magica Sphere Collider] from the right-click menu as shown in the image.
Objects are automatically generated like images.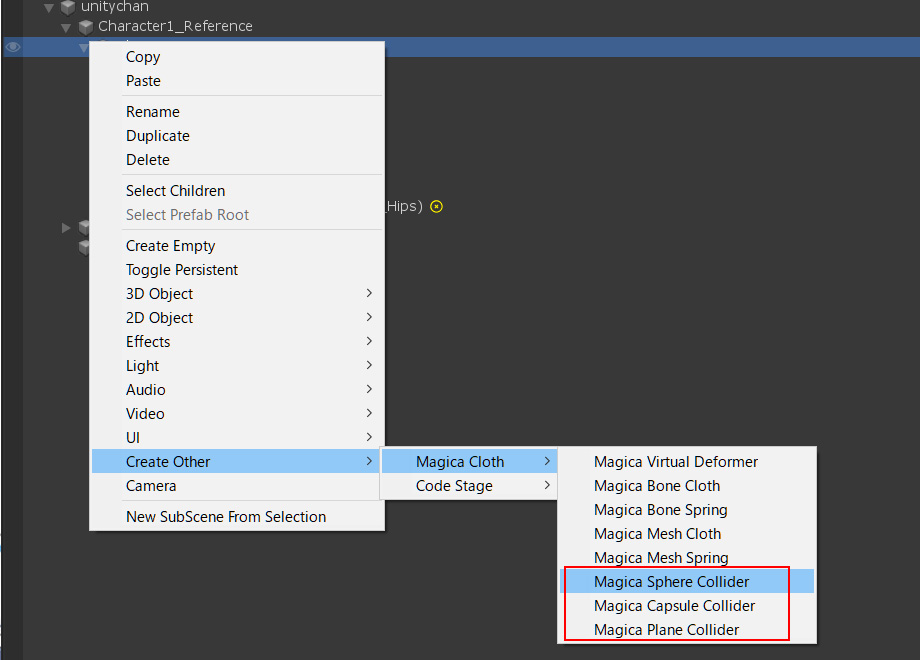

Adjust the radius from the SphereCollider inspector, adjust the position from the Transform, and set the collider so that the waist is almost hidden.
(* It is easy to see when setting in wireframe mode)

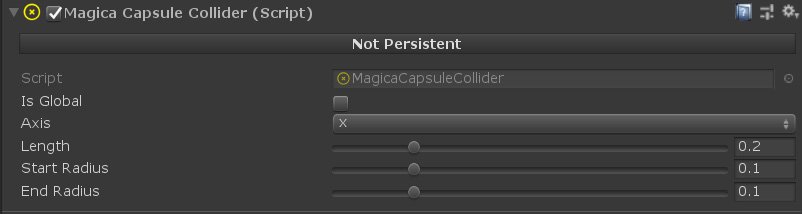
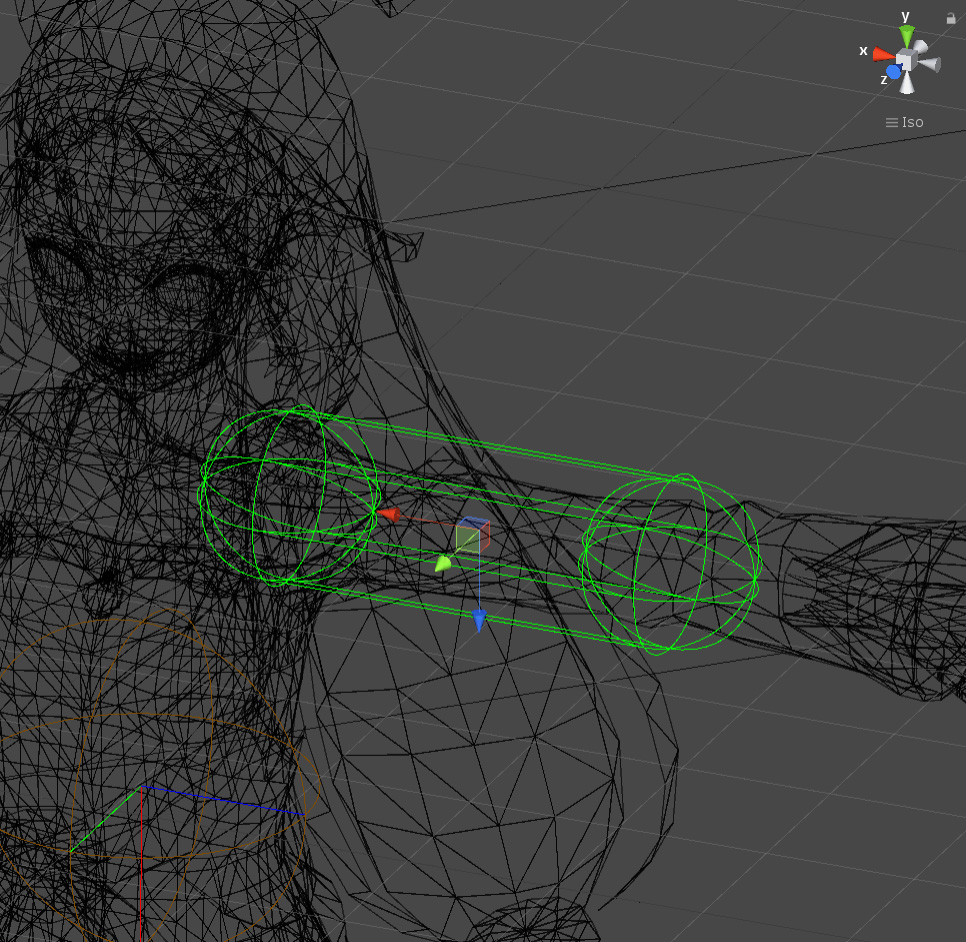
Next, add a capsule collider to your arm.
Also select the Unity-Chan arm bone and add [Magica Capsule Collider].
The capsule collider inspector allows you to adjust the length of the capsule and the size of the tip and end.
In the same way, adjust the size so that the arm is hidden.
Such work was performed on the waist and so on, and finally the settings as shown in the image were made.

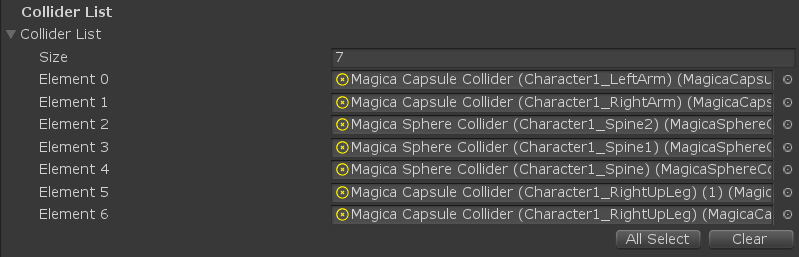
Register the collider created earlier in BoneCloth.
Register all the colliders that make collision judgments in the [Collider List] of the BoneCloth inspector.
MagicaCloth allows you to select colliders to be judged for each cloth team.
Set up the collision panel.
First, check the [Collision] panel.
If unchecked, collision judgment will not be performed.

Finally, adjust the particle size of BoneCloth.
When you select the BoneCloth object in Hierarchy, the cross particles appear in the scene view as yellow (fixed) and white (moving).
The size of the sphere at this time will be the hit judgment size of each particle.
(* Various indications can be displayed on the cloth monitor described later.)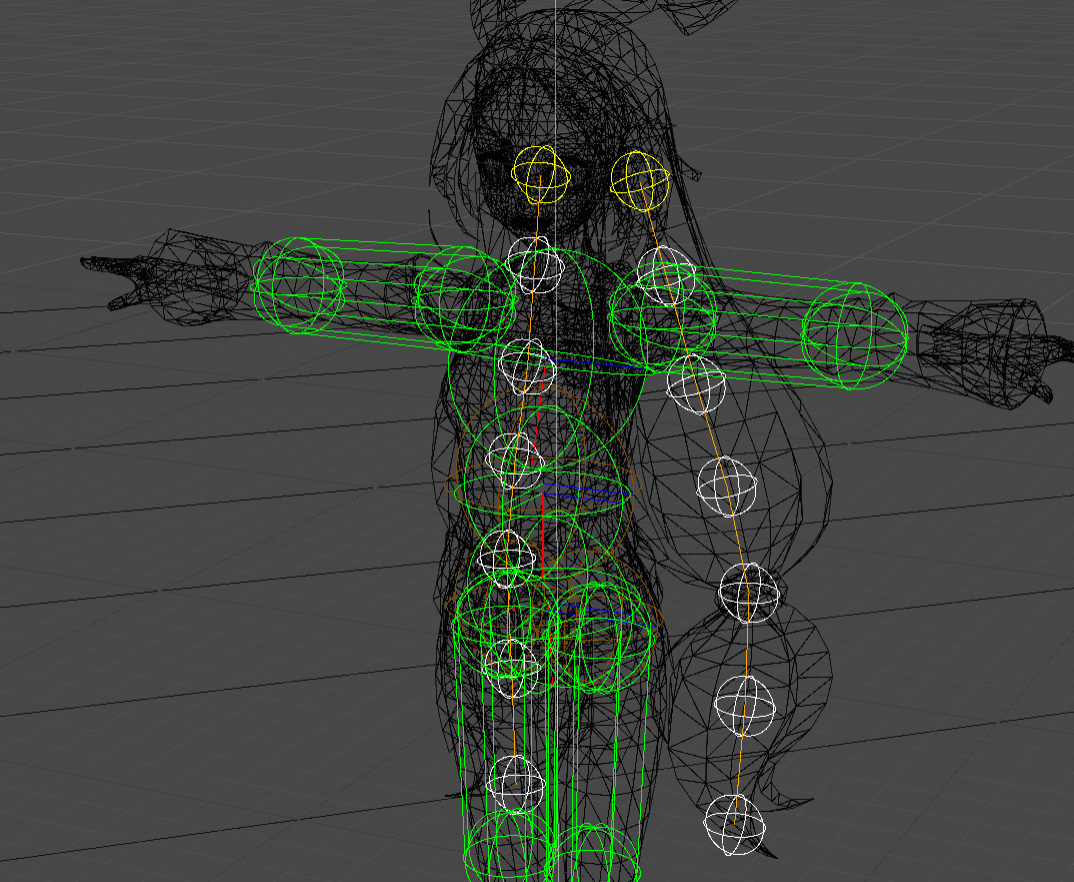
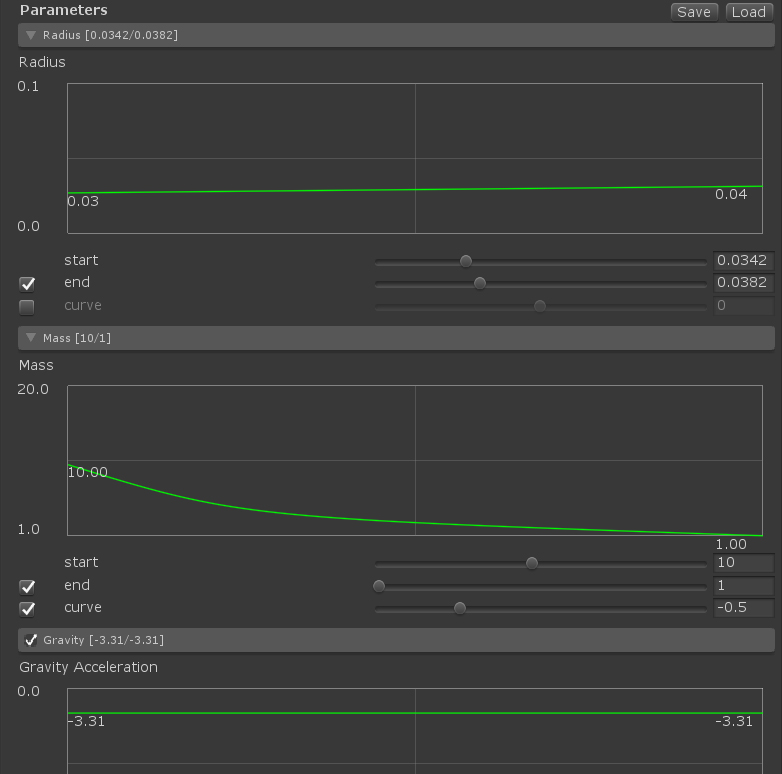
In this state, open the [Radius] panel of the BoneCloth parameter and move the start / end slider of the Radius curve.
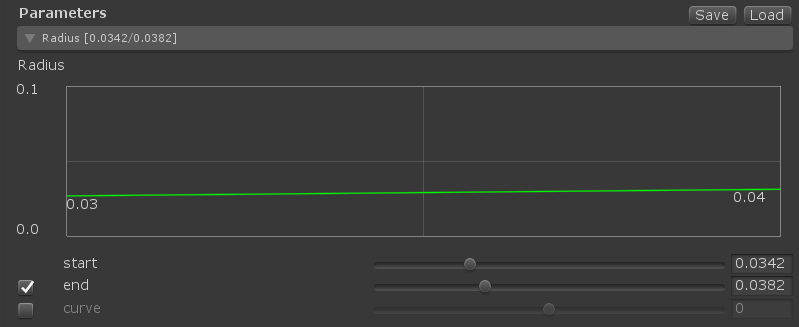
I think the particle size in the scene view has changed.
In all parameter settings, start indicates fixed (root) particles, and end indicates the end of moving particles.
Adjust the actual collision particle size in this way.
Click the [Create] button to reflect the last adjusted collider and parameters in the data.
In MagicaCloth, you need to press the [Create] button to reflect the adjusted parameters in the data.
This completes the collider settings.
Let’s run Unity.
Now the hair particles should have collided with the body and no longer penetrate.
This concludes the basic setup of the bone cloth.