Contents
Introduction
This guide is a continuation of how to use BoneCloth.
Therefore, we will omit the items that have already been explained, so please read how to use BoneCloth before this guide.
What is MeshCloth?
MeshCloth is a method of cloth simulating mesh vertices.
It is possible to express more realistic shaking than BoneCloth.
However, the load will be higher.
- Express shaking by manipulating mesh vertices
- Can be used even if the mesh does not contain bones
- Pay attention to performance when using a lot as processing load is high
Model importer settings
Before using MeshCloth, it is necessary to check the import settings of the target model.
MeshCloth requires Read/Write attributes for the mesh to manipulate vertices.
Since this is normally OFF, select the target model in the Project view as follows and set the ReadWrite check of the model importer to ON.

Also, “Optimize Game Objects” in [Rig] must be Off.

Other conditions
- For skinning meshes, the maximum number of weights per vertex must be 4 or less.
Adding MeshCloth
Let’s add MeshCloth.
Here, I will explain the setup using the UnityChanKAGURA skirt in the sample as an example.
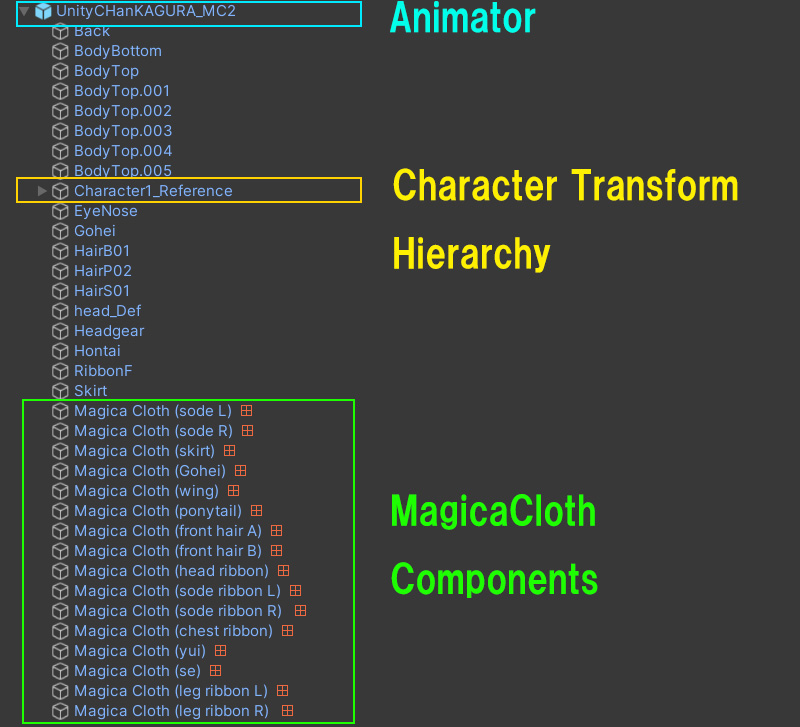
First, add the Magica Cloth component from the right-click menu of Hierarchy like BoneCloth.
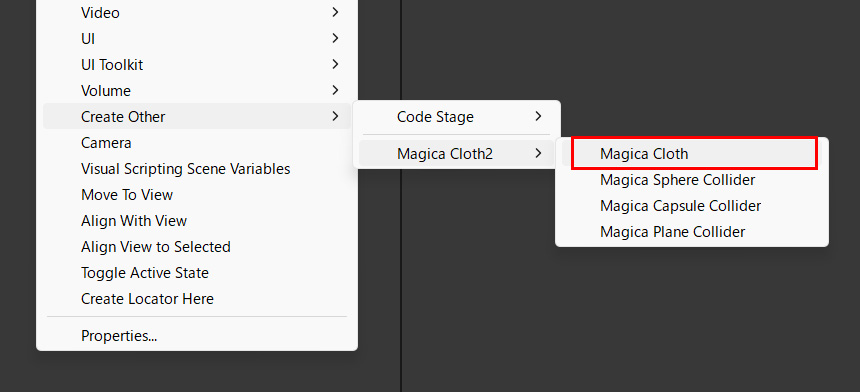
Try to place the component as directly under the Character root as possible.
This will usually be a child of the Animator component.
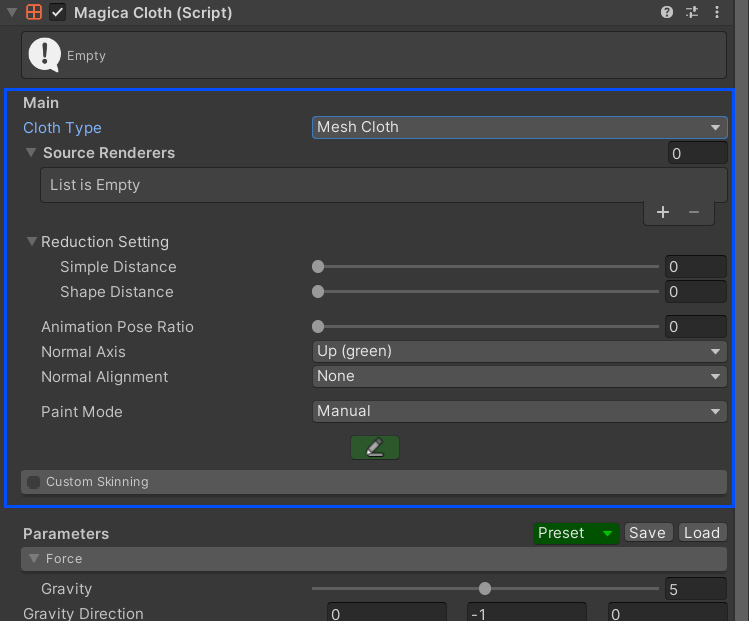
And change the Cloth Type to [Mesh Cloth].
The inspector will now switch for MeshCloth.

MeshCloth’s inspector differs from BoneCloth only in the Main settings as follows.
Other parts are the same as BoneCloth.
Render mesh and proxy mesh
An important concept when working with MeshCloth is the proxy mesh.
MeshCloth does not use the render mesh, that is, the display mesh as it is for simulation.
This is mainly because:
- If you use the render mesh as it is, the number of vertices will be too large and the simulation load will be enormous.
(It is not uncommon for even simple-looking meshes to have more than 10,000 vertices.) - Triangular connection structures are largely unsuitable for simulation
- There are many cases where the mesh is divided for convenience of expression
(Example: Split to separate the material for the back and front of the skirt, etc.)
Proxy mesh solves such problems.
A proxy mesh is a virtual mesh with reduced vertices based on the render mesh.
This proxy mesh only exists in memory at runtime.
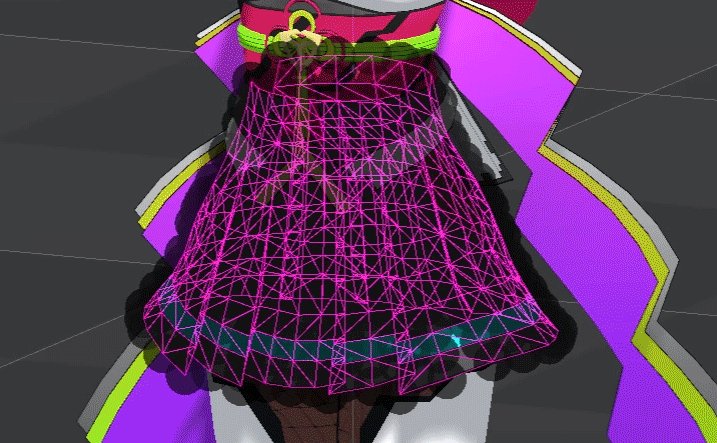
Below is the relationship between the original render mesh (top) and the simplified proxy mesh (bottom).

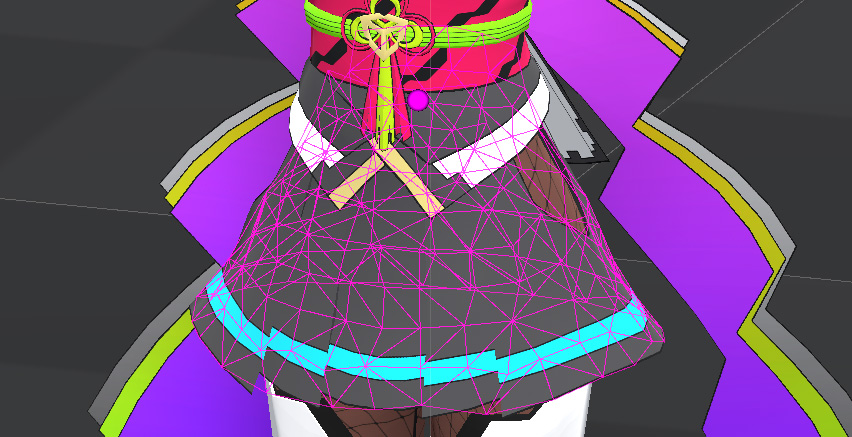
You can see that the lower proxy mesh has fewer vertices and a simpler shape.
MeshCloth runs all simulations on this proxy mesh.
And the result is fed back to the original render mesh and displayed on the screen.
Remember this as it is a very important concept.
Registering a render mesh
Let’s register the render mesh that will be the source of the proxy mesh.
SkinnedMeshRenderer and MeshRenderer can be registered.
KAGURA’s skirt is assigned a SkinnedMeshRenderer as follows.
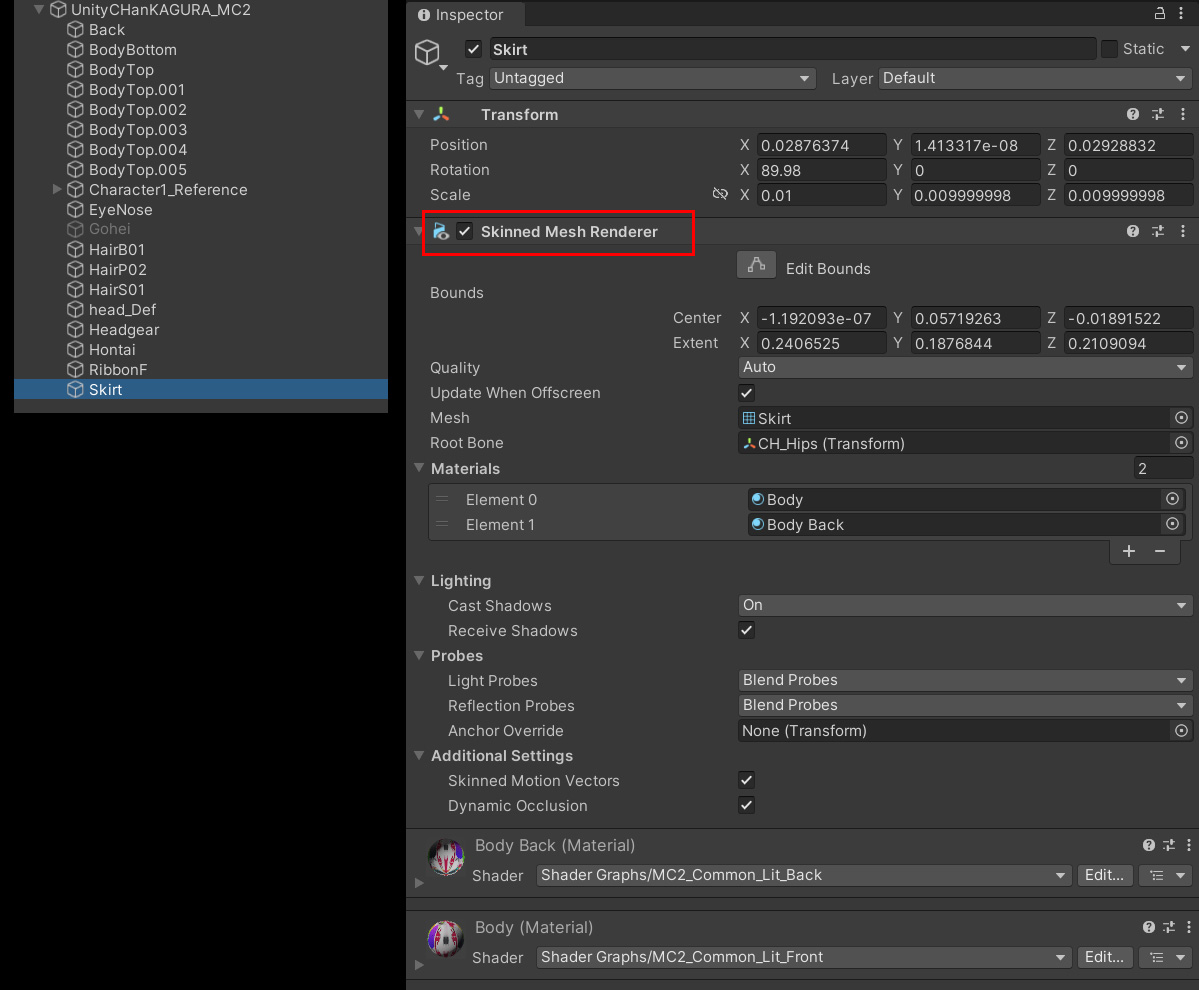
Register this SkinnedMeshRenderer in the MeshCloth Source Renderers list.

The proxy mesh will now appear in the scene view.
This proxy mesh is before simplification, so it still has the same structure as the render mesh.
Multiple render meshes can be registered.
In that case all render meshes are combined into one proxy mesh.
Reduction
The proxy mesh at the time of registering the render mesh has the same structure as the render mesh.
It is possible to start the simulation as it is, but as mentioned earlier, using a simpler proxy mesh has advantages in terms of performance and stable simulation.
Reduction does the work of this simplification.
reduction panel
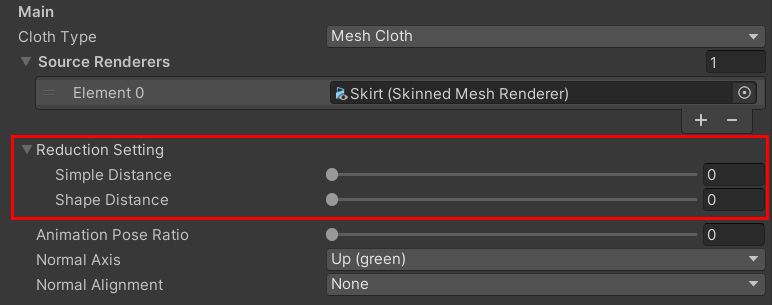
Simplification is done by combining two slide bars.
| Simple Distance | It simply joins nearby vertices. The structure of the mesh is not considered. |
| Shape Distance |
Connects nearby vertices based on the shape of the mesh. |
Adjust while looking at the scene view
Try moving the slide bar.
Moving the slide bar will simplify the proxy mesh in real time and display it in the scene view.
Let’s simplify the proxy mesh while looking at the scene view.
How simple should it be?
This varies depending on the shape and length of the mesh and what kind of simulation you want to do, so it is difficult to set a general standard.
Use the following indicators as a guide only.
- The simpler the proxy mesh, the better the performance
- It should be simplified to the extent that there are no fine protrusions in the render mesh
- If you simplify too much, the collision detection will be weak.
Also, the difference between the render mesh and the proxy mesh may increase and the display may become unstable.
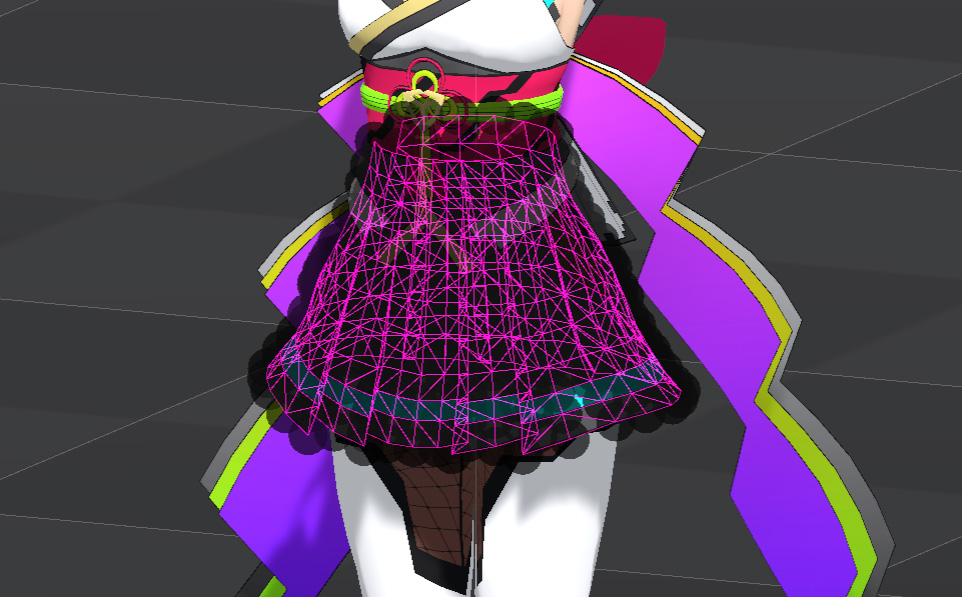
Finished proxy mesh
This time, I tried to simplify it to the extent that the surface of the proxy mesh is almost flat.

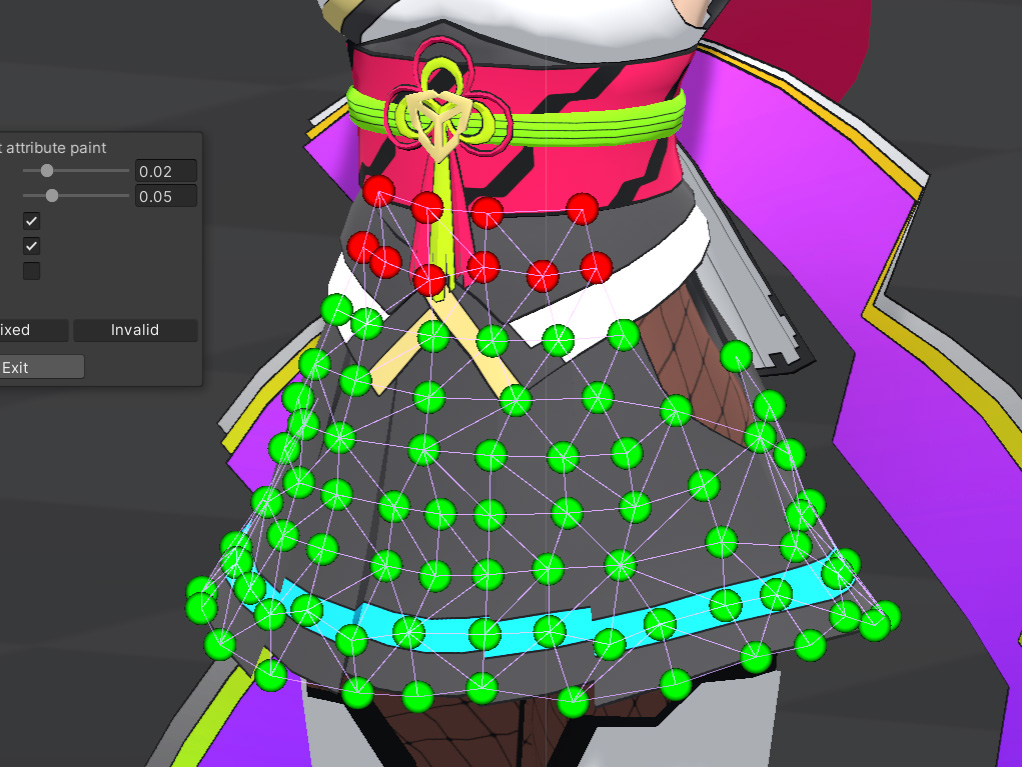
Vertex paint
After simplifying the proxy mesh, we need to make decisions about the behavior of each vertex.
Vertex Paint does this.
Vertex painting of MeshCloth is important unlike BoneCloth.
This is because MeshCloth initializes all vertex attributes to invalid.
Therefore, MeshCloth always requires vertex painting to determine the attributes of each vertex.
fixed and moving attributes
An important task to do here is to make a clear distinction between non-moving and moving vertices.
Ideally, in the skirt example, the vertices near the waist should not move, and the rest should be free to move.
A vertex that does not move is called a fixed attribute, and a vertex that moves is called a moving attribute.
Start Vertex Paint
Vertex Paint is activated by the following pen mark button.
When started, the scene view switches to paint mode.

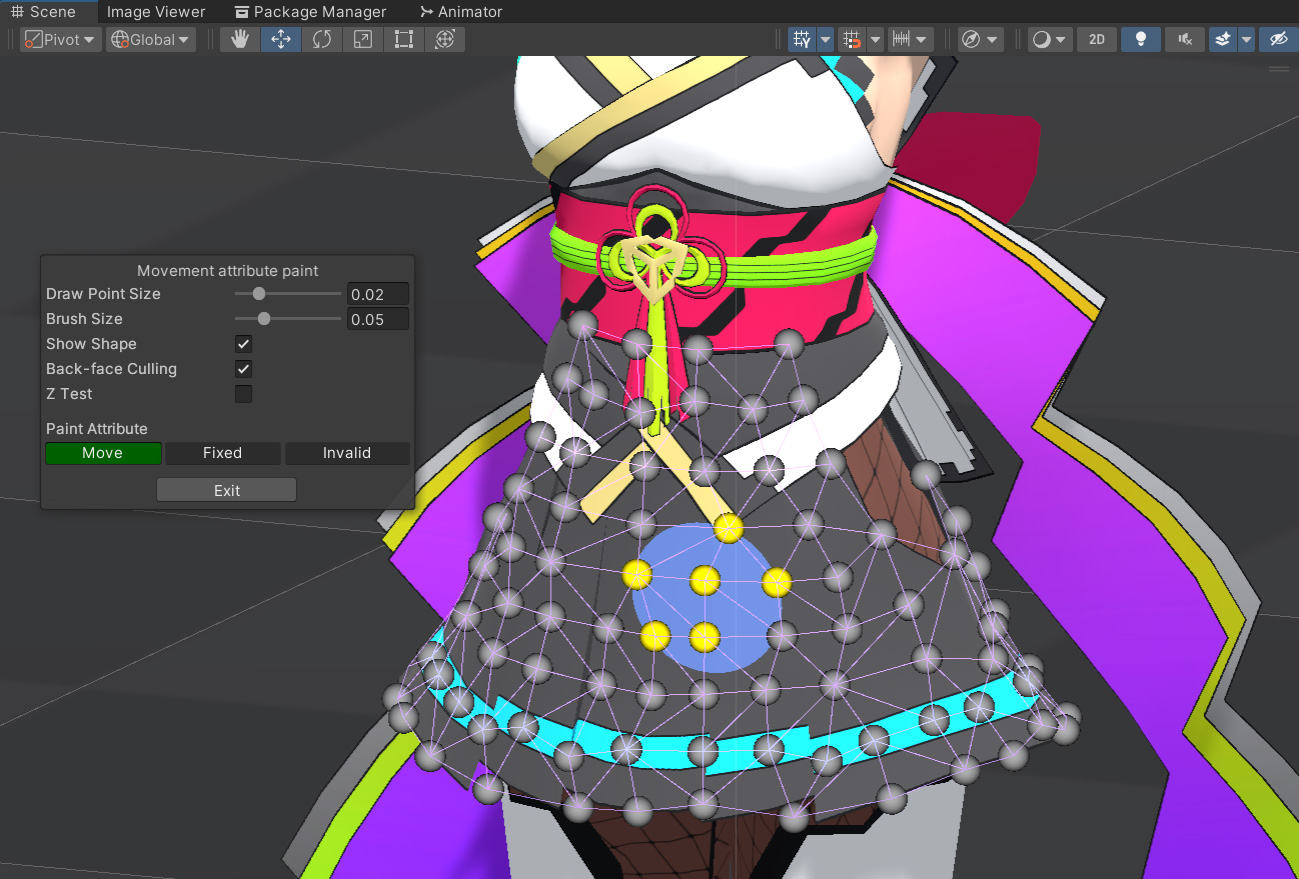
paint panel
Paint attributes are set using the Paint panel.
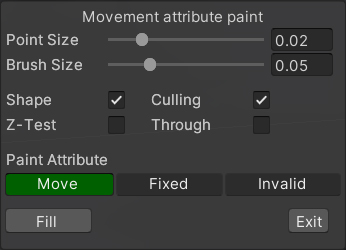
| Point Size | the size of the displayed vertex sphere |
| Brush Size | paint brush size |
| Shape | When turned on, the structure of the proxy mesh is displayed with a gizmo. |
| Culling | When turned on, the vertex sphere will not be displayed if the vertex normal of the proxy mesh is in the opposite direction to the scene camera. |
| Z test | When turned on, the vertex sphere is displayed and the results of the depth test are displayed. |
| Through | When turned on, you can ignore the depth and fill the points inside the cursor. The brush size also changes to a dedicated one. |
| Paint Attribute | Choose a vertex attribute to paint |
Vertex attributes are divided into three categories.
| Move | Green | Movement attribute Set it to a vertex that can be moved freely |
| Fixed | Red | Fixed attribute Set to a vertex that does not move |
| Invalid | Gray | Invalid attribute Set the vertices to exclude from the simulation. For example, if the part above the waist is not related to the simulation at all, such as a dress, setting it to the invalid attribute will improve the performance. |
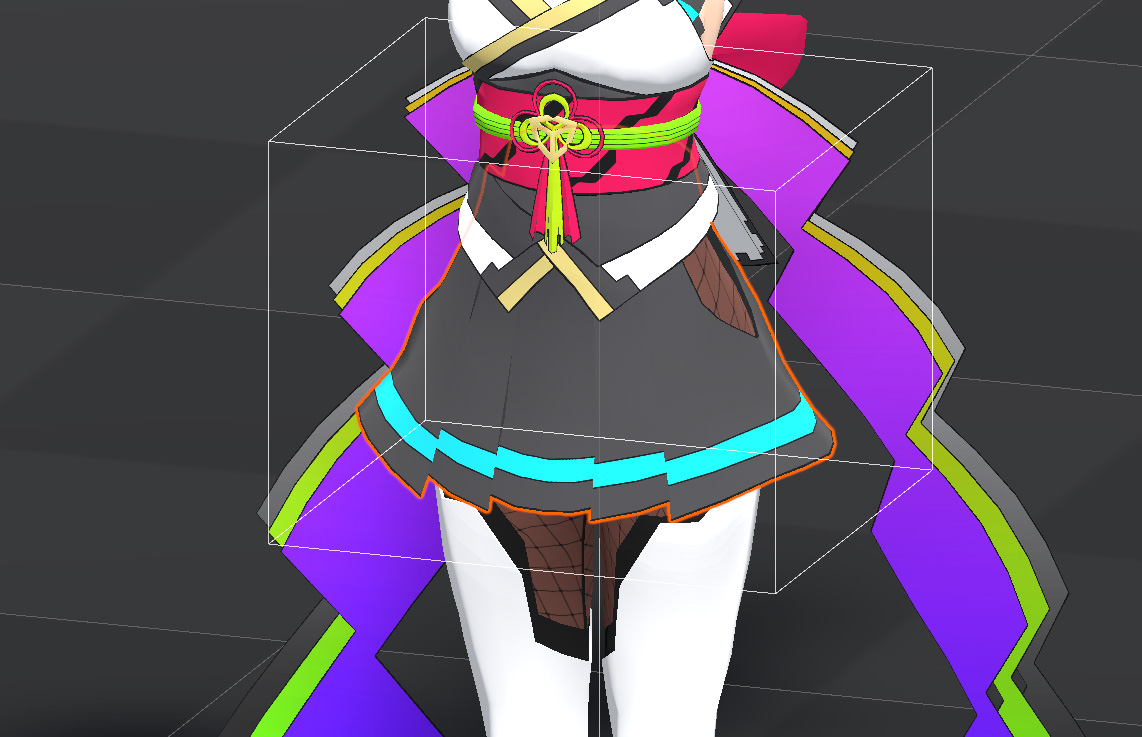
finished paint
Now let’s actually paint.
Select the attribute to paint, place the mouse cursor on the proxy mesh and click or drag to paint.
I painted the skirt this time as follows.
When you are done painting, press the Exit button to exit paint mode.
This completes the basic settings for proxy mesh!
Parameter settings
Finally, we will set the parameters that control the movement.
Here, let’s easily set it from the preset as well as how to use BoneCloth.
Select [skirt] from the Preset menu as follows.

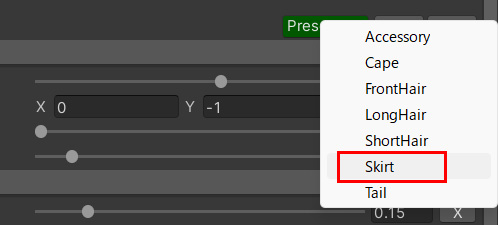
Now the skirt preset content has been expanded to parameters.
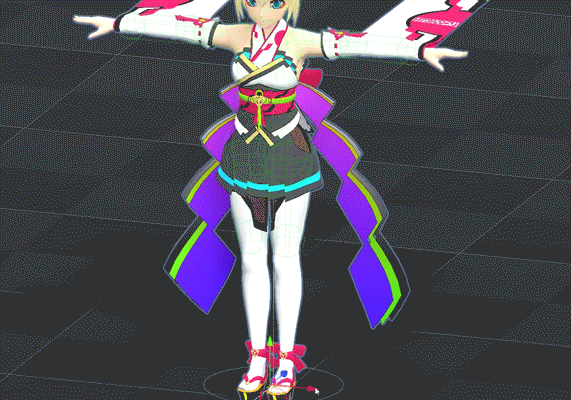
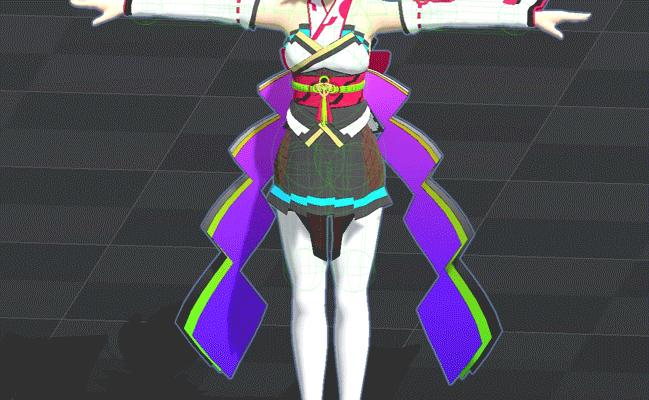
Operation check
Let’s run!
Move the character while running and if the skirt is shaking, you’ve succeeded!
What next?
This time, we made the minimum settings for MeshCloth.
However, as you can see from the animation, collision detection with the human body has not yet been set for this skirt.
As a result, the skirt moves through the leg.
The next chapter will go into detail about setting up this collision detection.