Overview
MagicaCloth2 fully supports runtime construction.
Here we will explain how to build MagicaCloth components from scripts during runtime.
It is assumed that the reader is familiar with C# programming in Unity.
Sample scene
A sample scene is provided for runtime construction.
These can be found in the following folders, select a scene in your render pipeline to test.
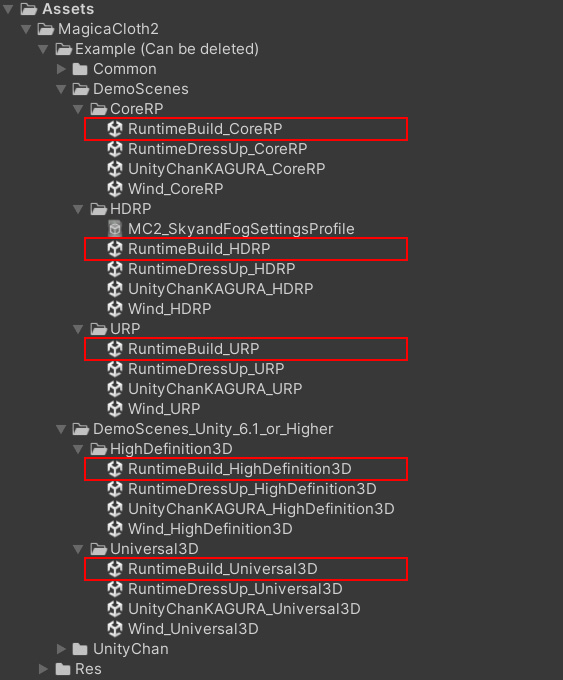
The test code is RuntimeBuildDemo.cs attached to RuntimeBuildDemo in this sample scene.
On this page, I will also extract and explain the contents of this test code.
The reason why the scenes are separated is simply to switch drawing materials.
The sample code included inside is identical.
Construction procedure
Follow the steps below to build.
- Generating MagicaCloth components
- Set parameters
- Start creating and running cloth data
We will explain these with examples.
There are also a few things to keep in mind when building.
Specifying vertex attributes
In MagicaCloth, you need to clearly specify which vertices move and which vertices don’t move.
These are called vertex attributes.
When editing in the editor, you set these attributes manually using the vertex paint function.
However, this method cannot be used for runtime construction.
Therefore, when building at runtime, you need to specify vertex attributes in several ways depending on the cloth type.
We will explain these methods using examples.
Runtime delay
MagicaCloth2 constructs cloth data at runtime.
Since this construction is done in a separate thread, it has little effect on the main thread.
However, it takes a few frames of time to build.
So there is a delay of a few frames between building the component and actually starting the cloth simulation.
Example
Here are some construction examples.
The example is excerpted from the sample scene RuntimeBuildDemo.cs, so please refer to the demo scene as well.
See the ScriptingAPI page for the API used.
The “character” written in the code is the character’s GameObject.
Also, “gameObjectContainer” is a simple class that allows you to get a character’s GameObject by name.
BoneCloth construction example (1)
/// <summary>
/// BoneCloth construction example (1).
/// Set all parameters from a script.
/// </summary>
void SetupHairTail_BoneCloth()
{
  if (character == null)
    return;

  var obj = new GameObject("HairTail_BoneCloth");
  obj.transform.SetParent(character.transform, false);

  // add Magica Cloth
  var cloth = obj.AddComponent<MagicaCloth>();
  var sdata = cloth.SerializeData;

  // bone cloth
  sdata.clothType = ClothProcess.ClothType.BoneCloth;
  sdata.rootBones.Add(gameObjectContainer.GetGameObject("J_L_HairTail_00_B").transform);
  sdata.rootBones.Add(gameObjectContainer.GetGameObject("J_R_HairTail_00_B").transform);

  // setup parameters
  sdata.gravity = 3.0f;
  sdata.damping.SetValue(0.05f);
  sdata.angleRestorationConstraint.stiffness.SetValue(0.15f, 1.0f, 0.15f, true);
  sdata.angleRestorationConstraint.velocityAttenuation = 0.6f;
  sdata.tetherConstraint.distanceCompression = 0.5f;
  sdata.inertiaConstraint.particleSpeedLimit.SetValue(true, 3.0f);
  sdata.colliderCollisionConstraint.mode = ColliderCollisionConstraint.Mode.None;

  // start build
  cloth.BuildAndRun();
}
In this example, BoneCloth is created and all parameters are set from script.
The important part is the SerializeData class.
This SerializeData class contains all the parameters that can be manipulated from the script.
Therefore, the setting is done by rewriting this class.
In this example, no vertex attributes are specified, but in BoneCloth/BoneSpring, the Transform specified for the root bone is automatically set to a fixed attribute, and all others are set to translation attributes.
Therefore, it can be omitted.
BuildAndRun() is executed at the end.
This will create the cloth data in a thread and automatically start the simulation when complete.
BoneCloth construction example (2)
/// <summary>
/// BoneCloth construction example (2).
/// Copy parameters from an existing component.
/// </summary>
void SetupFrontHair_BoneCloth()
{
  if (character == null || frontHairSource == null)
    return;

  var obj = new GameObject("HairFront_BoneCloth");
  obj.transform.SetParent(character.transform, false);

  // add Magica Cloth
  var cloth = obj.AddComponent<MagicaCloth>();
  var sdata = cloth.SerializeData;

  // bone cloth
  sdata.clothType = ClothProcess.ClothType.BoneCloth;
  sdata.rootBones.Add(gameObjectContainer.GetGameObject("J_L_HairFront_00_B").transform);
  sdata.rootBones.Add(gameObjectContainer.GetGameObject("J_L_HairSide2_00_B").transform);
  sdata.rootBones.Add(gameObjectContainer.GetGameObject("J_L_HairSide_00_B").transform);
  sdata.rootBones.Add(gameObjectContainer.GetGameObject("J_R_HairFront_00_B").transform);
  sdata.rootBones.Add(gameObjectContainer.GetGameObject("J_R_HairSide2_00_B").transform);
  sdata.rootBones.Add(gameObjectContainer.GetGameObject("J_R_HairSide_00_B").transform);

  // Normal direction setting for backstop
  sdata.normalAlignmentSetting.alignmentMode = NormalAlignmentSettings.AlignmentMode.Transform;
  sdata.normalAlignmentSetting.adjustmentTransform = gameObjectContainer.GetGameObject("HeadCenter").transform;

  // setup parameters
  // Copy from source settings
  sdata.Import(frontHairSource, false);

  // start build
  cloth.BuildAndRun();
}
In this example, the parameters are imported from another external cloth component, “frontHairSource”.
This simplifies parameter setting.
However, some parameters can be imported and some cannot.
This is documented as a comment in the source code.
/// [OK] Runtime changes.
/// [NG] Export/Import with Presets
In this example, “normalAlignmentSetting” is set manually because it cannot be imported.
BoneCloth construction example (3)
/// <summary>
/// BoneCloth construction example (3).
/// Load parameters from saved presets.
/// </summary>
void SetupRibbon_BoneCloth()
{
  if (character == null || string.IsNullOrEmpty(ribbonPresetName))
    return;

  var obj = new GameObject("Ribbon_BoneCloth");
  obj.transform.SetParent(character.transform, false);

  // add Magica Cloth
  var cloth = obj.AddComponent<MagicaCloth>();
  var sdata = cloth.SerializeData;

  // bone cloth
  sdata.clothType = ClothProcess.ClothType.BoneCloth;
  sdata.rootBones.Add(gameObjectContainer.GetGameObject("J_L_HeadRibbon_00_B").transform);
  sdata.rootBones.Add(gameObjectContainer.GetGameObject("J_R_HeadRibbon_00_B").transform);

  // setup parameters
  // Load presets from the Resource folder.
  // Since presets are in TextAssets format, they can also be used as asset bundles.
  var presetText = Resources.Load<TextAsset>(ribbonPresetName);
  sdata.ImportJson(presetText.text);

  // start build
  cloth.BuildAndRun();
}
In this example the parameters are imported as a preset file (Json).
Parameters can be exported externally in Json format.
Since this is a simple text file, it can be loaded at runtime by placing it in the Resources folder or AssetBundle.
Vertex attribute settings in BoneCloth
When constructing BoneCloth, the root bone is automatically set as a fixed attribute, and the others are automatically set as movement attributes.
Therefore, this is basically optional.
However, you can also set it manually by using the boneAttributeDict in ClothSerializeData2.
boneAttributeDict is a dictionary consisting of Transform and attribute pairs, and is specified as follows:
// Transform Attribute
var sdata2 = cloth.GetSerializeData2();
sdata2.boneAttributeDict.Add(bone1, VertexAttribute.Fixed);
sdata2.boneAttributeDict.Add(bone2, VertexAttribute.Invalid);
sdata2.boneAttributeDict.Add(bone3, VertexAttribute.Move);
MeshCloth construction example (1)
/// <summary>
/// MeshCloth construction example (1).
/// Reads vertex attributes from a paintmap.
/// </summary>
void SetupSkirt_MeshCloth()
{
  if (character == null || skirtPaintMap == null)
    return;

  // skirt renderer
  var sobj = gameObjectContainer.GetGameObject(skirtName);
  if (sobj == null)
    return;
  Renderer skirtRenderer = sobj.GetComponent<Renderer>();
  if (skirtRenderer == null)
    return;

  // add Magica Cloth
  var obj = new GameObject("Skirt_MeshCloth");
  obj.transform.SetParent(character.transform, false);
  var cloth = obj.AddComponent<MagicaCloth>();
  var sdata = cloth.SerializeData;

  // mesh cloth
  sdata.clothType = ClothProcess.ClothType.MeshCloth;
  sdata.sourceRenderers.Add(skirtRenderer);

  // reduction settings
  sdata.reductionSetting.simpleDistance = 0.0212f;
  sdata.reductionSetting.shapeDistance = 0.0244f;

  // paint map settings
  // *** Paintmaps must have Read/Write attributes enabled! ***
  sdata.paintMode = ClothSerializeData.PaintMode.Texture_Fixed_Move;
  sdata.paintMaps.Add(skirtPaintMap);
  sdata.paintMapUvChannel = 0;

  // setup parameters
  sdata.gravity = 1.0f;
  sdata.damping.SetValue(0.03f);
  sdata.angleRestorationConstraint.stiffness.SetValue(0.05f, 1.0f, 0.5f, true);
  sdata.angleRestorationConstraint.velocityAttenuation = 0.5f;
  sdata.angleLimitConstraint.useAngleLimit = true;
  sdata.angleLimitConstraint.limitAngle.SetValue(45.0f, 0.0f, 1.0f, true);
  sdata.distanceConstraint.stiffness.SetValue(0.5f, 1.0f, 0.5f, true);
  sdata.tetherConstraint.distanceCompression = 0.9f;
  sdata.inertiaConstraint.depthInertia = 0.7f;
  sdata.inertiaConstraint.movementSpeedLimit.SetValue(true, 3.0f);
  sdata.inertiaConstraint.particleSpeedLimit.SetValue(true, 3.0f);
  sdata.colliderCollisionConstraint.mode = ColliderCollisionConstraint.Mode.Point;

  // setup collider
  var lobj = new GameObject("CapsuleCollider_L");
  lobj.transform.SetParent(gameObjectContainer.GetGameObject("Character1_LeftUpLeg").transform);
  lobj.transform.localPosition = new Vector3(0.0049f, 0.0f, -0.0832f);
  lobj.transform.localEulerAngles = new Vector3(0.23f, 16.376f, -0.028f);
  var colliderL = lobj.AddComponent<MagicaCapsuleCollider>();
  colliderL.direction = MagicaCapsuleCollider.Direction.Z;
  colliderL.SetSize(0.082f, 0.094f, 0.3f);

  var robj = new GameObject("CapsuleCollider_R");
  robj.transform.SetParent(gameObjectContainer.GetGameObject("Character1_RightUpLeg").transform);
  robj.transform.localPosition = new Vector3(-0.0049f, 0.0f, -0.0832f);
  robj.transform.localEulerAngles = new Vector3(0.23f, -16.376f, -0.028f);
  var colliderR = robj.AddComponent<MagicaCapsuleCollider>();
  colliderR.direction = MagicaCapsuleCollider.Direction.Z;
  colliderR.SetSize(0.082f, 0.094f, 0.3f);

  sdata.colliderCollisionConstraint.colliderList.Add(colliderL);
  sdata.colliderCollisionConstraint.colliderList.Add(colliderR);

  // start build
  cloth.BuildAndRun();
}
In this example, MeshCloth is constructed and vertex attributes are given by paint maps.
Note that the paintmap is in sync with the renderer you set.
In other words, the number of renderers and paintmaps must be the same.
I also created two capsule colliders and added them to the collider list.
Creating a collider is the same as creating a general component in Unity.
Other than that, it is the same as the BoneCloth example.
Symmetry Collider
Starting with v2.15.0, symmetric colliders are now available.
By using this feature, the above code can be simplified to a single collider.
// setup collider
// UpperLeg L
var lobj = new GameObject("CapsuleCollider_L");
lobj.transform.SetParent(gameObjectContainer.GetGameObject("Character1_LeftUpLeg").transform);
lobj.transform.localPosition = new Vector3(0.0049f, 0.0f, -0.0832f);
lobj.transform.localEulerAngles = new Vector3(0.23f, 16.376f, -0.028f);
var colliderL = lobj.AddComponent<MagicaCapsuleCollider>();
colliderL.direction = MagicaCapsuleCollider.Direction.Z;
colliderL.SetSize(0.082f, 0.094f, 0.3f);

// UpperLeg R (Symmetry)
colliderL.symmetryMode = ColliderSymmetryMode.AutomaticHumanBody;
colliderL.UpdateParameters(); // Required when changing parameters.
sdata.colliderCollisionConstraint.colliderList.Add(colliderL);
Please note that Symmetry Colliders require you to call UpdateParameters() after creation.
See the Symmetry feature for more information.
Direct specification of vertex attributes in MeshCloth
Unlike BoneCloth, vertex attributes must be clearly specified with MeshCloth.
They cannot be omitted.
There are two ways to do this: using a paint map as explained in MeshCloth construction example (1), or by preparing and specifying attribute arrays with the same number as the vertex array.
If you want to use a vertex attribute array instead of a paint map, use vertexAttributeList in ClothSerializeData2.
First, the number of elements in vertexAttributeList must match the number of Renderers registered in MeshCloth.
Second, each element must match the number of mesh vertices in the corresponding Renderer.
Here’s an example of using a vertexAttributeList instead of a paint map.
This example assumes there is one renderer.
// add vertex attribute
var sdata2 = cloth.GetSerializeData2();
var attributes = new VertexAttribute[VertexCount];

// Initialize with movement attributes
for(int i = 0; i < VertexCount; i++)
  attributes[i] = VertexAttribute.Move;

// Making a specific vertex a fixed attribute
attributes[0] = VertexAttribute.Fixed;
attributes[7] = VertexAttribute.Fixed;
attributes[21] = VertexAttribute.Fixed;

// Registering vertex attributes
sdata2.vertexAttributeList.Add(attributes);